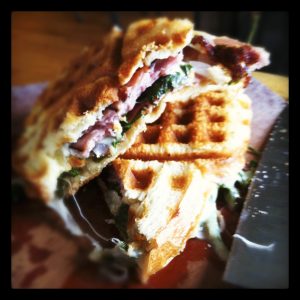
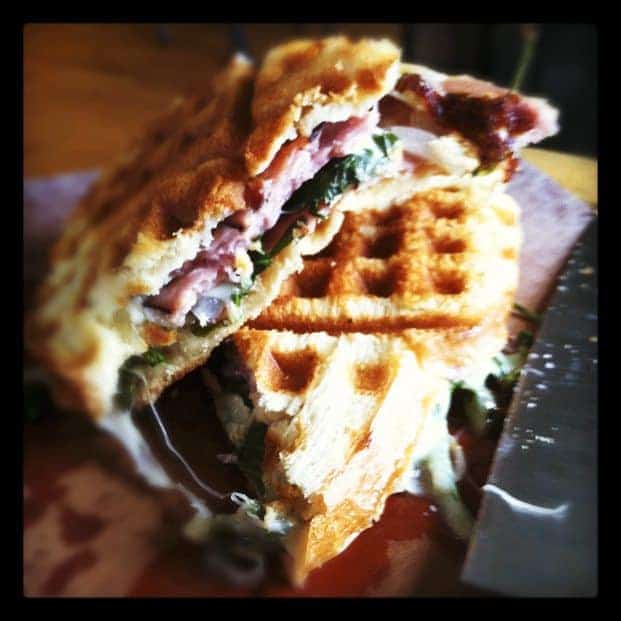
We all know how I feel about ham and cheese. It’s no secret that I love it truly, madly, deeply…
The world’s simplest ham and cheese is good enough, no doubt, but everyone knows a toasted ham and cheese is even better.
And when you compress that sandwich while it’s toasting -á la panini- you get some serious hubba hubba working.
Now, I’ll be honest, as much as I love kitchen gadgets, I’ve never been able to justify buying a panini maker. There’s no panini maker big enough (that I’m aware of) to make a large amount of sandwiches simultaneously, and since I’m making meals for seven at a time, paying big kitchen gadget bucks to stand there pressing and grilling one sandwich at a time just doesn’t sound like my idea of good money management. Plus, it’s another thing on the shelves taking up space. On the other hand, pressed and grilled sandwiches… Sigh.
I’ve tried every trick out there for pressed sandwiches. Wrapping a brick in foil and heating it in the oven worked well, but dangit! I had to wrap a brick in foil and preheat it. I don’t always think that far in advance of my desperate need for a sandwich.
I tried heating up two cast iron skillets at the same time and laying one on top of the other, but then you get to scrape toasted cheese off of the bottom of an otherwise clean cast iron skillet. Since I’m firmly in the no-soap-on-cast-iron camp, that, too, was a pain in the rear.
I even bought a slimline cast-iron panini “lid” thingie. Cute, yes. But it was yet another “heat up the second component” thing and darned if it didn’t fall out of the cabinets onto my toe. That hurt enough that the item got its very own special trip to the thrift store.
One day last week, while I was cleaning and putting away my beloved waffle maker, the proverbial light bulb over my head flickered and went BING! Big, fat, hairy DUH! How had I not thought of this before? My waffle maker could be my panini maker, too! Granted, I was still only going to be able to turn two sandwiches out at a time but hey! We’re talking about two extraordinary sandwiches, no extra gadgetry on the shelves and multi-tasking. If there’s anything I love almost as much as pressed, toasted sandwiches, it’s multi-tasking: delicious, nutritious, cheapola multi-tasking.
A word about waffle makers before I go any further; I adore my waffle maker. This is my waffle maker.
What the picture doesn’t show is that the lid is “free-floating”. In other words, it can rise or fall depending on the bulk of what you have in it. This makes it the perfect ad hoc panini press. (The fact that it turns out the best waffles I’ve ever had in my life is nothing to sniff at either. Oh! And you want one that cleans up beautifully? This is the one for you. The waffle/grill plates snap out and the housing is stainless steel. Yes, it gets hot to the touch, but it doesn’t melt. What? You, unlike me, can manage not to melt the cool-touch waffle makers? So, it’s just me who melts plastic waffle makers? Huh. Who knew?)
Now, the sandwiches.
My all-time favourite sandwich filling is, as I’ve said, ham and cheese, but I have sandwich related Obsessive Compulsive Disorder. Yes, it’s surprising, I know, because I am so very moderate in everything else in my life. Ahem. Anyway…
Here’s my idea of the perfect sandwich construction layer-by-layer.
- Soft but sturdy bread spread with mayonnaise and Dijon mustard.
- Three or four very thin slices of ham (depending on the size of the bread) draped and not laid flat. This comes from my time working at a deli. I like a pretty sandwich. I swear I can feel the difference between a pretty sandwich and a sad, depressed, flat sandwich blindfolded. But really, no, I am sane!
- One thin piece of cheese. You can rip the cheese to cover the meat and reach the edges of the bread, if you’d like. And I do.
- Baby or tender arugula or leaf lettuce. If you put a sandwich in front of me with iceberg on it, I’ll eat it -don’t misunderstand- because I love sandwiches of all kinds. But if I’m talking perfect world sandwich, which is rather the point here, iceberg has no business being in the mix.
- Paper thin slices of sweet onion, preferably Vidalia. And since I’ve already gone down the high-maintenance sandwich preference road, I’m going to say another thing here. For cryin’ out loud (onion joke), please make the onion slices in half moons. That way, when you take a bite, you’re not going to pull an entire slab-o-onion off the sandwich when you pull away with a mouthful.
- More arugula!
- More cheese!
- More ham! Still draped! (Don’t make me come fix your sandwich to prove it!)
- One more piece of bread with mayonnaise and Dijon mustard.
- Cut it in half, for the love of all that is good in the world. I realize that’s not technically a layer, but to me, it’s part of the enjoyment of the sandwich, so don’t skip it!
And when you butter the outside of both ends of that sandwich and shove it in a waffle iron or panini maker you get the most heavenly, shatteringly crunchy exterior to a toasted ham and cheese you’ve ever seen. Golden-brown, crisped bread that is still tender inside with gooey cheese, salty ham, peppery arugula, sweet onion, pungent Dijon mustard and smooth mayonnaise; this sandwich is everything a sandwich aspires to be. Whether you serve these as part of a meal or as part of your game day party food, you are sure to score big.

Waffle-Iron Ham and Cheese Paninis
Rate RecipeIngredients
Per Sandwich:
- 2 slices about 1/2-inch thick each soft but sturdy bread. (Like this. )
- 1 tablespoon approximately, softened butter
- 6 very thin slices deli ham Black Forest or Virginia Style, preferably
- 2 thin slices provolone cheese
- 1 fistful baby or tender arugula
- paper thin slices sweet onion to taste
- Dijon mustard to taste
- mayonnaise to taste
Instructions
- Preheat your waffle iron or panini maker according to manufacturer's instructions.
- Spread the top of one piece of bread with mayonnaise and Dijon. Arrange 3 pieces of the ham on the bread, top with 1 piece of the provolone cheese, half of the arugula, the onions, the other half of the arugula, last piece of cheese, and the remaining 3 slices of cheese. Finally, spread the remaining piece of bread with more Dijon and mayonnaise and put that side down on top of the sandwich. Generously butter the top of the bread.
- Open the waffle iron, hold the sandwich together and carefully invert it so the buttered top is facing down on the waffle iron. Quickly butter the piece of bread that is now on the top and close the waffle iron. You may need to weight the top of the waffle iron down until the sandwich begins to compress. A heavy pan or can of something that will not be damaged by heat is a good bet.
- Toast until the sandwich is compressed and the outside is a crispy, deep golden brown. In my waffle maker, set on high, that took about 5 minutes.
- Use tongs or a spatula to carefully remove the sandwich from the waffle iron and transfer it to a cutting board. Cut in half (or quarters) and serve hot.
Nutritional information is an estimate and provided to you as a courtesy. You should calculate the nutritional information with the actual ingredients used in your recipe using your preferred nutrition calculator.
did you make this recipe?
Make sure to tag @foodiewithfam on Instagram and #hashtag it #foodiewithfamily so I can check it out!
What are you favourite sandwich fillings? Are you a cold or hot sandwich person or not a *GASP* sandwich person at all?


Reader's Thoughts...
DiAnne says
Hmm. Hmm!! This sounds frickin’ amazing. Except for the lettuce. Warm lettuce is a hard no for me. But everything else, divine. Love the description of the recipe and I can’t wait to try it.
Rebecca says
Hi DiAnne! I hope you enjoy the panini with or without the lettuce. HAHAHA! 🙂 I kind of dig warm lettuce, which is funny.
David says
If your waffle iron has removable plates and a flat plate how is it that you didn’t think to use it as a panini maker? I thought this was a recipe for waffles sandwiches using waffle plates. 🙁
Rebecca says
That’s a good question. It’s because the flat plate doesn’t give as much variety in texture as the waffle plates do. It was a deliberate choice after trying both. 🙂
Ellen says
I was searching for validation that a waffel grill could, indeed make a pannini! Voila! Here is a great pannini to try. Black Forrest Ham, sliced thinly, baby spinach leaves, pears sliced thinly and brie!
Wenz28 says
Its all wow! The content and the concept is all perfect. Delicious.
Mary says
I love your writing style and this sandwich!
Kevin (Closet Cooking) says
Now that is the way to do waffles!
Kathy - Panini Happy says
This looks fabulous! And very resourceful. 🙂 As someone who uses a panini maker on a pretty regular basis I can tell you that you’d find all kinds of uses for it if you ever decided you wanted one! In the meantime, it looks as if your waffle iron is working out just fine. 🙂
Kitchensink says
Favorite sandwich fillings: cole slaw, meatloaf, pickles, gruyere, turkey, havarti, pastrami, tomatoes, bacon, avocado…THIS LIST COULD GO ON FOREVER!
Perhaps a shorter list would be my LEAST favorite sandwich fillings: liquid smoke, oatmeal.
LOVE YOUR PANINI HAM & CHEESE BY THE WAY!
Rebecca says
You’re a girl after my own heart. I think if we worked hard enough, we might be able to work out an oatmeal sandwich, though. 🙂
Virginia says
I’m always searching for an out of this world sandwich. I like ham and cheese but love a turkey sandwich on rye – toasted!
Nancy says
Sheer brilliance. My parents had a waffle maker whose panels flipped from waffle-textured to flat griddle, which made the world’s most sublime grilled cheeses. I just have a Belgian waffle maker, but I’m going to give it a try.
Minnie says
this menu going to be great for my boy, he like waffle a lot.
Rachel @ Baked by Rachel says
Yet another reason why I need a waffle iron! What a fun way to serve a sandwich 🙂
Amy says
I have a waffle maker and a panini press. Decisions decisions…