If you like this tutorial on How to Make Buttermilk Biscuits, visit our Bread Recipes page for more fantastic homemade breads.
There are times when nothing but a biscuit will do. Drop biscuits are okay; they can fill in the gaps when you are desperate and short on time.
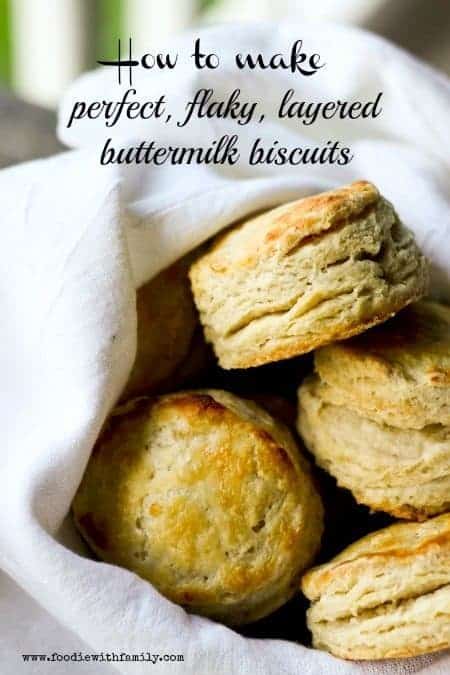
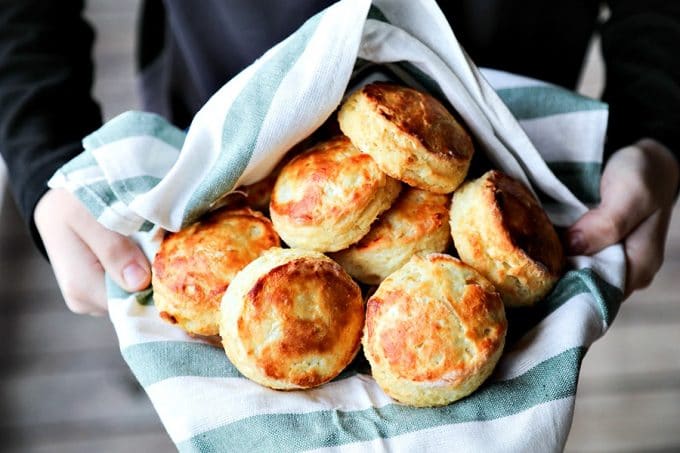
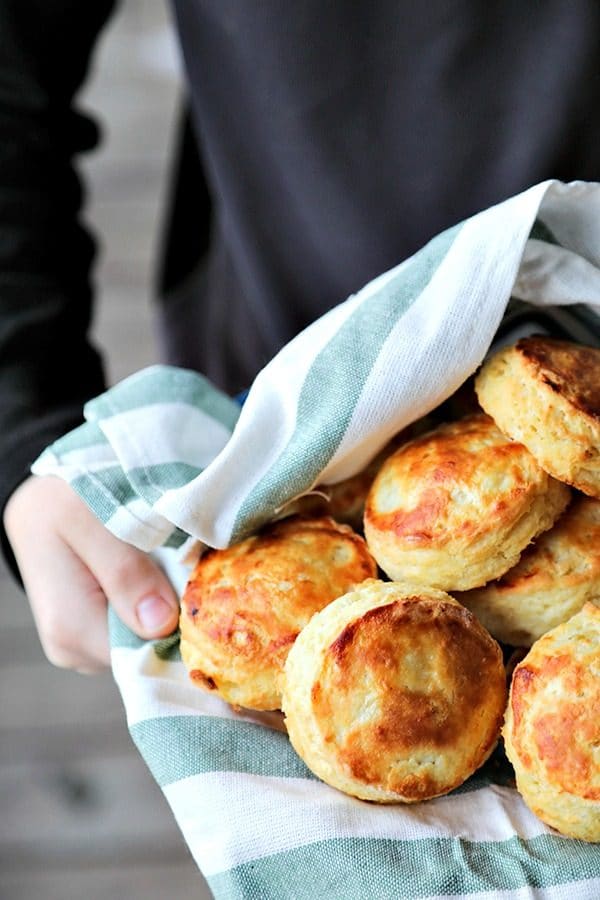
But most of the time, what I’m really and truly hankering for is a lofty, perfect, flaky, layered-from-top-to-bottom, golden brown, moist, golden brown, and delicious buttermilk biscuit. I’m talking about the kind where you can split it in half with your fingers and slather with cold butter and strawberry jam or cover with sausage gravy.
My homemade buttermilk biscuits were always really good… My grandma’s from Arkansas, folks, and she’s an amazing cook and it was her recipe I always made.
Then I learned a few techniques after attending a King Arthur Flour traveling baking demo (and later their Blog & Bake event), that turned my biscuits into the most perfect flaky layered buttermilk biscuits. My Perfect Flaky Layered Buttermilk Biscuits are now the One Biscuit to Rule Them All.
What are these magical techniques? I’ll summarize first.
If these sound fussy, I’ll explain why they make a difference further up and further in! (Name that reference!)
How to Make Buttermilk Biscuits
- Use COLD butter. Do not soften it at room temperature at all.
- Cut your butter into both pats and cubes before working them into the flour.
- Use your hands to work in the butter. Don’t use knives, forks, a pastry cutter, or a food processor.
- Don’t add too much buttermilk. It’s easier to add more later than it is to take excess out.
- Be gentle!!! Don’t overwork or manhandle the dough. Stay relaxed. Biscuits are happy food!
- Use a sharp biscuit cutter. Don’t use a jar, juice glass, or tea cup unless the edge is sharp enough to hurt your lip when you drink from it.
- Push straight down when cutting biscuits. Don’t spin or twist the cutter. Straight down and straight back up!
- Get as many biscuits out of the first cutting as you can. Each subsequent re-rolling and cutting of the dough yields tougher and tougher biscuits.
- Don’t crowd the pan. Make sure each biscuit has room to grow!
Those are the rules. Now, let’s break this down a little more…
Homemade Buttermilk Biscuits
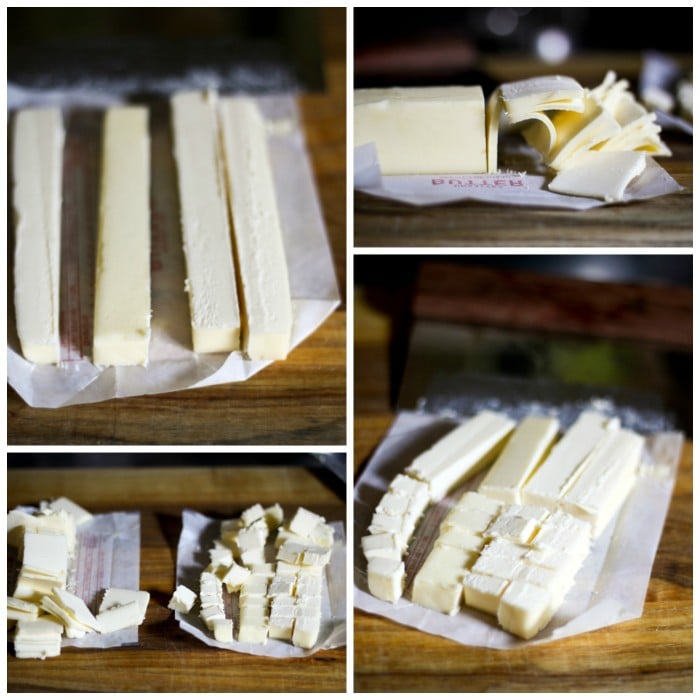
I am not kidding you when I tell you one of the main keys to perfect biscuits is cutting your butter two different ways. When you read through the recipe, it will be obvious that the photos show a double batch here. Because BISCUITS!
Notice that I cut half of the SUPER COLD butter into super thin pats and half into long quarters (or batons) and then crosswise into cubes. There is a scientific reason to this.
You don’t want homogenous pockets or ‘chunks’ of butter in your biscuit dough. Smaller pieces yield tender dough, larger, flatter pieces yield flakiness.
Both of those traits are prized in biscuits. Starting with the butter in two different shapes and sizes helps yield that desired final product.
Using cold butter is crucial, too. Cold butter melts when it’s in the hot oven rather than when it’s being worked into the flour.
The longer it takes to melt, the better… That helps create the layers, too, in our perfect Homemade Buttermilk Biscuits.
Because this recipe uses self-rising flour, you don’t have to worry about anything other than measuring said flour into a nice, large mixing bowl. Into the flour goes the butter.
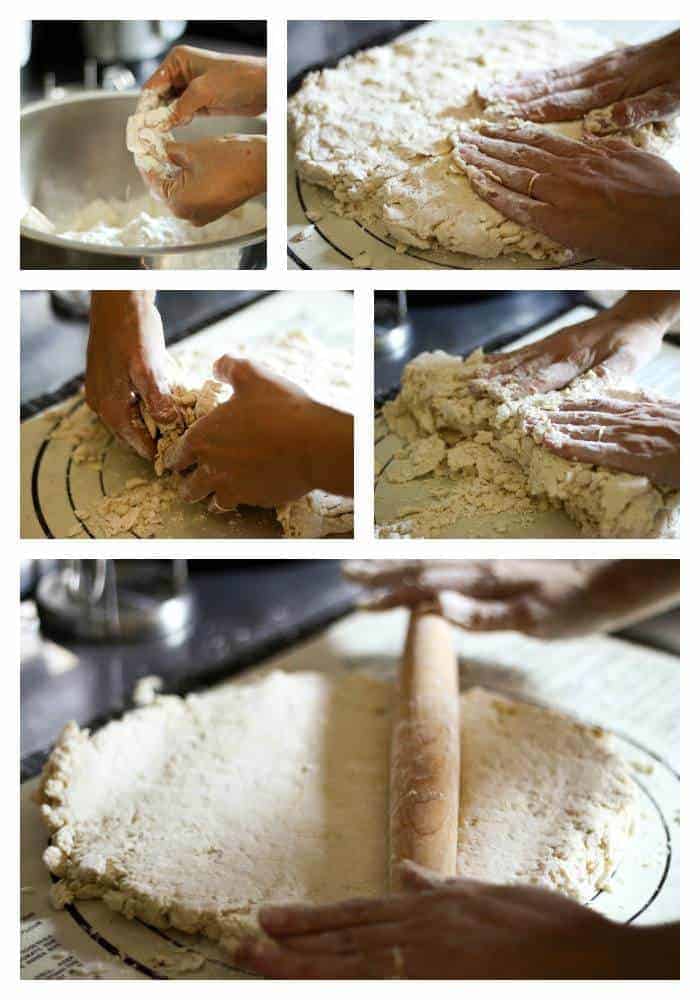
Now, drop your finger tips into the flour and butter and pull apart the butter pieces while tossing them into the flour. Don’t use the palms of your hands because those radiate heat and that melts butter which makes tough biscuits.
TOUGH BISCUITS. It sounds like an insult, doesn’t it?
Here’s a little video my 13 year old helped me make to show you what I mean years ago. Please enjoy the squawking in the background.
This is a real home with real children who eat the real food I share. They’re especially fond of biscuits.
This brings me to an important point.
Why should I use my hands to work the butter into my homemade buttermilk biscuit dough?
There’s a simple reason for this; it’s because you literally get a feel for how the dough is behaving.
When your hands are in the dough, you know when there are pieces that are too big. You also know when it will or won’t hold together, and you know you’re not beating the tar out of it which would yield TOUGH BISCUITS.
And I’m also not kidding when I tell you that your dough will look a little shaggy -okay, a lot shaggy- when you turn it out of the bowl. In fact, if you’ve not had success with biscuits before, you’re quite likely to think you’ve gone dreadfully wrong and that I’m crazy.
You’re going to be tempted to add a lot more buttermilk, but resist! Don’t do it! Trust me!
It’s time to pat out and fold the dough. That’s how we get all the lovely layers.
Here’s the method:
Slide both hands under one side of the dough (at about 9 o’clock if you think of the dough as a clock face), lift it up, and fold it over the other side at 3 o’clock like you’re closing a book. Again, pat the dough round out into a 2-inch thick rectangle.
This time, slide your hands under the bottom of the dough at 6 o’clock and fold it up toward 12 o’clock. Repeat the patting into a 2-inch rectangle, folding from 9 o’clock to 3 o’clock, patting, then folding from 6 o’clock to 12 o’clock.
Each time you do this, the dough should hold together just a little better. Onto rolling the dough!
Just like every other step, use a light hand when rolling the dough. It shouldn’t take much effort to roll it out.
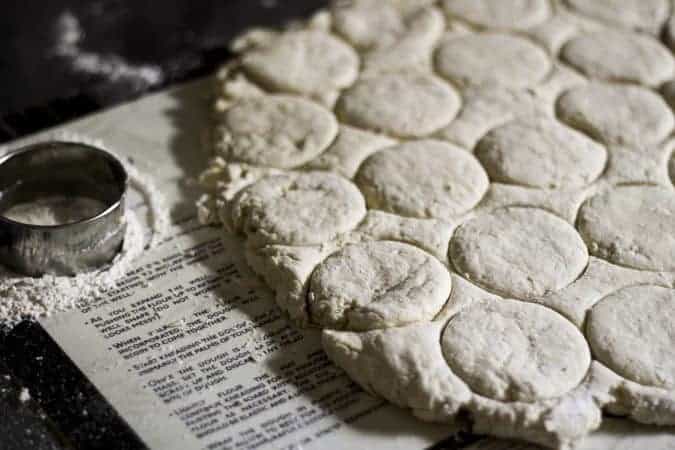
You have a couple of options for cutting the biscuits. You can either use a nice, sharp, open topped biscuit cutter or a knife.
Either way, you will push the cutter or knife straight down toward the counter. Do not twist the cutter or saw the knife back and forth because that will mar the layers you worked so hard to achieve and keep the biscuits from rising high.
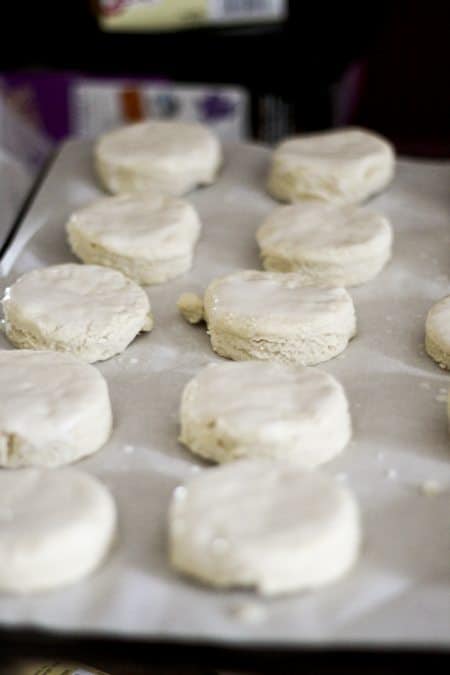
Make sure you don’t crowd your biscuits on the pan. They won’t have a chance to rise and have those gorgeous layered sides if you do. With so many do’s and don’ts in this recipe, I’m happy to say I have an optional step for you.
If you’d like them to be a pretty, glossy brown on top, you can brush them with more buttermilk (as I always do). If you prefer a rustic, flour dusted look to the top of your Perfect Flaky Layered Buttermilk Biscuits, omit that step. It’s just a matter of personal preference.
Finally, I have to tell you… this makes a lot of Perfect Flaky Layered Buttermilk Biscuits. It does.
It even makes more than our Viking horde should eat in one meal. (That’s not to say we haven’t eaten the whole shooting match at once, but I recognize that’s a little excessive.)
When I’m feeling virtuous, I freeze half of the unbaked batch for later meals. Sometimes, when I’m really on the ball, I just whip up a batch of dough, cut out the biscuits, and freeze all of them.
Are you wondering whether they’re as good when they’re baked after having been frozen? I don’t blame you if you are.
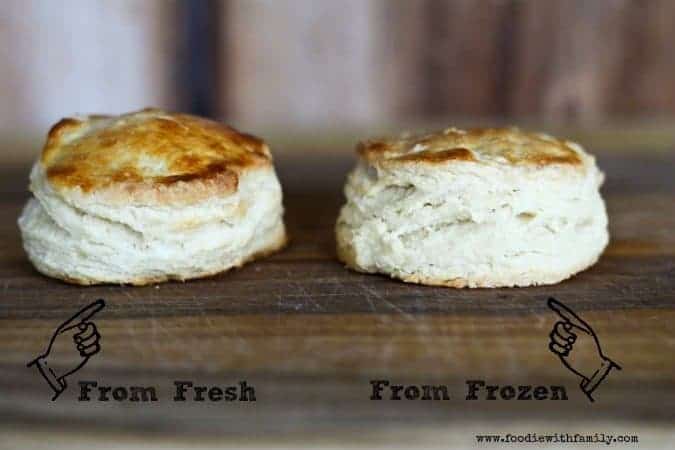
I offer proof. The Homemade Buttermilk Biscuit on the left was made from fresh biscuit dough.
The biscuit on the right was from pre-cut biscuits that were frozen for a week prior to baking. Both are fanastic, moist, flaky, and layered top to bottom with fabulous biscuit goodness.
Would you like to know something I’ve discovered? The frozen ones, in my experience, puff up a little higher than the fresh ones.
I love having frozen biscuits in the oven for busy nights or unexpected dinner guests. Now, anyone want a Homemade Buttermilk Biscuit?
Cook’s Notes
- There is going to be a little give and take on yield, but if you use a 2-inch round cutter, you should get about 24 Homemade Buttermilk Biscuits from this recipe.
- Feel free to cut them into squares if you’d like to reduce the work and waste!
- This is a case where you really want to use real cultured buttermilk. There are a lot of times when ye olde vinegar-mixed-with-milk substitute will work, but this is not one of them.
Use These to make Buttermilk Biscuits
Connect with Foodie with Family
facebook | pinterest | instagram | twitter
How to Make Buttermilk Biscuits
Rate RecipeIngredients
- 4 cups self-rising flour 1 pound by weight
- 1/2 cup very cold butter 1 stick or 4 ounces by weight
- 1 1/3 cups buttermilk plus extra if needed and for brushing
- all purpose flour for dusting the work surface
Instructions
- Preheat oven to 425°F. Add the self-rising flour to a large mixing bowl.
- Cut the stick of butter in half. Cut one half in 4 batons lengthwise, then cut across the batons to create small cubes. Cut the other half of the butter into pats as thin as you possibly can. Toss the cubes and pats of butter into the flour using just your fingertips so that they are fully coated with flour. Then, one piece at a time, quickly rub each pat and cube of butter between your fingers like you are rubbing dried glue off of your fingers. Continue doing this until all the butter has been rubbed into uneven pieces no larger than peas.
- Pour all but about 2 tablespoons of the buttermilk around the inside edges of the bowl. Reserve the buttermilk in case it's needed. Use a sturdy spoon, silicone or rubber spatula, or flexible dough/bench scraper to toss the buttermilk into the butter and flour mixture until a scrappy dough starts to form. If the mixture is still very dry, toss in the remaining buttermilk. Pick up a small amount of the dough and squeeze it in your hand. If it holds together you're ready to proceed. If most of the mixture is still very dry, you can add buttermilk -1 tablespoon at a time- until the dough holds together when squeezed.
- Dust a clean work surface with all-purpose flour (NOT self-rising here) and scrape the dough out into a pile. Quickly and gently use just enough pressure to pat the pile of dough into a rectangle that is about 2-inches thick. As you're patting it out, gently incorporate any crumbling edges back into the dough mass.
- Slide both hands under one side of the dough (at about 9 o'clock if you think of the dough as a clock face), lift it up, and fold it over the other side at 3 o'clock like you're closing a book. Again, pat the dough round out into a 2-inch thick rectangle. This time, slide your hands under the bottom of the dough at 6 o'clock and fold it up toward 12 o'clock. Repeat the patting into a 2-inch rectangle, folding from 9 o'clock to 3 o'clock, patting, then folding from 6 o'clock to 12 o'clock. Each time you do this, the dough should hold together just a little better.
- Rub a rolling pin with flour and very gently roll out the dough into any shape you'd like, but aim for 3/4-inch to 1-inch thickness. Flour a sharp round or square open-topped biscuit or cookie cutter. Cut straight down into the biscuit dough, not turning or spinning the cutter as you cut. Cut the biscuits as closely together as you possibly can, minimizing any excess between them. If you do not have a sharp biscuit cutter, use a sharp knife and cut straight down into the dough forming squares.
To Bake Right Away:
- Transfer the biscuits to a greased or parchment lined cookie sheet, brush the tops of the biscuits with buttermilk. Put the tray in the oven and bake for 8-12 minutes, rotating the pan front to back halfway through baking. When they are golden brown, delicious looking, and lofty. Remove them from the oven. Let stand at least 2 minutes before eating or transferring to a towel lined bowl.
To Freeze Biscuits for Later:
- Transfer the unbaked, cut biscuits to a parchment lined cookie sheet. Cover lightly with plastic wrap and stick the cookie sheet in the freezer. When the biscuits are frozen solid, stack them in a resealable freezer bag, label the bag, and keep frozen until needed, or for up to 3 months. If you store them longer than that, they will still be bake-able after that, but not quite as high-rising and tasty!
To Bake the Frozen Biscuits:
- Preheat the oven to 475°F. Line a cookie sheet with parchment paper. Arrange the frozen biscuits on the sheet leaving at least 2 inches between each biscuit. Brush the biscuit tops with buttermilk and bake the biscuits for 5 minutes. After 5 minutes, lower the heat to 425°F and continue cooking for 10 minutes or until the biscuits are golden brown, delicious looking, and lofty! Remove them from the oven and let stand at least 2 minutes before eating or transferring to a towel lined bowl.
Nutrition
Nutritional information is an estimate and provided to you as a courtesy. You should calculate the nutritional information with the actual ingredients used in your recipe using your preferred nutrition calculator.
did you make this recipe?
Make sure to tag @foodiewithfam on Instagram and #hashtag it #foodiewithfamily so I can check it out!
Are you looking for more delicious options to fill your freezer and pair with your Buttermilk Biscuits? Try this!
Turkey Breakfast Sausage comes together in a flash and is easily stored in the freezer using a clever method that lets you pull single patties from the bulk package!
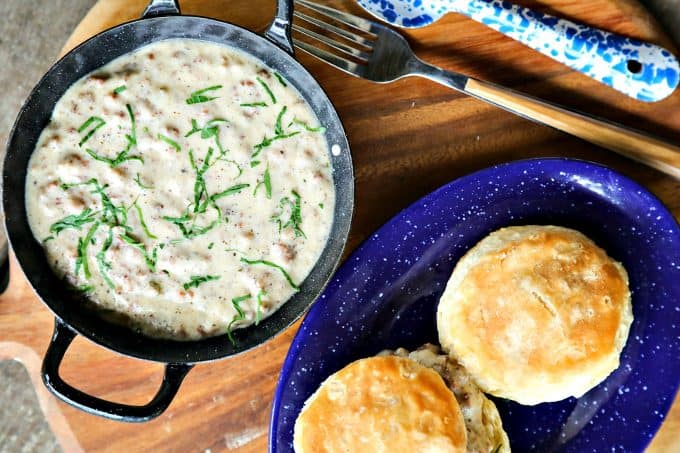
You can also ladle copious amounts of this terrific Classic Sausage Gravy over the Perfect Flaky Layered Buttermilk Biscuits and be a very happy human indeed!
This post originally published on October 26th, 2013, updated notes in November 2015, July 2017, and March 2021.





Reader's Thoughts...
Juliana says
Hi!!
This looks amazing! Such amazing tips! Thank you.
I have a question… i wanna freeze the biscuits… should I put them frozen in the oven or should I wait until room temperature and then put them in the oven?
Thank you
Rebecca says
Hi Juliana! Definitely bake them directly from the freezer!! Happy Baking!
mpotter says
I have made these several times over the past few years. When I make non self-rising flour biscuits, I still use your method. You are so detailed & helpful—my favorite part is the description of rubbing glue off your fingers. Perfect.
I am horrible with doughs. I am very hit or miss with every cinnamon roll, bread, biscuit & pizza that I make. This recipe and your directions definitely make it more hit than miss. THANK YOU.
Rebecca says
Thanks so much for taking the time to rate the recipe and let me know you love it, Mpotter! I truly appreciate it!
Francesca says
I have 5lbs of unused self rising flour. Your recipe is perfect for all of my questions I asked finding a particular recipe. Thank you so much for sharing all this!
Rebecca says
You’re so very welcome, Francesca! Thanks for taking the time to rate the recipe!
Jeany G says
You did not include how to store baked but uneaten biscuits. I want them neither dried out nor soggy.
Rebecca says
Hi Jeany- I didn’t include that because I truly think you’re better off only baking what you’ll eat that day. Biscuits just plain don’t hold up to storage beyond a day in my opinion. That’s why I made such a point of freezing them before baking. 🙂
Carol says
I followed your steps exactly and ended up with hockey pucks instead of flakey pull apart biscuits. Where might I have gone wrong?
I used self raising flour and cultured buttermilk and cold butter???
Rebecca says
Hey there, Carol! Let’s see if we can figure this out for you. Did you measure your flour by weight or by dunking the cup into the flour or by fluffing/spooning/sprinkling the flour over the measuring cup and leveling it?
Elizabeth C Mudd Kifonidis says
I miss read your directions I guess I thought I could pre-make these bake them freeze them in freezer bags and use them at a later date I didn’t realize they had to be Frozen unbaked. Are they ruined I just made them put them in a freezer Ziploc bag and put that in a Tupperware and put them in the freezer for later use in about two weeks when I have a party to gift? Thank you
Rebecca says
Ooooh, okay, Elizabeth. I’ll tell you honestly that I’ve not frozen the baked ones and then thawed/eaten them. If I was in your position, I’d thaw a couple and try them out. If they’re not what you hoped, you definitely have time to make another batch and freeze them un-baked.
Diane says
Thank you for this recipe and tutorial, Rebecca! I came across it while googling “how to freeze pre-cooked homemade biscuits”. I had to make my own self rising flour for these, but they came out perfectly, both when baked fresh and baked frozen.
Regarding baking of the frozen biscuits, have you ever let them thaw before baking? I ask because I only wanted to bake a few this morning and thought I would use our toaster oven. It only heats to 450°, though, so I used the big oven, not wanting to risk messing them up on my first attempt at baking homemade frozen biscuits.
Diane says
That was supposed to say “precut” not “precooked” homemade biscuits!
Rebecca says
Hi Diane- I would not thaw them first… You’ll lose some spring in the oven if you do that. You could probably go ahead and bake them at 450°F in the toaster oven. 🙂
Diane Acy says
Thanks for the advice. I’ll try a couple that way next time.
Robin S. says
Hi. Merry Christmas..
I made Bacon Jam for the males in the family. I thought I would make home made biscuits, came across your recipe. Liked how u offered information on the Tips… BUT.. They came out terrible. Too hard n no taste. So I looked at other recipes n found they added salt n baking powder. So I made another batch this time using another recipe , n they came out GREAT. Are you suppose to use salt n baking powder in your recipe too?? If so, then you need to correct it.
Thank you for listening.
Rebecca says
Hi Robin- This recipe is an excellent one, so I’d like to see if we can troubleshoot your issues. The flour I start with is self-rising flour. That means the salt and baking powder are already in it and do not need to be added. Did you use self-rising flour or all-purpose flour? Also, did you use cultured buttermilk as specified in the recipe or a combination of vinegar and milk?
Misty says
Can you use butter flavored Chris I with this recipe? Will it affect the texture or taste?
Misty says
Butter flavored crisco?
Rebecca says
I would not. It will change the texture for sure. Butter is just a better choice here texturally and flavour-wise.
dan turner says
yum!
April says
I cant wait to try this. I have failed to make and freeze my bisuits, tried again and failed again and then again. I also cannot seem to make them and have them turn out the same way twice in a row. Its such a struggle all though my hubby never complains about them. Being a southern woman and cooking southern food it feels like a big failure. Its biscuits for heaven’s sake y’all!
Rebecca says
HA! I feel your pain, April! Please let me know how these go for you!
Grace says
The only thing I do different is I cut the butter from a frozen state and leave it in the freezer in a container and weigh it out as needed.
And I use a sheet of plastic lined freezer paper, paper side up to roll it out on.
When done, fold up and throw away…
MoLiver4u says
Help! I weighed my flour and three cups is one pound! What do I go with, the weight or the measure?
Rebecca says
Hey there, MoLiver4u! I always go by weight when in doubt. Self-rising flour should weigh 4 ounces per cup. I’m wondering if you dipped your cup in and maybe shook it around a bit or your flour was otherwise compacted?
Moliver4u says
I made my own as I only had AP flour. I tried it out by weight at it didn’t come out as good as when I went with 3.5 Cups so I did that. I baked up one from each batch to test and my 10yr old daughter begged me to bake more so I think they’re going to be a hit tomorrow. Thanks so much for sharing this and for your prompt response!
Chris S. says
The best biscuits I’ve ever had! made half and froze half. Good thing because I would have ate them all!
I’m looking forward to seeing how the frozen batch tastes. My first attempt at another biscuit recipe but with this same techniques was a fail [tough biscuits 🙂 ]. I think this will make a great gift to the adult kids in the family as well.
Rebecca says
Thanks so much for the great review, Chris! There’s nothing like a good biscuit to make your day, right?
Charl Anne says
Never mind, I just realized I didn’t use self rising flour:(
Rebecca says
Yep, unfortunately, that’ll do it. Please let me know how it works out for you if you try it with self-rising!
Charl Anne says
It took almost thirty minutes to cook these . I rolled them out to 1” cut in squares. When I put them in the oven they looked perfect. But they are not done in the middle.
Katie Dotson says
Cut the butter into the desired bit size while semi-soft , then place in the freezer until needed. Covered of course.
Or you can put the butter into the freeze, grate the frozen butter with a cheese grater, then return to the freezer until needed. This method also works for recipes that call for butter to be spread over the top of dish prior to baking. (i.e. dump cake) In this way, you get even coverage with out “butter puddles”.
Matt says
Hi, thanks for the recipe and tips! Curious about your freezing…when I freeze my biscuits they don’t rise as high as fresh baked. Any tips there on fixing this? Many thanks!
Rebecca says
Hi Matt- Do you use this particular biscuit recipe when you freeze and they don’t rise as well?
Matt says
Hi Rebecca, thanks for the reply! I just found this recipe yesterday so I haven’t tried it yet but will soon.
I will say, my recipe has a bit more buttermilk in it (1 1/2 c with 3 c flour), and I don’t use self-rising flour, and add baking powder and a small amount of baking soda (which I know is acid activated)…so maybe that’s part of it?
Rebecca says
Why don’t you give this one a go and see if it rises better for you from the freezer? 🙂 Those little things can make a big difference!
Matt says
I figured out oven temp was the issue. I had been cooking my own recipe at 400 for frozen biscuits to avoid burning bottom…So I raised the temp and moved the pan to the top shelf. No burning now and great lift! Thanks again Rebecca!
Debbie says
So glad I found your site. I’m baking your biscuits for dinner today, and thankfully your the only blogger that I have found that tells you exactly how to freeze some for later. Which is great since it’s only 2 of us and we have been buying frozen biscuits when I don’t have time to make a batch. This way I can make a large batch and freeze them. All your recipes looks delicious and I can’t wait to make the salad with Cabot cheese love their products. I too love to bake and I always bake with King Authors love their baking challenges each month.
Rebecca says
Thank you, Debbie! It sounds like we have a lot of food loves in common. 🙂 <3 I look forward to "cooking with you" virtually!
NW says
I’ve made these twice and they are a hit with family and guests. Only one tiny problem…I don’t remember if it is salted or unsalted butter I used and the recipe doesn’t indicate. Can you clarify?
Rebecca says
Hi NW. It’s down to personal preference. I prefer to use unsalted butter in most of my baking, but my guys like it when I use salted. Either way will be fine!