Refried beans are a staple food at our house. I can’t imagine trying to feed five boys without refried beans, to be honest. One person or another is always ‘STARVING!’ and ‘ABOUT TO DIE IF I DON’T EAT!’ or ‘HAS A STOMACH THAT IS A GIANT VOID!’. You thought drama was reserved for daughters? Oh, no. I assure you it isn’t. This is most especially true when it comes to describing the depths and depravity of their hunger and when the last time was you provided food for their neglected, shrunken stomachs. That last one? The one about the void? That’s my eight year old’s preferred method of telling me he’s hungry. And it is delivered with such a look of pain the child actor should get an Oscar.
Enter refried beans.
I make a batch of these almost weekly but sometimes more often and divide them into snack sized containers then stash them in the freezer. Even the littlest knows how to pull out a container of beans, crack the lid open, and microwave it until hot all the way through. Granted, he does it wearing an apron and oven mitts that go up his arms past his elbows, but people- it’s an independent kitchen skill. (In other words, I can go to the bathroom for five minutes without someone banging on the door yelling about how their stomach will invert if I don’t feed them immediately.) I’m not arguing!
Where does a kid go from there? In our house, we have an almost bottomless supply of tortilla chips. I buy them by the case at Aldi. (Glorious, wonderful, fabulous Aldi. Long may it remain in business!) The guys take a reheated container of refrieds, a bag of chips, and it holds them in gastronomic comfort for at least an hour.
Those beans aren’t just snack fare, though, they’re the basis for an almost limitless number of meals from fast beans-n-rice and quesadillas and nachos to burritos and tacos or veggie burgers.
Why should I make refried beans from scratch?
That’s the million dollar question, isn’t it? It’s not like canned refried beans are expensive. They’re dirt cheap. And, honestly, I keep a couple cans around for emergency situations (like when the kids had friends over and had failed to tell me ahead of time they had eaten the last of the freezer stash the previous day.) Dried beans are also cheap and shelf stable. When you break it down by money, you’re about even whether you use canned or dried.
Sure, you can make arguments that the homemade ones are healthier (mainly because they can be when you control the amount of sodium and fat that goes into the mix.) So if money and health aren’t my main motivators what is? The reason is simply this: Homemade Refried Beans are so much better tasting and texture-wise that it’s hard to believe they’re the same food as the canned ones.
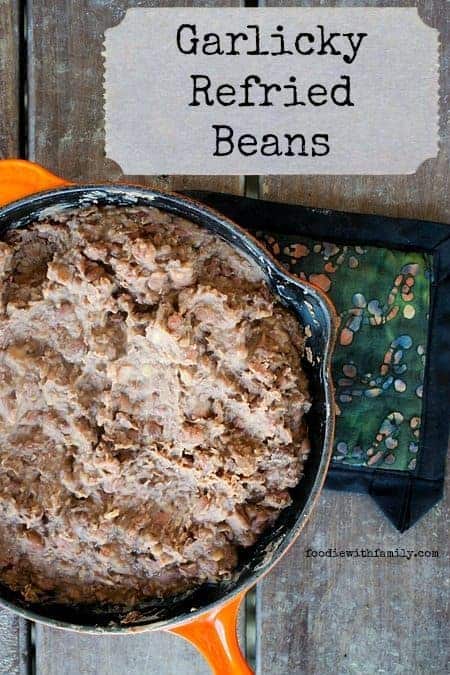
Hyperbole? No. Not here. Homemade refried beans have FLAVOUR. They’re not just mushed pinto beans with fat. Granted, we’re still talking mashed pinto beans with fat, but the ones from scratch are INSANELY delicious. My version is simple but sublime: JAM PACKED with garlic, a hint of smoky spice, creamy with some whole beans still visible.
One of our favourite snacks: a simple tortilla, charred lightly, spread with refried beans, topped with a little grated cheese and a couple cilantro leaves or salsa.
Cooking Notes:
- No. You don’t need to soak the beans. That’s a bill of goods we were sold for years. Believe me. Using this method will free you from bean-soaking slavery.
- Yes. You can cook the beans with salt. (That salt toughens the beans if added while cooking is another load of malarkey.) In fact, you SHOULD cook the beans with salt. You have ONE chance to get that flavour that salt delivers down to the very core of the bean and that’s by adding the salt at the beginning.
- I give you a range of amounts of fat in the recipe. The low end is, in my opinion, the bare minimum amount necessary to have a delicious batch of refried beans. The high end is a more indulgent (and more fabulous) version. Let me know which way you like it better!
- I also give you a serious number of fat options in the recipe. This is because everyone has a different favourite. I personally like bacon grease in my refried beans more than anything else. Lard is most traditional. Play around with it and figure out which fat YOU like best.
- In the second stage of cooking (the “refrying” stage), avoid the temptation to cook the beans down to the finished thickness you like. If you do boil it to this thickness, you’ll end up with a stodgy blob o’ beans. They’ll continue to thicken after being removed from the heat as they cool.
- If you do end up with a stodgy blob o’ beans, you can probably save them. Stir in some more fat and a little chicken stock until they’re thin, then bubble away until about the viscosity of banana bread batter. Remove from the heat and let cool. Tada!

Homemade Garlicky Refried Beans
Rate RecipeIngredients
- 1 pound dried pinto beans 2 cups
- 8 cloves garlic peeled but left whole
- 1/2 an onion trimmed of both ends, peeled, and roughly chopped
- 2 bay leaves
- 1 Ancho pepper dried poblano chile, wiped clean, stem and seeds removed
- 1 tablespoon dried oregano
- 2 teaspoons kosher salt
- 1/4 to 1/2 cup peanut canola, or vegetable oil, vegetable shortening, lard, or bacon grease
Instructions
- Preheat the oven to 275°F.
- Put the pinto beans into a colander. Pick through and remove any foreign objects and dried, shriveled or discoloured beans. Rinse them well and put them into a 3 quart or larger dutch oven. Cover the beans by 2 to 3-inches of fresh water then stir in the garlic, onion, bay leaves, Ancho pepper, oregano, and salt. Bring to a boil, put the lid tightly in place on the dutch oven and place in the oven for 60-90 minutes (*See notes), or until the beans are quite tender.
- Add the fat of choice to a cast-iron or other heavy-bottomed 8 to 12-inch skillet over MEDIUM HIGH heat. When it is shimmery, use a ladle to transfer about 3 cups of the cooked beans and liquid to the skillet. When this comes to a boil, add 2 more ladles-full of beans and liquid. Let it return to a boil and repeat the process (2 ladles then boil) until all the beans have been added then drop the heat to MEDIUM LOW. Stir the mixture vigorously with a wooden spoon to help break up the beans. Keep simmering until most of the beans are broken up and the mixture is creamy and thick. There will still be some whole beans visible in the pan(**See Notes). Keep in mind that the mixture will continue to thicken as it cools.
- Taste the beans and adjust with salt if desired.
Notes
Nutritional information is an estimate and provided to you as a courtesy. You should calculate the nutritional information with the actual ingredients used in your recipe using your preferred nutrition calculator.
did you make this recipe?
Make sure to tag @foodiewithfam on Instagram and #hashtag it #foodiewithfamily so I can check it out!


Reader's Thoughts...
Reni says
Making the beans right now! So far all of the pre-tasting 🙂 tastes scrumptious…
Rebecca says
We do so love these!!!!! I hope you do, too!
Crystal says
I have made theses a few times! We love them!!