This Baked Salmon Sushi satisfies your cravings for salmon sushi rolls and is a healthier option for a crowd-pleasing dish while being kind to your budget at the same time! Enjoy this easy-to-make salmon sushi bake recipe as a family-friendly easy weeknight meal or watch it disappear at the speed of light at a party.
While traditional sushi rolls take skill and a bit of time to prepare, this recipe for what amounts to a deconstructed Philadelphia sushi roll comes together in a fraction of the time. You don’t need any special equipment to make it and the ingredients are pretty easy to find in your grocery store or Asian market.
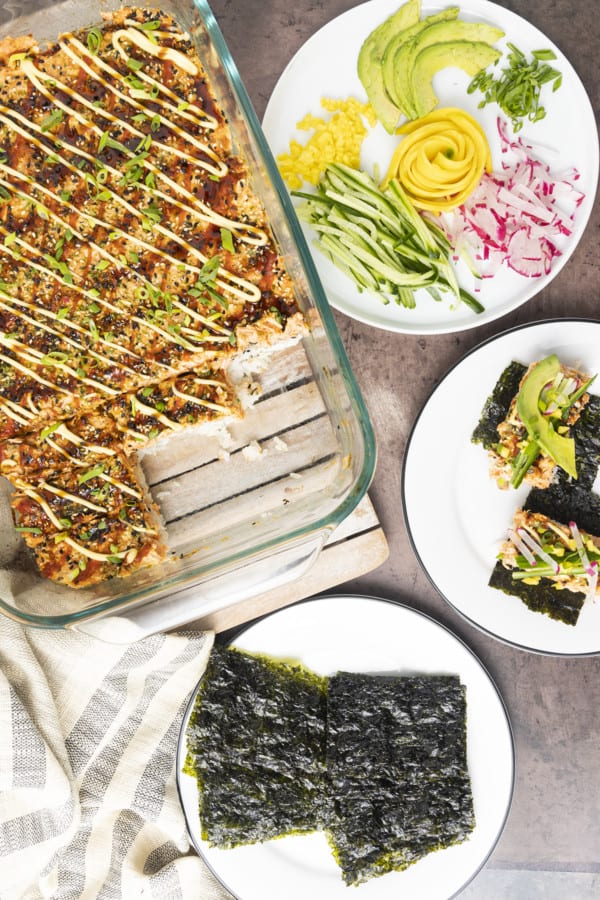
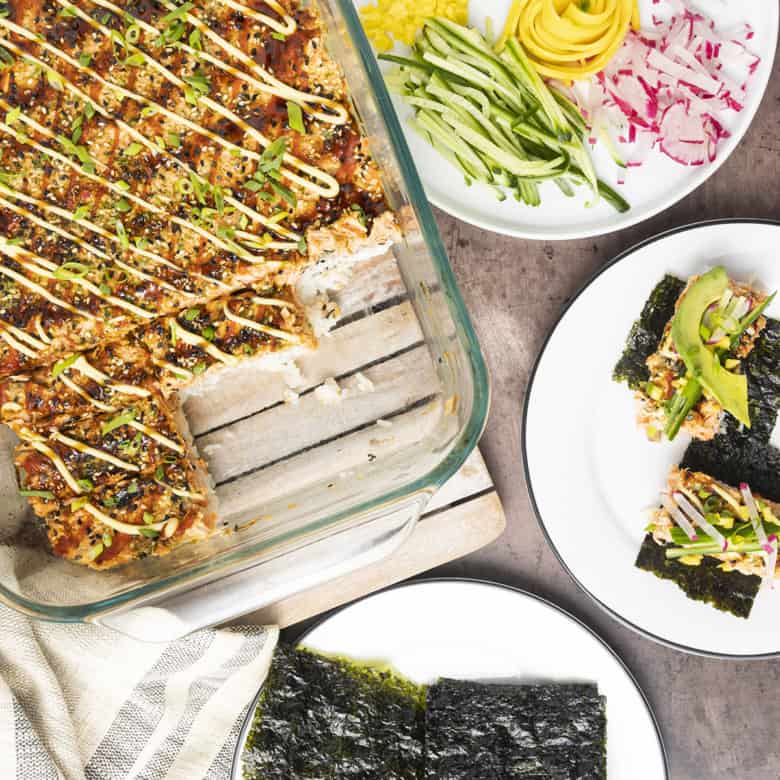
There are many different ways to make baked sushi, but today’s recipe is my best-loved one. Cooked sushi rice is tossed with seasoned rice vinegar, pressed into a baking dish, topped with furikake seasoning, cooked salmon in a dressing, unagi sauce (a.k.a. eel sauce), Japanese Kewpie mayonnaise, and sriracha, then baked ’til comforting and warm.
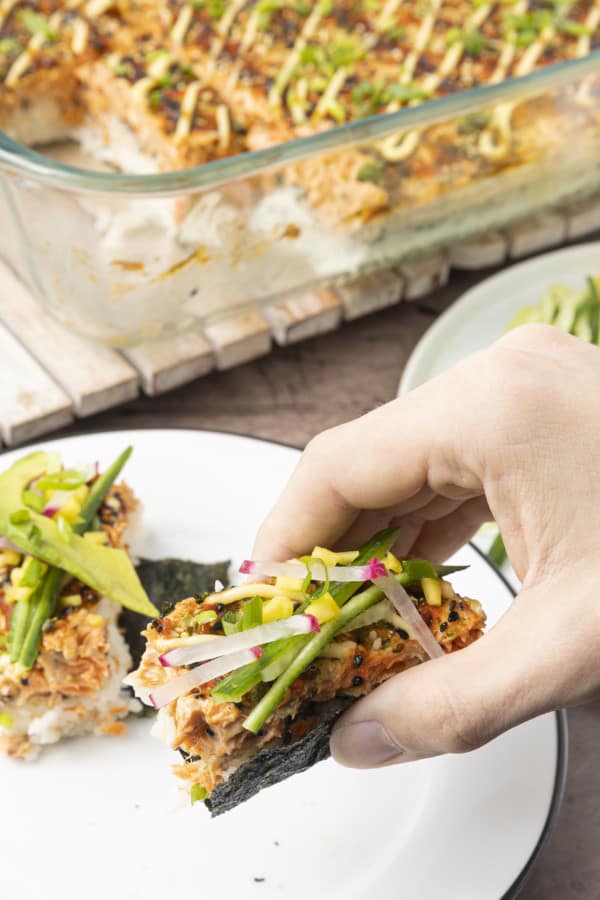
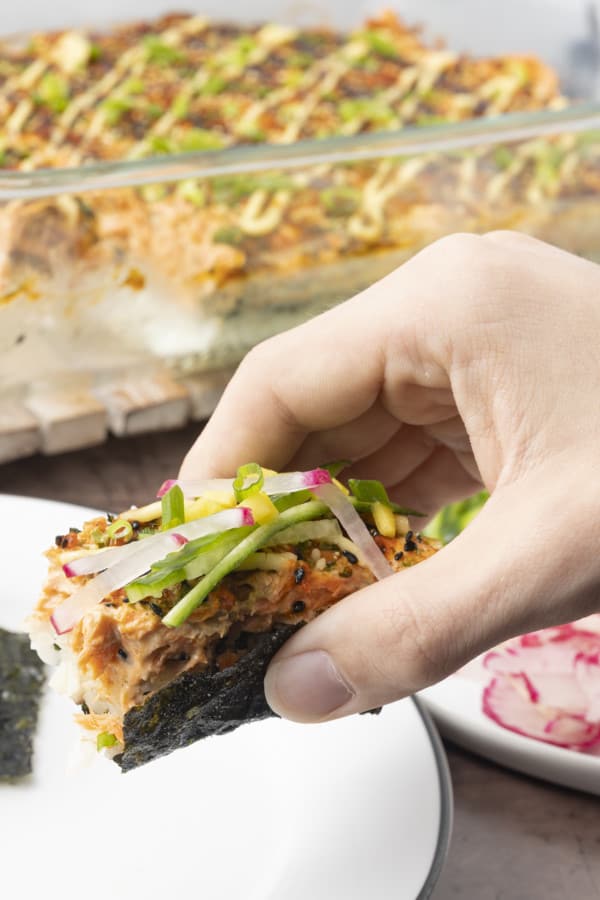
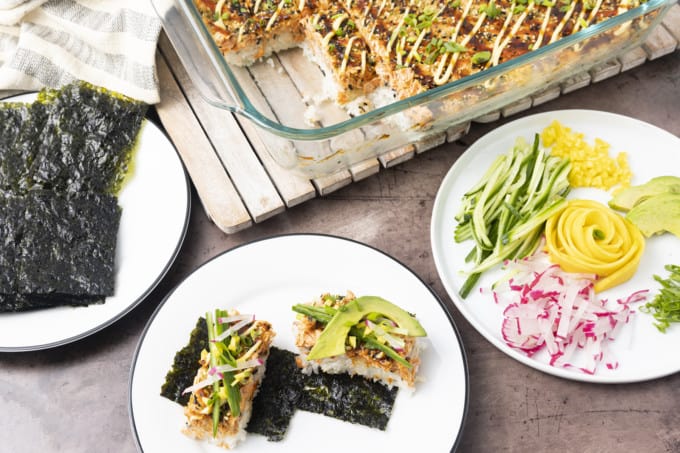
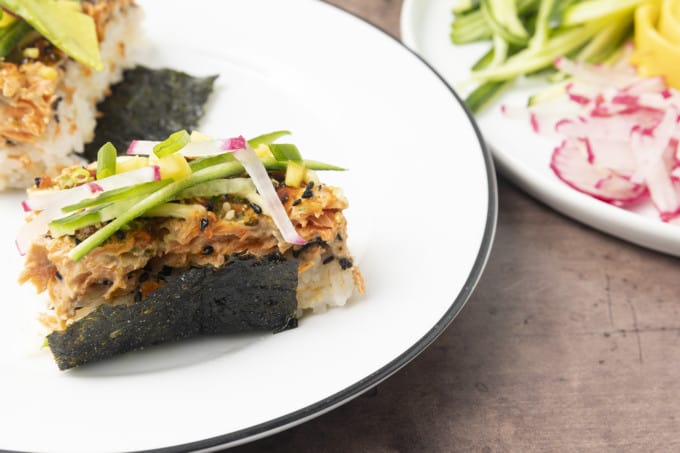
The sushi bake is then sliced into rectangular small pieces and served on seaweed snacks with any or all of your favorite toppings for sushi; sliced cucumbers, radishes, green onions, avocados, cilantro, soy sauce, spicy mayo, or more. Fold the nori sheet like a little taco, and VOILA! Baked Salmon Sushi.
Somehow it satisfies a sushi craving and casserole craving simultaneously. It may sound odd, but believe me, once you’ve tried it, you’ll know why it’s such a popular dish to pass at potlucks and parties in Hawaii.
Let’s break down what you need in terms of ingredients and equipment. The list might look long, but I promise baked salmon sushi is a delicious dish with very little prep time.
What Ingredients Do I Need to Bake Salmon Sushi?
- Sesame Oil
- Short Grain Rice (white rice or brown rice)
- Seasoned Rice Vinegar or Plain Rice Vinegar with Sugar and Salt
- Furikake (Homemade Furikake or Purchased)
- Cream Cheese
- Mayonnaise (Preferably Kewpie Mayonnaise)
- Sriracha
- Cooked Salmon
- Green Onions
- Unagi Sauce (a.k.a. Eel Sauce)
- Seasoned Seaweed Sheets (I’ll share a hack to turn regular nori into seasoned nori, too!)
While that is all you really, truly need to bake salmon sushi, it’s awfully nice to serve it with julienned or diced cucumber, radishes, mango, avocado, toasted sesame seeds, soy sauce, and hot sauce.
While you can most definitely use garden variety mayonnaise in your sushi bake, I do prefer to use the Japanese mayo brand Kewpie. It’s a slightly richer mayonnaise because it only uses egg yolks not whole eggs and it comes in a handy squeeze bottle that makes piping it over your sushi bake in a decorative way super easy.
If you can’t find Kewpie mayonnaise, though, please feel free to use standard mayonnaise. You can still pipe it decoratively by using this simple hack; load your mayonnaise into a zipper top sandwich bag, seal it, and snip a tiny bit off of the corner.
Ta-da! Almost instant piping bag!
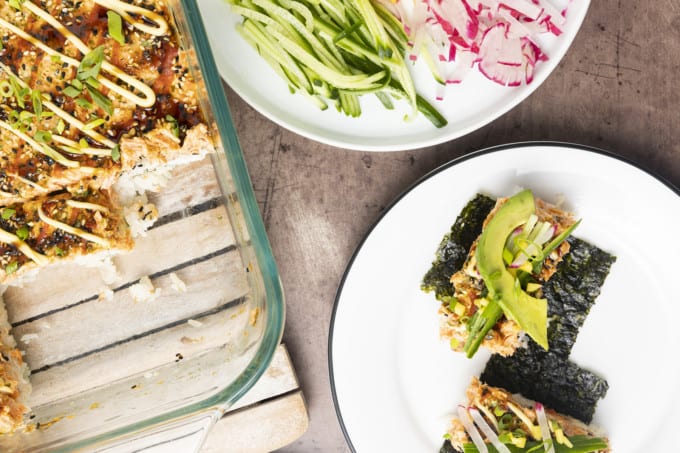
Instead of the cubes of cold cream cheese you generally find in Philadelphia rolls, you soften the cream cheese and mix it into your cooked salmon. The salmon mixture is then spread over the sushi rice you patted into your baking dish.
How Do I Cook Sushi Rice?
Short grain rice is the key to authentic sushi rice whether you’re making sushi rolls or baked sushi. As you might expect from the name, the grains are short and stubby. They release a lot of starch as they cook, yielding a sticky rice characteristic of sushi.
You can use Japanese rice or American grown short grain rice with equally good results, but please rinse and drain the rice several times before cooking it. There are a couple of great reasons for this.
Should I Rinse Rice Before Cooking It?
There are three really solid reasons to rinse your rice. First and perhaps most obviously, you rinse rice to clean it.
Rice is grown in a rice paddy and makes quite a few stops between there and the bag on your counter. It can pick up dust, debris, dirt, and more. Rinsing it thoroughly does the job.
Second, you remove excess starch from the outside of each grain of rice. This extra starch comes from the jostling of rice grains in transit.
They rub against each other and grind ever so slightly. If you don’t rinse it from the rice, you end up cooking what amounts to rice flour on the outside of your rice grains, giving it a gluey and gloppy character.
Finally, rice is dry! Rinsing it allows the rice to kickstart the rehydration process gradually before you introduce heat to the party. This yields rice grains that are plump and sticky but perfectly cooked through.
How Do I Rinse Rice?
There are two excellent ways to rinse rice. My preferred method is to measure the rice into a bowl, cover it with cool tap water, swirl it with my hands, then pour it through a fine mesh sieve. Repeat this until the water around the rice is clear.
The second way to rinse rice is to measure the rice directly into a fine mesh sieve. Hold the sieve under running water and gently turn the rice over with your hands until the water runs clear.
How to Cook Sushi Rice
The easiest way to cook sushi rice, by far, is the Instant Pot. Rinse and drain it well, add an equal volume of water, close the Instant Pot, set it to seal, and cook on low pressure for 12 minutes or high pressure for 5 minutes. After the cycle runs, release the pressure and toss with the seasoned rice vinegar. If you’re using plain rice vinegar, just combine it with sugar and salt in a jar and shake it ’til it’s dissolved.
If you do not have an instant pot, you can certainly cook it in a rice cooker following the manufacturer’s instructions or in a saucepan according to package instructions. Go with what you have handy!
How Do I Make Seaweed Snacks?
Preheat your oven to 250ºF. Brush full sized sheets of nori very lightly with sunflower or toasted sesame oil on both sides. Cut them into half lengthwise and then crosswise to yield 4 equal rectangles.
Sprinkle lightly with fine sea salt (and/or wasabi powder), arrange in a single layer on a baking sheet, and bake for 15 minutes. Let them cool completely, and store in an airtight container.
What Equipment Do I Need for Baked Sushi
I’m very happy to tell you you don’t need any specialty equipment for your baked sushi; no sushi mat needed!. It is quite likely you have what you need in your kitchen already!
- A way to cook your rice (instant pot, rice cooker, or a saucepan with a tight fitting lid.)
- Wooden spoon or rice paddle
- 9-inch by 13-inch rectangular baking dish or casserole
- Chef’s knife
- Cutting board
Baked Salmon Sushi
To Make the Sushi Rice Layer
Preheat oven to 400ºF. Lightly brush a 9-inch by 13-inch baking dish with toasted sesame oil and set it aside.
Cook the rinsed rice according to package instructions. While it rests after cooking, combine the rice vinegar, sugar, and salt in a small saucepan or a microwave safe bowl and heat just until the salt and sugar easily dissolve when stirred.
Drizzle the vinegar over the hot rice and toss to evenly distribute the vinegar. Scrape the rice into the prepared pan.
Wet your hands thoroughly and use them to lightly press the rice into the pan in an even layer. Do not compress the rice too much.
Sprinkle the rice generously with furikake and set it aside.
To Make the Spicy Salmon Layer
In a mixing bowl mash together the softened cream cheese, mayonnaise, and sriracha. When it is mostly smooth, stir in the sliced green onions and flaked salmon.
Dollop the salmon mixture over the rice layer. Use a flexible spatula to spread it evenly over the rice.
To Garnish and Bake the Sushi Bake
Sprinkle the spicy salmon layer generously with furikake again.
Drizzle the unagi (eel) sauce, in a decorative pattern over the top. Do this with the mayonnaise and sriracha, as well.
Bake for 10 to 12 minutes, or until hot all the way through and the rice is sizzling. This is easiest to discern if you used a glass baking dish.
To Serve the Sushi Bake
Remove from the oven, let stand for 5 to 10 minutes.
Scatter the top with the sliced green onions and cut into rectangles while still in the pan. Use a narrow, flexible metal spatula to lift the sushi bake from the pan.
Serve with nori rectangles, diced cucumber, and minced or sliced radish to be assembled by the diners at the table.
Baked Salmon Sushi
Rate RecipeEquipment
- 1 9×13 baking dish
- 1 chef's knife
- 1 cutting board
- 1 wooden spoon or rice paddle
- 1 instant pot, rice cooker, or pan to cook the rice
Ingredients
Sushi Rice Layer:
- 2 teaspoons toasted sesame oil
- 2 cups uncooked sushi rice rinsed several times
- ¼ cup rice vinegar See Notes
- 1 tablespoon white sugar See Notes
- 1 teaspoon Morton’s kosher salt See Notes
- 2 tablespoons furikake
Spicy Salmon Layer:
- 8 oz cream cheese softened to room temperature
- 1/4 cup mayonnaise divided (preferably Kewpie Japanese mayonnaise)
- 1 tablespoon to ¼ cup sriracha divided (we prefer the higher end)
- 3 green onions thinly sliced
- 3 cups cooked salmon flaked. See notes.
- 2 tablespoons furikake
Garnish
- 2 tablespoons Unagi sauce oyster, or teriyaki glaze
- 2 tablespoons Sriracha
- 2 tablespoons mayonnaise preferably Kewpie Japanese mayonnaise
To Serve:
- 3 Green onions thinly sliced
- Korean toasted seaweed snacks or nori
- Diced seedless cucumber
- 2 radishes minced or thinly sliced
Instructions
To Make the Sushi Rice Layer
- Preheat oven to 400ºF. Lightly brush a 9-inch by 13-inch baking dish with toasted sesame oil and set it aside.
- Cook rice according to package instructions. While it rests after cooking, combine the rice vinegar, sugar, and salt in a small saucepan or a microwave safe bowl and heat just until the salt and sugar easily dissolve when stirred.
- Drizzle the vinegar over the hot rice and toss to evenly distribute the vinegar. Scrape the rice into the prepared pan.
- Wet your hands thoroughly and use them to lightly press the rice into the pan in an even layer. Do not compress the rice too much.
- Sprinkle generously with furikake and set aside.
To Make the Spicy Salmon Layer
- In a mixing bowl mash together the softened cream cheese, 2 tablespoons of the mayonnaise, and sriracha with a splash of pickled ginger brine, if available. When it is mostly smooth, stir in the sliced green onions and flaked salmon.
- Dollop the salmon mixture over the rice layer. Use a flexible spatula to spread it evenly over the rice.
To Garnish and Bake the Sushi Bake
- Sprinkle the spicy salmon layer generously with furikake again.
- Drizzle the unagi (eel) sauce, if using in a decorative pattern over the top. Do this with the mayonnaise and sriracha, as well.
- Bake for 10 to 12 minutes, or until hot all the way through and the rice is sizzling. This is easiest to discern if you used a glass baking dish.
To Serve the Sushi Bake
- Remove from the oven, let stand for 5 to 10 minutes.Scatter the top with the sliced green onions and cut into rectangles while still in the pan. Use a narrow, flexible metal spatula to lift the sushi bake from the pan.
- Serve with nori rectangles, diced cucumber, and minced or sliced radish to be assembled by the diners at the table.
Notes
Nutrition
Nutritional information is an estimate and provided to you as a courtesy. You should calculate the nutritional information with the actual ingredients used in your recipe using your preferred nutrition calculator.
did you make this recipe?
Make sure to tag @foodiewithfam on Instagram and #hashtag it #foodiewithfamily so I can check it out!


Reader's Thoughts...
Laura says
How many days would this last in the fridge?
Rebecca says
Hi Laura- It’s best served the day it is made, but if it is promptly refrigerated, it is good for about three more days!