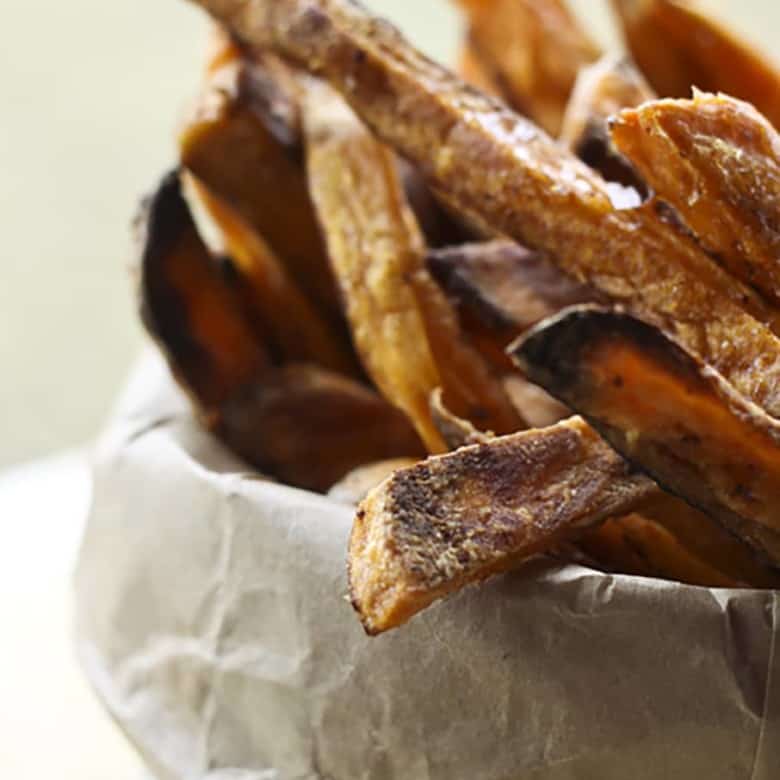
Crispy Baked Sweet Potato Fries are a perennial favourite here on Foodie with Family for a great reason. So many of you have made crispy, crunchy, delicious sweet potatoes at home with the recipe.
A quick word of advice: grab a cheap oven thermometer to see if your oven’s temperature is correctly calibrated. You can compensate by however many degrees it is off when you bake your fries!
Check out all of our fabulous Sweet Potato Recipes here!
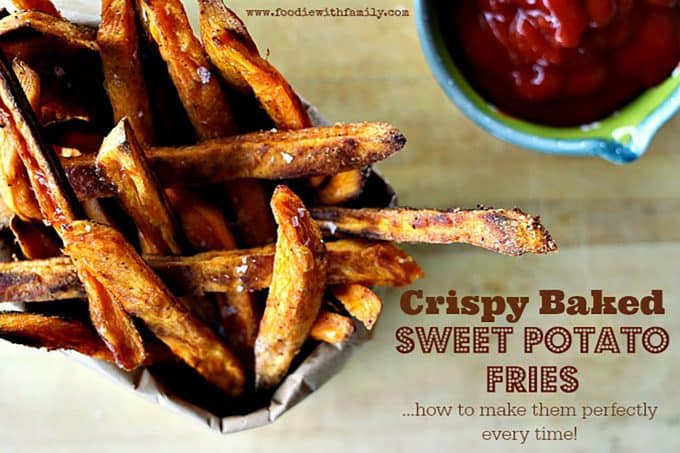
I am passionate about sweet potato fries. Possibly, I qualify as being clinically obsessed with them. I can’t think of a single food I crave more consistently than the salty sweet perfection that is sweet potato fries.
If I go out to dinner and sweet potato fries are on the menu, I order them. It doesn’t matter if it goes with the entrée I’ve chosen, they’re mine.
While normally I will eat a sweet potato any which way, when I’m eating sweet potato fries, I’m picky about them.
They have to suit MY idea of what a perfect sweet potato fry is: ALL-CAPS LEVEL CRISPY with no added sweetener because WHY in heaven’s name would you add SUGAR or somesuch to a SWEET POTATO?
Seriously, people. I can sniff out sugar added to a sweet potato fry and it makes me cranky.
To me, the beauty of the sweet potato fry comes not in amplifying the already sweet tuber, but in playing off of it with salty and spicy. And friends, don’t even get me started on the disappointment that is a soggy sweet potato fry.
Ugh. It’s like deflating a balloon of happiness with a wet noodle… Torturous.
That usually ends up being the problem with homemade sweet potato fries. Sweet potatoes are a little trickier to get super crispy than the good old regular potato.
While I’m not one to shy away from deep-frying, I wanted to make crispy baked sweet potato fries. It was time for research.
Because there were so many brands of tasty bakeable sweet potato fries in the freezer section, it had to be possible to make them from scratch. I examined the backs of the bags of the brands I liked, used my previous experience as a professional slinger-of-pub-grub.
We made more than fifteen batches of sweet potato fries of varying degrees of success. But we finally dialed in on a recipe that I’m confident will turn out crispy sweet potato fries every time.
I’m about to dazzle you with a breathtaking display of absolutely insane nit-picking detail on how to guarantee yourself crispy baked sweet potato fries. *Cue the theme music from ‘The Anal-Retentive Chef”.
How to Make Perfect Crispy Oven Baked Sweet Potato Fries
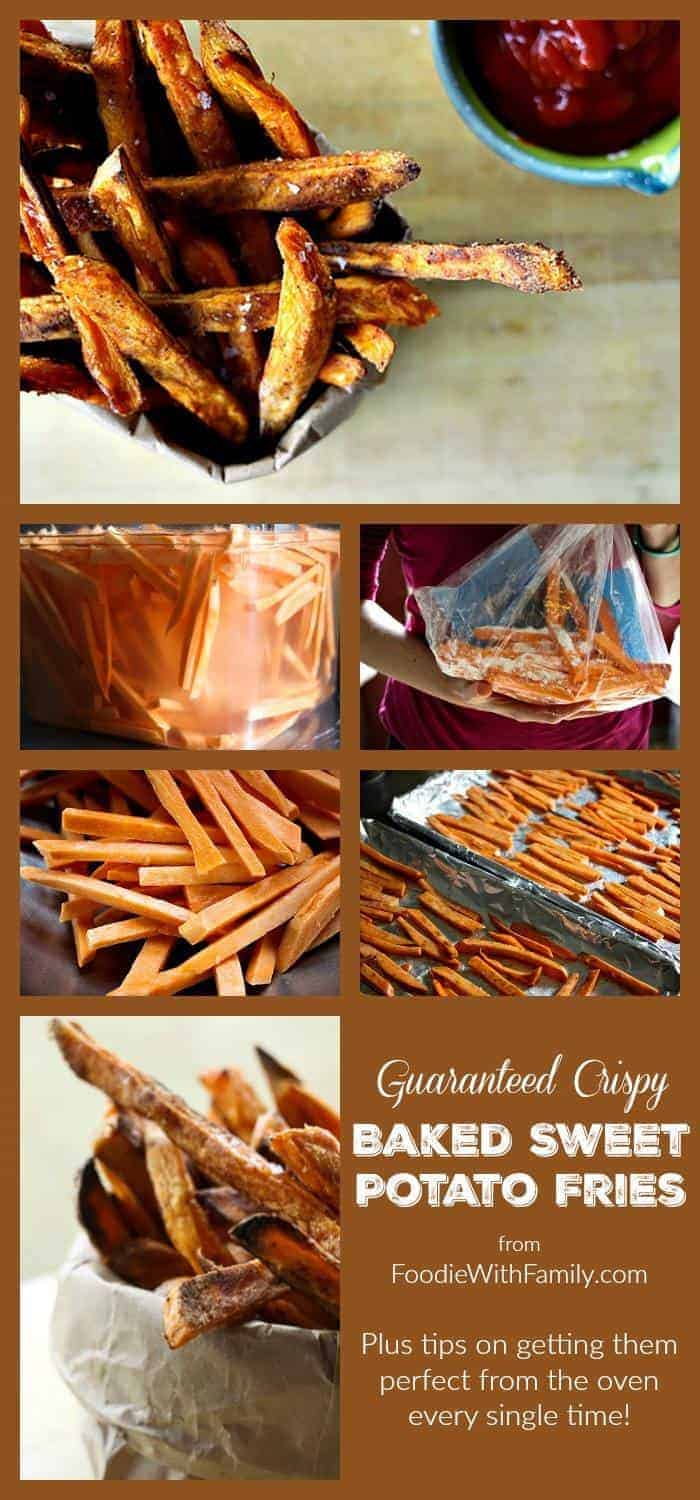
Take your time cutting your sweet potatoes to size. By size, I mean 1/4-inch by 1/4-inch by whatever length matchstick pieces.
Yes, you do need to be particular about cutting them to size. It’s better to err a little on the skinnier side than the fatter side if your knife work isn’t your strong point.
The best way to accomplish this is to cut a little piece off of one side of the peeled sweet potato so it can sit more securely on the cutting board. Cut lengthwise into 1/4-inch thick ‘cards’.
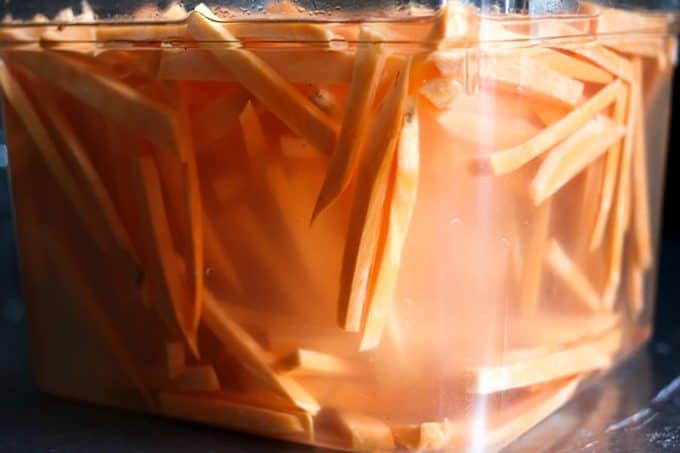
Then take each card and cut again into 1/4-inch thick matchsticks. I find it easier to do this -and far less frightening- by knife rather than by mandoline.
SOAK YOUR SWEET POTATOES. I’m not joking.
We soaked the regular potato fries in cold water in every restaurant where I worked. I applied the same technique to sweet potato fries and it worked beautifully.
It draws the excess starch out of the sweet potatoes (or regular potatoes) which helps them cook through better to be crispy on the outside, tender on the inside without burning. Don’t skip this step or you’ll be disappointed.
How to Cook Sweet Potato Fries
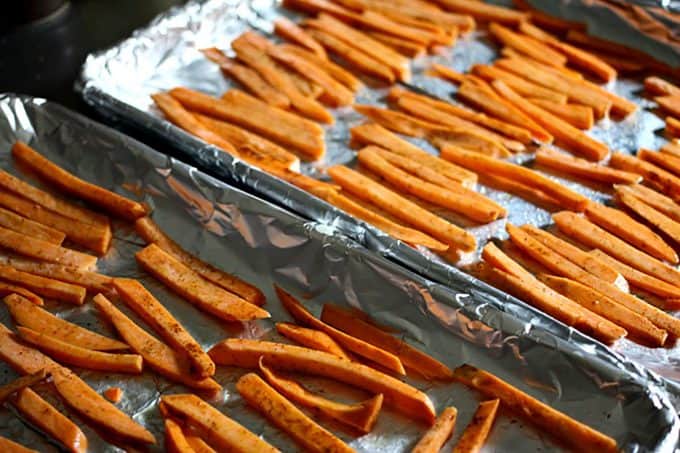
Line your sheet pans with heavy-duty foil (dull side up!) AND spritz them with non-stick cooking spray. I experimented with regular foil, heavy-duty foil, parchment paper, straight up nekkid pans, stoneware sheet pans, and silpat lined pans.
Garden variety heavy-duty foil yielded my best results Don’t skip THIS step or you’ll be attempting to chisel sweet potato fries off of foil. If THAT doesn’t deter you from skipping this step, I don’t know what will.
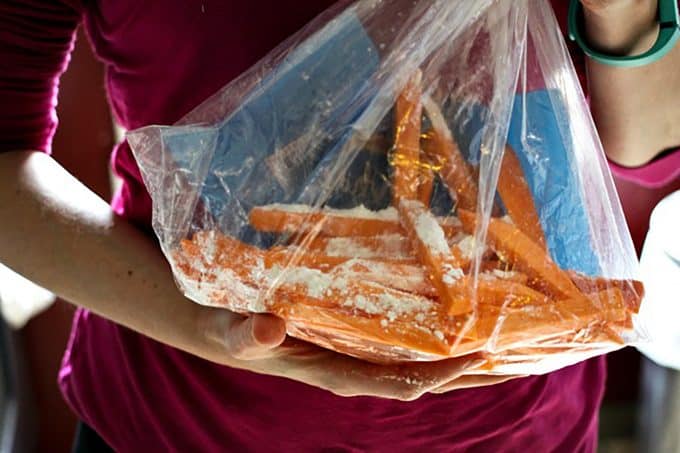
After draining, rinsing, and patting dry your soaked sweet potatoes, add two handfuls of them to a very large plastic bag along with 2 teaspoons of starch (*See Cook’s Notes). Shake vigorously.
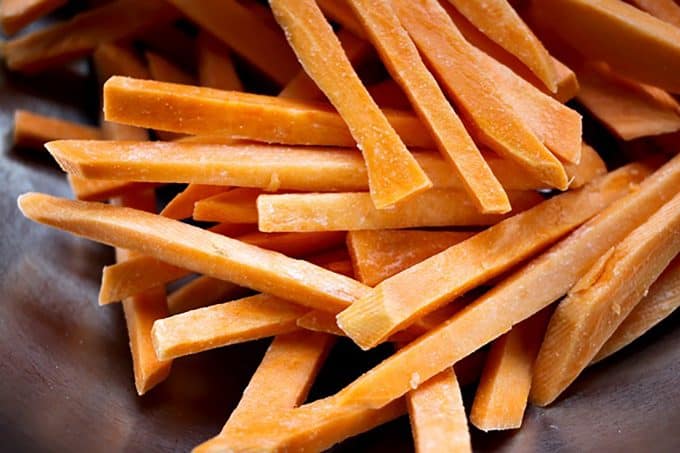
You should keep as much air in the bag as you can so the fries move around like popcorn in an air popper. The idea is to get a whisper thin coating of the starch on the potatoes; not to COVER them in starch. In fact, when you dump them out into a bowl, you should have to look pretty closely to even see the starch on them.
Too much starch makes the fries taste like starch rather than sweet potatoes. Ick.
DO NOT ADD SALT BEFORE COOKING. In this particular case, adding salt before cooking yields limp, sad fries. You can get them plenty salty after baking them.
Let’s talk oil, shall we? Yes, I know we already spritzed the pans with non-stick cooking spray, but that’s an insurance policy… that’s not a crisping agent.
Don’t even think about olive oil here. While it’s super tasty, the temperature and duration of the cooking process will make olive oil billow smoke out of your oven before the sweet potatoes are even close to being done.
My favourite oil for the job is grapeseed, but if you cannot find it, canola or peanut should stand in well. The idea is to choose an oil that has a high smoke point and is neutral in flavour.
Baked Sweet Potato Fries
Even if you fail to heed my super detailed advice anywhere else, DO NOT CROWD THE PAN. If I could type it a million times and not be obnoxious, I would.
Science dictates that if you crowd a pan, your fries will automatically be soggy. How so?
When you’re ‘crisping’ these, you’re releasing the moisture from them. You release the moisture by applying heat and allowing air to circulate in your oven.
If you apply the heat but don’t allow the air to circulate around them, the moisture will have no where to go and will sit there steaming around those fries. You want steamed sweet potato fries?
Neither do I. Keep them spaced out, not touching as much as possible, and absolutely, positively only in a single layer.
By the same token, don’t crowd the oven. You don’t want too much moisture releasing from too many sweet potatoes at the same time or you’re essentially giving the pretty little things a nice sauna bath.
Halfway through the baking time, you’ll remove the pans from the oven to flip the fries. This is best accomplished by using a thin metal spatula or fish turner.
It will have enough backbone to get under the fries and enough flexibility not to mangle them. When you flip them, be sure they land in a single layer not touching.
You can adjust them with tongs if needed. Oh, and when you return the pans to the oven, rotate ’em from top to bottom AND front to back.
The pan that started in the top part of the oven should end the cooking process in the bottom of the oven facing the opposite direction from which it started. This helps compensate for any hotspots your oven may have.
Ready for something counter-intuitive? When your fries are done, prop the oven door open about halfway and let them cool on the pan for at least 10 minutes.
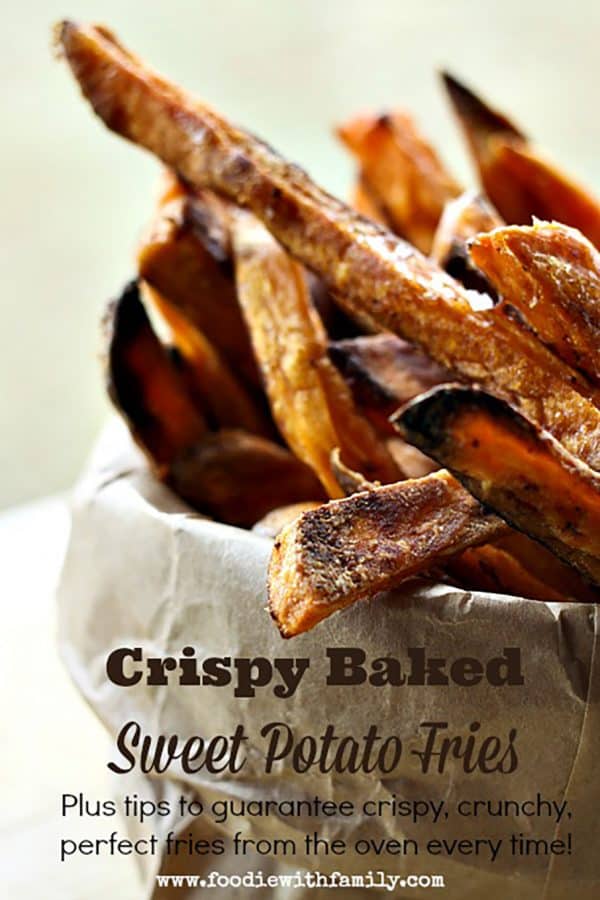
Believe or not, unlike regular potato fries, these bad boys crisp up even more as they cool slightly.
Troubleshooting
Even with all this advice, you may find the first batch doesn’t work out exactly the way you planned.
If your crispy baked sweet potato fries are darkening too quickly, but still not cooked through to your liking, you may have an oven that runs hot. Conversely, if you feel like you’re baking your fries FOREVER and they’re not crisping, your oven may run a little cool.
Get a $5 oven thermometer from Walmart and pop it in there to see how accurate your oven’s calibration is then compensate for it. It’s a cheap fix!
If your fries are soggy and you’ve followed all of my advice, you may have a smaller oven than the one I tested my fries in and may have to bake them one tray at a time.
Sadly, there are some bum sweet potatoes out there. It may be that you got one that was past its prime.
Cook’s Notes:
I didn’t mean to be vague when I said to toss the fries with starch, but I had a little explaining to do. In a perfect world, the best, crispiest baked sweet potato fries are made with a blend of three powdered starches: cornstarch, brown rice starch, and tapioca starch in a ratio of 2:1:1.
It’s a lot easier to find the more unusual tapioca and rice starches now that gluten-free baking is more prolific. If you can’t source them, have an allergy to one of them, or just don’t feel as compelled to get down and dirty with making the most perfect baked sweet potato fries ever, you can use all of one of kind of starch.
Cornstarch is the easiest to find, but health-food stores, well stocked grocers, and Amazon are great places to buy both tapioca starch and brown rice starch. If you are fortunate enough to be in possession of all three starches, whisk them together in a bowl or jar before adding to the fries.
I like my guaranteed crispy baked sweet potato fries with a hint of spice. To get this, I add about 1/4 teaspoon (or more, depending on how sassy I’m feeling) of ground chipotle powder when tossing the fries with oil before cooking.
This is, however, strictly optional. I’m convinced, though, that this is part of the reason that the three of my children who are vegetable-phobic love the fries.
Connect with Foodie with Family
facebook | pinterest | instagram |twitter
Use this to make Crispy Baked Sweet Potato Fries
- Chef’s Knife or Mandoline
- bucket for soaking cut fries
- Brown Rice Starch/Flour
- Tapioca Starch/Flour
- Sunflower Oil
- Heavy Duty Foil
- Half Sheet Pan
- Flexible Spatula
Crispy Baked Sweet Potato Fries
Preheat oven to 425°F.
Line two half-sheet pans with heavy-duty foil and spritz lightly with non-stick cooking spray. Set aside.
Add half of the sweet potato matchsticks to a very large plastic bag. Sprinkle 2 teaspoons of the starch over the potatoes, cinch the top (trapping as much air in the bag as you can when you cinch it) and shake vigorously to coat the fries.
Empty the bag into a mixing bowl and use your hands to toss with 1 tablespoon of the oil and the chipotle powder (if using). Arrange the fries on the prepared pan in a single layer, not touching. Repeat with the remaining fries, starch, and oil.
It is important to remember not to crowd the pans. If needed, you can always use another pan and bake another batch.
Arrange the pans in the oven so that one is in the top third of the oven and the other is in the bottom third of the oven. Set the timer for 15 minutes.
After 15 minutes, use a stiff metal spatula or fish turner to get under the fries and flip them over. Remember to keep them in a single layer after flipping.
Return the pans to the oven, rotating the pans from top to bottom and front to back. In other words, the one that started in the top third of the oven should end in the bottom third of the oven facing the other direction.
Bake for another 10-15 minutes, or until they have browned and are cooked clean though.
Shut the oven off, prop the door open halfway, and let cool and crisp up further for 10 minutes before serving. Toss with salt to taste.
Guaranteed Crispy BAKED Sweet Potato Fries
Rate RecipeIngredients
- 2 large sweet potatoes about 3/4 pound, give or take
- 4 teaspoons starch corn starch, tapioca starch/flour, brown rice starch/flour, or a mixture of any or all of them
- 2 tablespoons grapeseed, sunflower, peanut, or canola oil
- 1/4-1/2 teaspoon chipotle powder
- non-stick cooking spray
- salt to taste
Instructions
- Peel the sweet potatoes and cut them into 1/4-inch by 1/4-inch matchsticks. Put them in a bowl and cover with cold, fresh water. Let them soak for 1 hour or up to overnight. Pour the water and sweet potato matchsticks into a colander, rinse with fresh water, then pat dry with paper towels. They should not be visibly wet, but they don’t have to be bone dry.
- Preheat oven to 425°F.
- Line two half-sheet pans with heavy-duty foil and spritz lightly with non-stick cooking spray. Set aside.
- Add half of the sweet potato matchsticks to a very large plastic bag. Sprinkle 2 teaspoons of the starch over the potatoes, cinch the top (trapping as much air in the bag as you can when you cinch it) and shake vigorously to coat the fries. Empty the bag into a mixing bowl and use your hands to toss with 1 tablespoon of the oil and the chipotle powder (if using). Arrange the fries on the prepared pan in a single layer, not touching. Repeat with the remaining fries, starch, and oil.
It is important to remember not to crowd the pans. If needed, you can always use another pan and bake another batch.
- Arrange the pans in the oven so that one is in the top third of the oven and the other is in the bottom third of the oven. Set the timer for 15 minutes. After 15 minutes, use a stiff metal spatula or fish turner to get under the fries and flip them over. Remember to keep them in a single layer after flipping. Return the pans to the oven, rotating the pans from top to bottom and front to back. In other words, the one that started in the top third of the oven should end in the bottom third of the oven facing the other direction. Bake for another 10-15 minutes, or until they have browned and are cooked clean though.
- Shut the oven off, prop the door open halfway, and let cool and crisp up further for 10 minutes before serving. Toss with salt to taste.
Nutrition
Nutritional information is an estimate and provided to you as a courtesy. You should calculate the nutritional information with the actual ingredients used in your recipe using your preferred nutrition calculator.
did you make this recipe?
Make sure to tag @foodiewithfam on Instagram and #hashtag it #foodiewithfamily so I can check it out!
Do you love these Guaranteed Crispy Baked Sweet Potato Fries? Try these other sweet potato recipes!
- Slow Cooker Peach Salsa Pork Roast with Sweet Potatoes
- Sweet Potato Casserole
- Melting Sweet Potatoes
- Sweet Potato Croutons
- 1-Pot Roasted Turkey Breast Dinner with Sweet Potatoes
This post was originally published April 17, 2014, republished with improvements in April 2017, and again in January 2021.


Reader's Thoughts...
Jessica Karlsson says
Thank you. Thank you. Thank you! I finally found what I was looking for! The best recipe for crispy baked sweet potatis fries EVER!
Jessica Karlsson says
Thank you. Thank you. Thank you! I finally found what I was looking for! The best recipe for crispy baked sweet potatis fries EVER!
Rebecca says
I’m so glad you like them, Jessica! Thanks for letting me know!
M. says
I just made these and HOLY MOLY are they amazing. My fries always turn out soft, burnt, and 90% stuck to the pan. These are the best instructions I’ve ever found and they came out looking like restaurant fries. THANK YOU!!
Rebecca says
So awesome, M! Thanks for the great feedback!
Janet Miller says
Hi. I too am very happy to find this recipe. I’ve seen many saying to use corn starch, but this may be the first to suggest soaking. And your reason for doing it makes a lot of sense. I think I saw this question asked a few times. I don’t know if it wasn’t answered or if I just missed the answer. I’ve had good luck doing my regular steak fries and zucchini fries (as well as chicken parm, and ‘fried chicken) on a wire rack set in a baking sheet. Everything comes out crispy. Will this work with sweet potato fries? I will def. be using the corn starch. Thank you.
James Nichols says
Dude….
My girlfriend and I have been trying to make these for awhile now, and each time we failed; so I was DETERMINED to make these damn things. So, I took upon myself to find the most trusted “sounding” recipe and stumbled upon yours. It sounded so fanatical as you claimed and it worked!!!!! They turned out beautifully! My girlfriend was impressed and I was to! 1) cause I can actually cook something and 2) because sweet potato fries are makable!
Cheers and beers!
Jimmy
Rebecca says
I absolutely, 100% get it, Jimmy. Sweet potato fries were my ultimate goal until I finally ironed out all the little tricks. I’m a big fan of why something works, so I figured other folks might like the scientific (read: OCD) breakdown of the recipe. I’m so glad you and your girlfriend liked it. (And I’m glad I helped you impress her. 🙂 )
Julie Stivers says
OK, these stuck to the tin foil terribly. I followed all instructions to the letter.
luz says
I served these at our housewarming party in individual paper cups and they were PERFECT!
Of course no way to keep them warm, but they did not become soggy which was important.
Great recipe!
Rebecca says
That is wonderful to know, Luz! Thank you so much!
Luz says
I cannot tell you how happy I am to have found your website. I LOVE detailed instructions… really, you dont even understand how much.
But i have a query – I am hosting a house warming party this friday, and now plan to serve these in individual paper cups, will they remain crispy thru the evening? Also, what are some good easy to make dipping sauces to go with them?
Sincere thanks,
An Angolan, married to a Pole, living in Denmark trying to make your sweet potato fries 🙂
Aurora says
I’d like to make these in bulk, in batches, to freeze and have on hand the same way one would buy a bag of frozen sweet potato fries. I’ve seen some recipes for freezing suggest blanching in boiling water, is this step necessary? Any advice on the best way to pull this off and then how to reheat when ready to serve? The truth is, I’ve already cut and soaked them but my day didn’t go as planned, I ate something else for dinner and now I’m too tired to do anything with them besides prepare them for the freezer. Any advice would be mighty appreciated, thanks!
Rebecca says
Hi Aurora-
I honestly have not prepared these for the freezer. I have only made them fresh. I can tell you that when recipes suggest you blanch before freezing it is for a reason, though. Freezing breaks the cell walls which breaks down texture. Blanching does the same thing, but in a controlled way. It allows you to cook them to a stable state where the freezing won’t leave you with an unpredictable texture. That being said, I’ll reiterate that I haven’t tried freezing them. I would love to know the results if someone else does, though.
Aurora says
Thanks Rebecca! I went ahead and blanched then shocked them in ice water, then they seemed a bit floppy so after towel drying them as best I could I actually put them on trays in the dehydrator for about 30 minutes, then on trays and into the freezer (I have a full sized spare freezer!). About 2 hours later I tossed them in the chipotle seasoned fat and put them back on trays into the freezer overnight …they are currently bagged up in the freezer, ready to go into a preheated 450 oven as soon as I’m ready to eat them!…which will probably be this weekend, I’ll keep you posted!
Aurora says
Well, they certainly were crispy as promised! Next time I think I’ll bake them for 10 minutes on the second side because some of them blackened a little. The burnt ones were still good with ketchup to counteract the bitterness though. I will definitely be making these again! Thanks for the thorough technique!
Rebecca says
You’re very welcome! Thanks for weighing in with your success!
Juliana says
Thanks so much! Made these tonight and they were perfect. I used refined coconut oil and olive oil spray on parchment and it worked out fine. So crispy and delish.
Rebecca says
That’s fantastic, Juliana! Thanks for sharing your success with me!
Jo says
Thank you for a brilliant tutorial….my first ever batch are in the oven as we speak. Let’s hope they are as good as yours. Wishful thinking from London, England.
Michele says
What would happen if you didn’t use any oil at al when you bake them? I’m trying to see if it’s necessary or if it only makes them taste better. Thank you!
Rebecca says
Oil will certainly make them taste better, but it also helps with texture. I wouldn’t skip the oil. There’s not very much in total.
sp lover says
Thanks for the details! But… I followed them to the T but the only crispy ones were the ones that burned a little. Also, I love Chipotle seasoning but I didn’t think it was a good choice on sp fries. Sorry, I just thought they were ok. I’ll try cookes kitchen sp frys next time.
David H. Smith says
How long do you soak them in water ?
Rebecca says
Hi David- The instructions state that you should soak for at least an hour, but up to overnight! Enjoy!
Susan says
I have been looking for a crispy sweet potato fries recipe and this is it! I did use arrowroot starch/flour to keep it Paleo and also used olive oil to coat them. I baked at 400 F for the time you specified and they were crispy and awesome!! Only a few were dark, but those were the smaller pieces. Thank you for this recipe!
Careen says
Thanks for your amazing tips. I know this is an old thread and I’m so grateful that you are still replying. I’d like to make these using arrowroot starch/flour and coconut oil. I have some inflammation issues so I have to steer clear of gluten and can only use specific oils. Any reasons why not to use these items? I may also cut the potatoes into cubes instead of sticks for more of a breakfast hash to serve with asparagus and eggs. Thanks in advance!!
Rebecca says
Hi Careen- I might not try the coconut oil because the smoke point is around 177. If you’re looking for an oil that shouldn’t agitate inflammation that has a higher smoke point, you might try grapeseed oil! I imagine arrowroot might work pretty well, but haven’t tried it. If you do, please let me know how it works for you! I would also love to know how your cubes work out.
Gaëlle says
refined coconut oil has a smoke point of 232 °C = 449.6 degrees Fahrenheit. It’s one of the safest oils to fry with!
John Grotting says
I am wondering, too, if they will stay crisp over a longer period. I am cooking for 50 people and would love to offer this as finger food at the start of the evening. Ideally, I could prep several batches the day before and then pop them in the oven on the day of the event. Even still, doing 5 batches will mean that some of the fries will be sitting out for a couple of hours before the guests arrive. Will they stay crispy?
Rebecca says
Hi John- I have not tested holding them for long periods of time. I simply don’t have the willpower when faced with a giant tray of fresh sweet potato fries. I would recommend doing a single batch trial run and sampling it as you go. 😀 I would love to hear your results if you play with it a bit!
Gina says
Damnit, you’re a genius! We love sweet potato fries but I could never get them to come out crispy or evenly cooked. I was looking for a better recipe and found your blog. I used all your tips and mine look just like your picture, plus they’re delicious!!! Thank you for posting this! So glad I found you! 🙂
Rebecca says
And I’m glad you found me, too. I like being called a genius. 😀
LJ says
sorry if this was already covered in the comments somewhere but if I wanted to make a big batch of fries (for a future fry emergency!) and blanch-freeze some, would this recipe still work? Like perhaps coat the frozen fries with starch and bake as directed?
Rebecca says
Hi LJ-
It was mentioned in the comments above, but there are quite a few of them, so I figured I’d mention it here, too 😀 I have not tested these for the freezer, but I would love to know the results if someone else does! Please check in if you try it!
Reva says
Can you make several trays of these in advance and how do you keep them crisp..
Reva says
Can these be made in advance for a crowd.. how do you keep them crisp if you make serveral trays..
Rebecca says
Hi Reva- I have not tested making them in advance in larger amounts. I would LOVE to know if you play around with it, though! Please do check in if you try it.