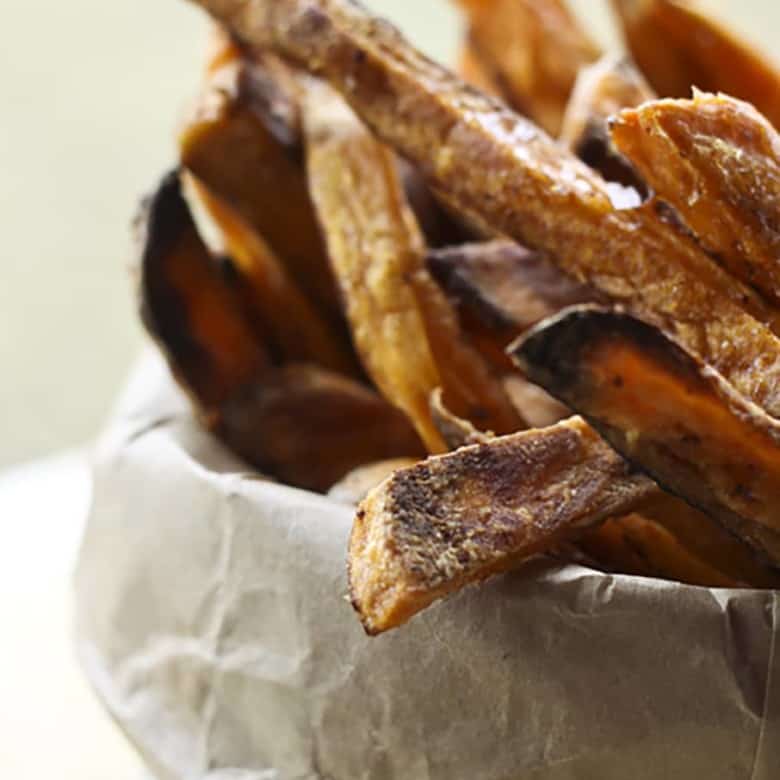
Crispy Baked Sweet Potato Fries are a perennial favourite here on Foodie with Family for a great reason. So many of you have made crispy, crunchy, delicious sweet potatoes at home with the recipe.
A quick word of advice: grab a cheap oven thermometer to see if your oven’s temperature is correctly calibrated. You can compensate by however many degrees it is off when you bake your fries!
Check out all of our fabulous Sweet Potato Recipes here!
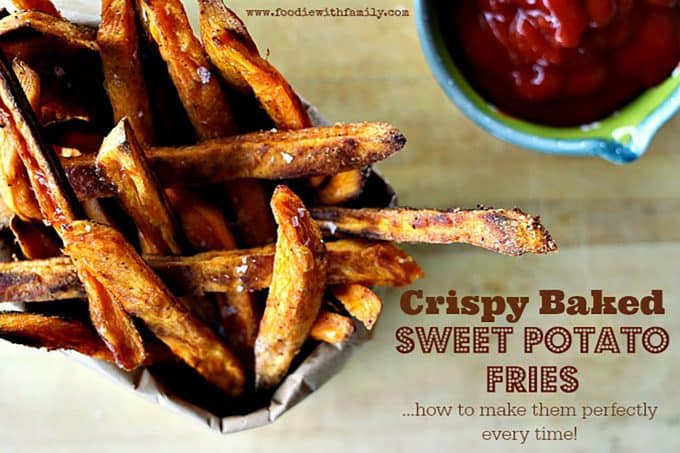
I am passionate about sweet potato fries. Possibly, I qualify as being clinically obsessed with them. I can’t think of a single food I crave more consistently than the salty sweet perfection that is sweet potato fries.
If I go out to dinner and sweet potato fries are on the menu, I order them. It doesn’t matter if it goes with the entrée I’ve chosen, they’re mine.
While normally I will eat a sweet potato any which way, when I’m eating sweet potato fries, I’m picky about them.
They have to suit MY idea of what a perfect sweet potato fry is: ALL-CAPS LEVEL CRISPY with no added sweetener because WHY in heaven’s name would you add SUGAR or somesuch to a SWEET POTATO?
Seriously, people. I can sniff out sugar added to a sweet potato fry and it makes me cranky.
To me, the beauty of the sweet potato fry comes not in amplifying the already sweet tuber, but in playing off of it with salty and spicy. And friends, don’t even get me started on the disappointment that is a soggy sweet potato fry.
Ugh. It’s like deflating a balloon of happiness with a wet noodle… Torturous.
That usually ends up being the problem with homemade sweet potato fries. Sweet potatoes are a little trickier to get super crispy than the good old regular potato.
While I’m not one to shy away from deep-frying, I wanted to make crispy baked sweet potato fries. It was time for research.
Because there were so many brands of tasty bakeable sweet potato fries in the freezer section, it had to be possible to make them from scratch. I examined the backs of the bags of the brands I liked, used my previous experience as a professional slinger-of-pub-grub.
We made more than fifteen batches of sweet potato fries of varying degrees of success. But we finally dialed in on a recipe that I’m confident will turn out crispy sweet potato fries every time.
I’m about to dazzle you with a breathtaking display of absolutely insane nit-picking detail on how to guarantee yourself crispy baked sweet potato fries. *Cue the theme music from ‘The Anal-Retentive Chef”.
How to Make Perfect Crispy Oven Baked Sweet Potato Fries
Take your time cutting your sweet potatoes to size. By size, I mean 1/4-inch by 1/4-inch by whatever length matchstick pieces.
Yes, you do need to be particular about cutting them to size. It’s better to err a little on the skinnier side than the fatter side if your knife work isn’t your strong point.
The best way to accomplish this is to cut a little piece off of one side of the peeled sweet potato so it can sit more securely on the cutting board. Cut lengthwise into 1/4-inch thick ‘cards’.
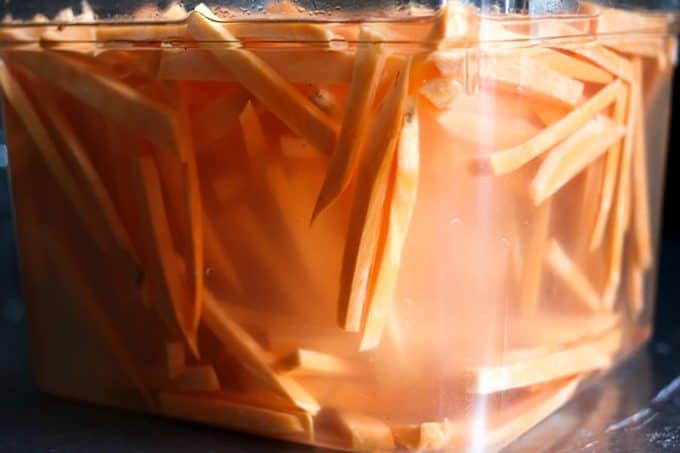
Then take each card and cut again into 1/4-inch thick matchsticks. I find it easier to do this -and far less frightening- by knife rather than by mandoline.
SOAK YOUR SWEET POTATOES. I’m not joking.
We soaked the regular potato fries in cold water in every restaurant where I worked. I applied the same technique to sweet potato fries and it worked beautifully.
It draws the excess starch out of the sweet potatoes (or regular potatoes) which helps them cook through better to be crispy on the outside, tender on the inside without burning. Don’t skip this step or you’ll be disappointed.
How to Cook Sweet Potato Fries
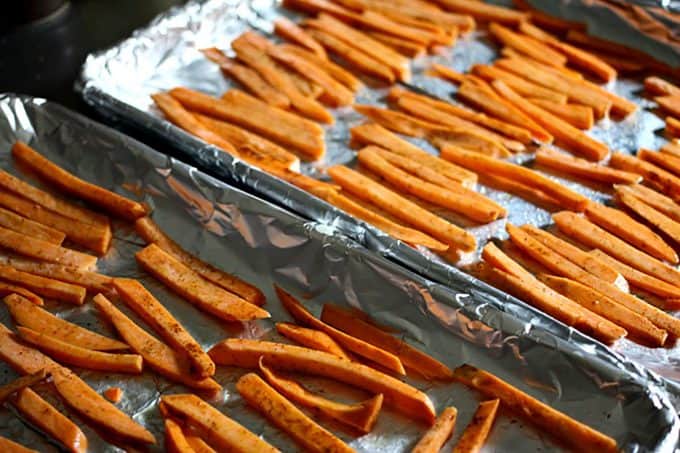
Line your sheet pans with heavy-duty foil (dull side up!) AND spritz them with non-stick cooking spray. I experimented with regular foil, heavy-duty foil, parchment paper, straight up nekkid pans, stoneware sheet pans, and silpat lined pans.
Garden variety heavy-duty foil yielded my best results Don’t skip THIS step or you’ll be attempting to chisel sweet potato fries off of foil. If THAT doesn’t deter you from skipping this step, I don’t know what will.
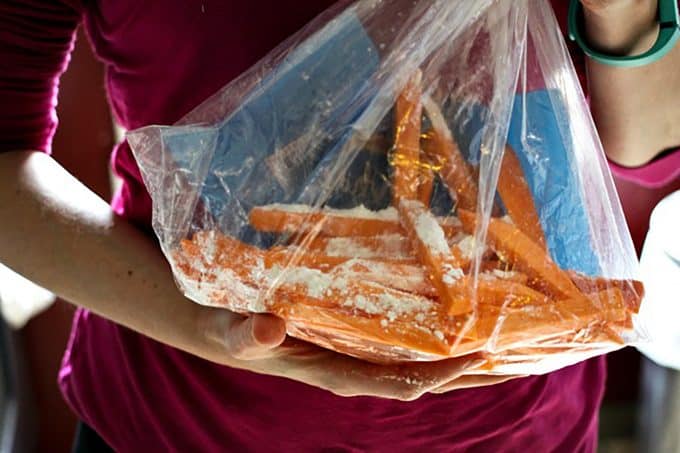
After draining, rinsing, and patting dry your soaked sweet potatoes, add two handfuls of them to a very large plastic bag along with 2 teaspoons of starch (*See Cook’s Notes). Shake vigorously.
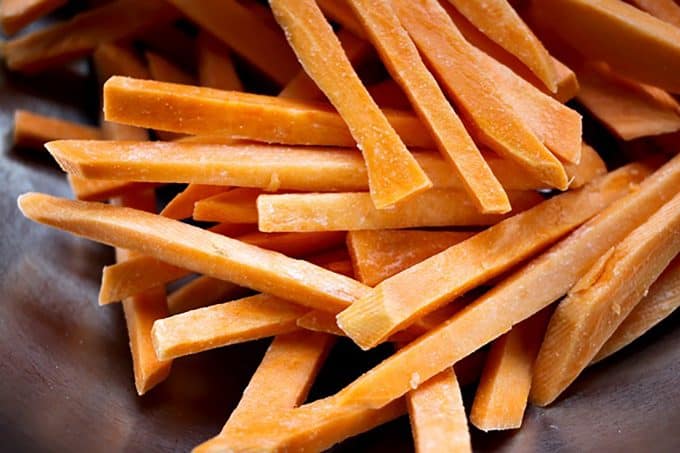
You should keep as much air in the bag as you can so the fries move around like popcorn in an air popper. The idea is to get a whisper thin coating of the starch on the potatoes; not to COVER them in starch. In fact, when you dump them out into a bowl, you should have to look pretty closely to even see the starch on them.
Too much starch makes the fries taste like starch rather than sweet potatoes. Ick.
DO NOT ADD SALT BEFORE COOKING. In this particular case, adding salt before cooking yields limp, sad fries. You can get them plenty salty after baking them.
Let’s talk oil, shall we? Yes, I know we already spritzed the pans with non-stick cooking spray, but that’s an insurance policy… that’s not a crisping agent.
Don’t even think about olive oil here. While it’s super tasty, the temperature and duration of the cooking process will make olive oil billow smoke out of your oven before the sweet potatoes are even close to being done.
My favourite oil for the job is grapeseed, but if you cannot find it, canola or peanut should stand in well. The idea is to choose an oil that has a high smoke point and is neutral in flavour.
Baked Sweet Potato Fries
Even if you fail to heed my super detailed advice anywhere else, DO NOT CROWD THE PAN. If I could type it a million times and not be obnoxious, I would.
Science dictates that if you crowd a pan, your fries will automatically be soggy. How so?
When you’re ‘crisping’ these, you’re releasing the moisture from them. You release the moisture by applying heat and allowing air to circulate in your oven.
If you apply the heat but don’t allow the air to circulate around them, the moisture will have no where to go and will sit there steaming around those fries. You want steamed sweet potato fries?
Neither do I. Keep them spaced out, not touching as much as possible, and absolutely, positively only in a single layer.
By the same token, don’t crowd the oven. You don’t want too much moisture releasing from too many sweet potatoes at the same time or you’re essentially giving the pretty little things a nice sauna bath.
Halfway through the baking time, you’ll remove the pans from the oven to flip the fries. This is best accomplished by using a thin metal spatula or fish turner.
It will have enough backbone to get under the fries and enough flexibility not to mangle them. When you flip them, be sure they land in a single layer not touching.
You can adjust them with tongs if needed. Oh, and when you return the pans to the oven, rotate ’em from top to bottom AND front to back.
The pan that started in the top part of the oven should end the cooking process in the bottom of the oven facing the opposite direction from which it started. This helps compensate for any hotspots your oven may have.
Ready for something counter-intuitive? When your fries are done, prop the oven door open about halfway and let them cool on the pan for at least 10 minutes.
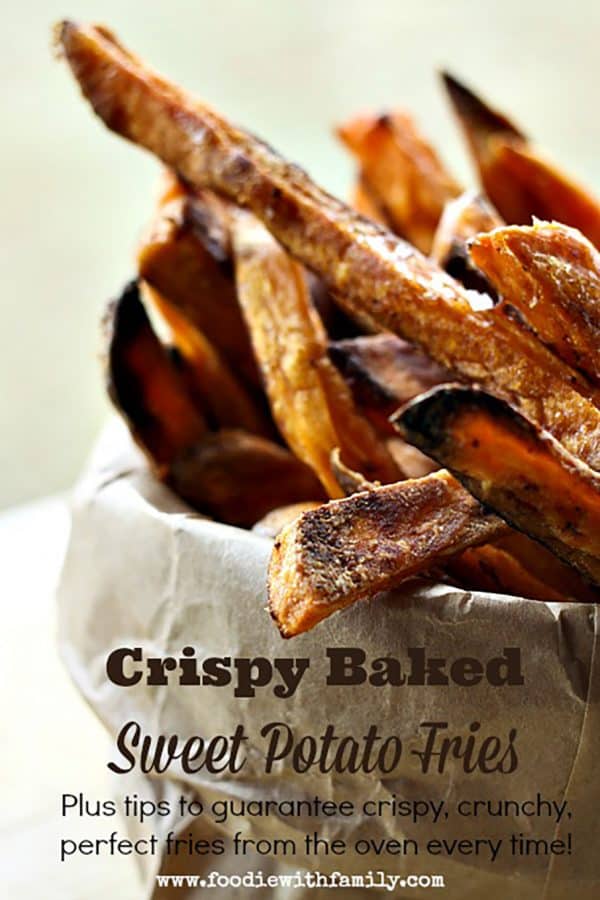
Believe or not, unlike regular potato fries, these bad boys crisp up even more as they cool slightly.
Troubleshooting
Even with all this advice, you may find the first batch doesn’t work out exactly the way you planned.
If your crispy baked sweet potato fries are darkening too quickly, but still not cooked through to your liking, you may have an oven that runs hot. Conversely, if you feel like you’re baking your fries FOREVER and they’re not crisping, your oven may run a little cool.
Get a $5 oven thermometer from Walmart and pop it in there to see how accurate your oven’s calibration is then compensate for it. It’s a cheap fix!
If your fries are soggy and you’ve followed all of my advice, you may have a smaller oven than the one I tested my fries in and may have to bake them one tray at a time.
Sadly, there are some bum sweet potatoes out there. It may be that you got one that was past its prime.
Cook’s Notes:
I didn’t mean to be vague when I said to toss the fries with starch, but I had a little explaining to do. In a perfect world, the best, crispiest baked sweet potato fries are made with a blend of three powdered starches: cornstarch, brown rice starch, and tapioca starch in a ratio of 2:1:1.
It’s a lot easier to find the more unusual tapioca and rice starches now that gluten-free baking is more prolific. If you can’t source them, have an allergy to one of them, or just don’t feel as compelled to get down and dirty with making the most perfect baked sweet potato fries ever, you can use all of one of kind of starch.
Cornstarch is the easiest to find, but health-food stores, well stocked grocers, and Amazon are great places to buy both tapioca starch and brown rice starch. If you are fortunate enough to be in possession of all three starches, whisk them together in a bowl or jar before adding to the fries.
I like my guaranteed crispy baked sweet potato fries with a hint of spice. To get this, I add about 1/4 teaspoon (or more, depending on how sassy I’m feeling) of ground chipotle powder when tossing the fries with oil before cooking.
This is, however, strictly optional. I’m convinced, though, that this is part of the reason that the three of my children who are vegetable-phobic love the fries.
Connect with Foodie with Family
facebook | pinterest | instagram |twitter
Use this to make Crispy Baked Sweet Potato Fries
- Chef’s Knife or Mandoline
- bucket for soaking cut fries
- Brown Rice Starch/Flour
- Tapioca Starch/Flour
- Sunflower Oil
- Heavy Duty Foil
- Half Sheet Pan
- Flexible Spatula
Crispy Baked Sweet Potato Fries
Preheat oven to 425°F.
Line two half-sheet pans with heavy-duty foil and spritz lightly with non-stick cooking spray. Set aside.
Add half of the sweet potato matchsticks to a very large plastic bag. Sprinkle 2 teaspoons of the starch over the potatoes, cinch the top (trapping as much air in the bag as you can when you cinch it) and shake vigorously to coat the fries.
Empty the bag into a mixing bowl and use your hands to toss with 1 tablespoon of the oil and the chipotle powder (if using). Arrange the fries on the prepared pan in a single layer, not touching. Repeat with the remaining fries, starch, and oil.
It is important to remember not to crowd the pans. If needed, you can always use another pan and bake another batch.
Arrange the pans in the oven so that one is in the top third of the oven and the other is in the bottom third of the oven. Set the timer for 15 minutes.
After 15 minutes, use a stiff metal spatula or fish turner to get under the fries and flip them over. Remember to keep them in a single layer after flipping.
Return the pans to the oven, rotating the pans from top to bottom and front to back. In other words, the one that started in the top third of the oven should end in the bottom third of the oven facing the other direction.
Bake for another 10-15 minutes, or until they have browned and are cooked clean though.
Shut the oven off, prop the door open halfway, and let cool and crisp up further for 10 minutes before serving. Toss with salt to taste.
Guaranteed Crispy BAKED Sweet Potato Fries
Rate RecipeIngredients
- 2 large sweet potatoes about 3/4 pound, give or take
- 4 teaspoons starch corn starch, tapioca starch/flour, brown rice starch/flour, or a mixture of any or all of them
- 2 tablespoons grapeseed, sunflower, peanut, or canola oil
- 1/4-1/2 teaspoon chipotle powder
- non-stick cooking spray
- salt to taste
Instructions
- Peel the sweet potatoes and cut them into 1/4-inch by 1/4-inch matchsticks. Put them in a bowl and cover with cold, fresh water. Let them soak for 1 hour or up to overnight. Pour the water and sweet potato matchsticks into a colander, rinse with fresh water, then pat dry with paper towels. They should not be visibly wet, but they don’t have to be bone dry.
- Preheat oven to 425°F.
- Line two half-sheet pans with heavy-duty foil and spritz lightly with non-stick cooking spray. Set aside.
- Add half of the sweet potato matchsticks to a very large plastic bag. Sprinkle 2 teaspoons of the starch over the potatoes, cinch the top (trapping as much air in the bag as you can when you cinch it) and shake vigorously to coat the fries. Empty the bag into a mixing bowl and use your hands to toss with 1 tablespoon of the oil and the chipotle powder (if using). Arrange the fries on the prepared pan in a single layer, not touching. Repeat with the remaining fries, starch, and oil.
It is important to remember not to crowd the pans. If needed, you can always use another pan and bake another batch.
- Arrange the pans in the oven so that one is in the top third of the oven and the other is in the bottom third of the oven. Set the timer for 15 minutes. After 15 minutes, use a stiff metal spatula or fish turner to get under the fries and flip them over. Remember to keep them in a single layer after flipping. Return the pans to the oven, rotating the pans from top to bottom and front to back. In other words, the one that started in the top third of the oven should end in the bottom third of the oven facing the other direction. Bake for another 10-15 minutes, or until they have browned and are cooked clean though.
- Shut the oven off, prop the door open halfway, and let cool and crisp up further for 10 minutes before serving. Toss with salt to taste.
Nutrition
Nutritional information is an estimate and provided to you as a courtesy. You should calculate the nutritional information with the actual ingredients used in your recipe using your preferred nutrition calculator.
did you make this recipe?
Make sure to tag @foodiewithfam on Instagram and #hashtag it #foodiewithfamily so I can check it out!
Do you love these Guaranteed Crispy Baked Sweet Potato Fries? Try these other sweet potato recipes!
- Slow Cooker Peach Salsa Pork Roast with Sweet Potatoes
- Sweet Potato Casserole
- Melting Sweet Potatoes
- Sweet Potato Croutons
- 1-Pot Roasted Turkey Breast Dinner with Sweet Potatoes
This post was originally published April 17, 2014, republished with improvements in April 2017, and again in January 2021.


Reader's Thoughts...
Curtis Jackson says
This looks *perfect*. I’ve got my 2:1:1 starches all mixed together in a jar in the freezer. I just have one question, which must be stupid because no one else has asked it:
When you say “2 large sweet potatoes about 3/4 pound, give or take”, do you mean two 3/4-lb potatoes, a total of 1.5 lbs, or two potatoes that together weigh 3/4 of a lb. in total?
If it were Russets, I’d know you meant 3/4 lb (12oz) total, as 6oz is a common size for a Russet. But the sweet potatoes in our grocery store are always ENORMOUS, in the 10-14oz range each. They’re seriously about double the size of Russets. So I’m really not sure which you meant.
Thanks in advance, and I’ll post a review once I make these.
Rebecca says
Hi Curtis- Good questions! Go for about 3/4 pound total. 🙂
Curtis Jackson says
Thank you! Just FYI, I went to the grocery store today, and here is what I found in the sweet potato bin:
• The smallest 2 sweet potatoes in the whole bin were each 7/8 lb.
• The average size was 1 1/8 – 1 1/4 lb.
• The largest one was nearly 1 3/4 lbs. !!
I’m making these tonight!
Rebecca says
Hi Curtis! Thanks for the update! You’re probably just fine going up to 1 1/4 pounds! I know there is so much variety in the wonderful world of sweet potatoes. 🙂
Gary says
These are tasty and there is a sort of crispness to the skin of the fries, but the interiors were no very “potatoey”. The seemed more like they were dehydrated with slightly crisp exteriors.
Rebecca says
Hi Gary- The only variable we have trouble predicting is the actual potato itself. Since there are so many varieties of sweet potato, it’s hard to know how each of them will react to this process. And for what it’s worth, I think sweet potatoes are always a little different texturally than “regular” potatoes, so fries are necessarily different. That said, a baked fry will also be different slightly texturally than a fried one. There’s something the deep fat does for texture that no dry heat ever can. I still love these madly, but when I want that particular texture, I always go to the fry-o-lator. 🙂 Thank you for your feedback, though. It’s thoughtful and descriptive! 🙂
Ross Grekoff says
I admire your passion for sweet potato fries
Diana says
Soak the to remove starch then sprinkle them with starch???!!!
Rebecca says
I know it sounds crazy, but there’s a reason to the madness. You remove the potato starch that is released when you damage the cell walls by cutting them. You want to soak that off because potato starch is wickedly sticky. It causes the slices of potato to stick together and makes for an altogether squishier and less fabulous end product. THEN, you want that wee bit of crunch to the exterior, so you dust it with DRY starch, vs. the sticky, gloppy stuff which adheres to the outside of these already separate potato pieces and gives them a nice crunch. It is a process thing vs. a product thing. Does that make sense? 🙂
VeggieTater says
Stupid question… I have some sweet potato starch, would that work for coating?
Rebecca says
That’s not a stupid question at all, but I’d probably take a pass on using sweet potato starch. I think that the combo of starches I recommended is best for texture.
Amani says
Wow, fantastic. Detailed and thorough, even mentioning the number of test batches you did before you got the perfect fry AND the technique from restaurant kitchens, this post is the stuff of dreams. Thank you.
As I sit here eating my dry-starch-coated air fried sweet potato fries, I wish I’d read this before I made mine according to others’ pointers. (Yes, too much “cornstarch” [arrowroot in my case] to coat.)
For air frying, I’ll drop the temp 25 degrees, and the time probably by about 10 minutes. If you have a moment to say and you were doing these in an air fryer… would you change anything else?
Lena says
This was such a good recipe. Mine were almost restaurant quality!
Siobhan says
Sadly, although [1] my oven is quite spacious and [2] my sweet potatoes were unassailably fresh [3] all steps in the recipe were followed with scrupulous attention, my end result was wretched: fries sticking to the foil and falling to mush. For a decade I have been making SP oven fries that at least managed to maintain their bodily integrity but lacked the crispness of Irish potato oven fries…and I came across this recipe as I wanted to attain that elusive quality without deep frying. Alas, failure 🙁
Rebecca says
Hi Siobhan- As I’m not in your kitchen, I’m unable to help you isolate what may have gone wrong. I wish you had the great results so many have had. Do you have an oven thermometer in place? I wonder if yours is calibrated differently. Some folks who have trouble with their ovens (or their foil, for whatever reason) have had better luck using a greased cooling rack over a rimmed sheet pan as a baking surface in place of the foil. I wish you the best of luck!
Mary LaPlante says
Can I substitue arrow root powder for corn starch / brown rice starch / tapioca starch?
Rebecca says
I think that would work quite well!
Stacey says
I love your soaking tips. You reveal all the top secrets for us! Thank you so muchhhhh!
Sarah says
So I did this and when either pan was on the bottom rack the side on the bottom burned. It was not the very bottom setting but the one up from that. When rotating pans I saw the bottom burned I moved it up a level and checked at 8 minutes and those ones burned too. Any advise?
Sadie says
These fries were delicious, but unfortunately they weren’t crispy, crunchy as described. They weren’t soggy either, but the only true crispness/crunch was the Kosher salt I dusted them with after they came out of the oven. I appreciate the detailed directions and followed them precisely. The only change I made was to use smoked paprika instead of chipotle powder. I’d make them again because they tasted great despite the less than crisp texture.
gregory anderson says
It is not the seasoning that makes the dish, as we learn from the ARChef, but the exact sizing of the pieces. Thanks for the detailed data, since I’m not in a position to try to figure out how to utilize soggy, limp, sad fries in another dish. Well, I’m tired of dry-frying them with beans and eggs for Bfast burritos actually.
Crispy is best, just like we like our battered fish. So now we are guaranteed crispy fish-n-chips. Thank you so very much. Truly. I could tell from your description of the process that I’ve done none of those things in my prior disasters.
Rebecca says
I agree 100%. Team Crispy all the way!
Isadora says
Hi Rebecca, I want to say thank you for your wonderfully detailed instructions. I always try to find out why a certain step is required so I loved your explanations. It made sense and helped me follow without any second thoughts. It felt safe.
And i am happy to report that i made my first batch yesterday and despite me using too little oil on the foil so some stuck and my oven was mad and fluctuated between hot and cold, The fries still turned out crispy and delicious.
I foresee this being a staple in my recipe repertoire. I loved them so much, I made too much and finished them.
I do have one question. why use the dull side of the foil instead of the shiny side?
Karen says
Followed this step by step recipe to the T…..stood over the oven watching the process….Massive FAIL ! Even worse than what I’ve attempted on my own in the past
Convinced there is NO way to get crispy sweet potato fries!
Rebecca says
You may have gotten bum potatoes, Karen. Sometimes they’re a little sketchy this time of year after sitting in storage all winter! Have you checked your oven’s calibration lately? Those might be two culprits of sad fries. Don’t give up!
Alex says
GREAT recipe! Excellent, easy to follow directions. Follow the directions exactly as noted. Will definitely use this recipe in the future. Thanks!
Setu says
Thank you for this awesome recipe!! I love your technique!!
Notes:
-IMHO parchment paper was better than aluminum foil (less sticking and no oil spray required)
-I did this for wedge shaped fries, worked well!
-I used an air fryer (convection oven)… it worked better than traditional oven! (very fast and crispy!)
Rebecca says
I’m so glad to get your feedback, Setu! Thanks for letting me know what worked for you and getting specific about your equipment! That will help others, I am sure!!
Lia says
Omg….. Theses are delicious!!!!!! Thank you so much for posting this recipe!
Chris says
Try sweet chili sauce for a dip with these!
Ron Hilmes says
This is the only recipe I have tried for crispy sweet potato fries that produces crispy sweet potato fries!
Something I did pick up from one of the other recipes though was to bake on a cooling rack instead of a pan. No flipping required. Just thought I would pass it on.