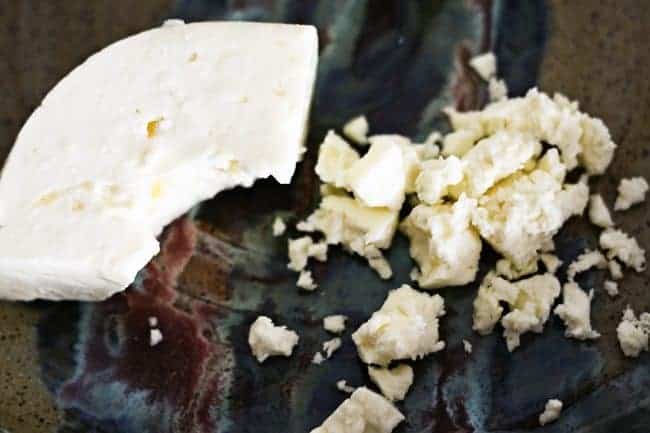
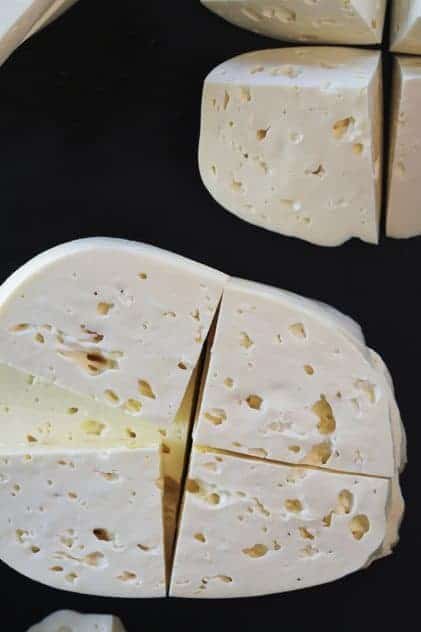
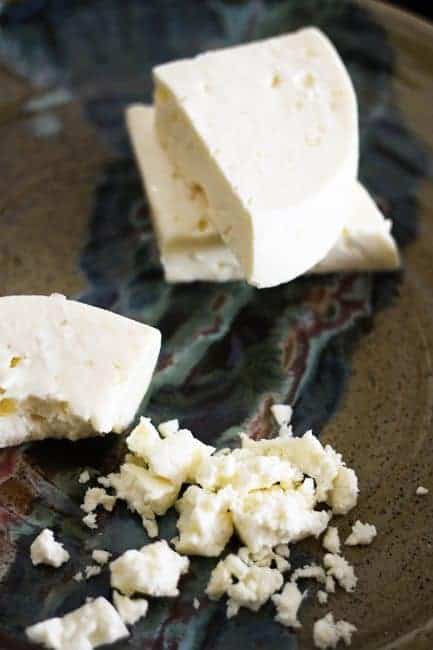
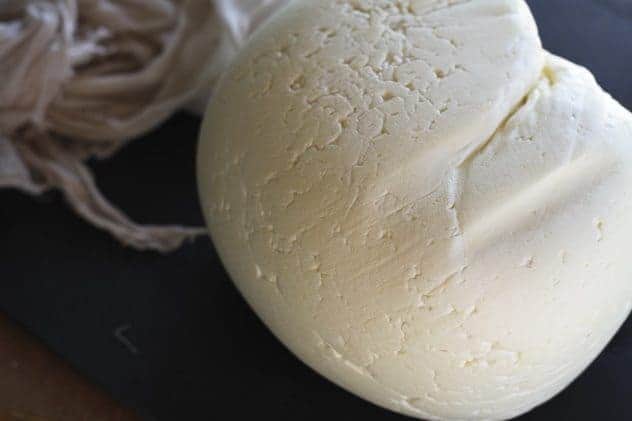
I have been promising to bring you my homemade feta cheese recipe for a while (Ahem, probably a couple of years. Eek.) Today is finally the day. You may be wondering why I bother making feta cheese from scratch. The answer-as is often the case- is that homemade tastes great and because I can. I am, after all, the daughter of a man who feels driven to walk laps around the house outside in blizzards when authorities warn that you shouldn’t go out unless you have to do so.
There’s an enormous satisfaction in doing something that seems just undo-able, isn’t there? Not only does homemade feta taste incredible, but it delivers a pioneer, up-by-my-bootstraps joy that a store-bought version just can’t give no matter how wonderful it is.
…But there’s another reason to take the plunge and it’s a doozy. For the cost of three gallons of milk (it can be pasteurized/homogenized or raw, cow or goat milk) and about a dollars worth of other stuff, you get a massive amount of feta cheese. As in a gallon jar of brined feta cheese. If you’re fearful of trying your hand at cheese making, just think of it this way; the risk is about twelve dollars worth of materials (depending on milk cost near you) versus a potential payoff of about forty dollars worth of cheese and an enormous ego boost. If it -bumbum BUM!!!!!- goes wrong, you can feed the errant cheese to dogs, cats, pigs, etc… They’ll be happy.
I’m going to get right into it because even if I’m being succinct, this post is going to be long on account of the how-to photos… There’s no getting around it. Some important notes:
- Stay calm! Cheesemaking is not supposed to be stressful. It may seem complicated, but it isn’t. Just go one step at a time and you’ll get there.
- Don’t get freaked out by the length of time it takes to make this. Much of the time is hands-off time. Another warning for those who haven’t made cheese or fermented something before; it gets a little, um, pungent smelling at times. Keep a-going. Don’t worry! Remember that cheese making is essentially controlling how fast and in what way milk ‘goes bad’. If it goes bad the right way it’s delicious!
- The only special equipment you really need to pull this off is a large stainless steel or other non-reactive pot, a heat source, a long knife or off-set spatula, a colander, something from whence to hang the cheese and butter muslin (extra, super, mega fine cheesecloth.) Do not confuse this with the “fine” cheesecloth you get in the grocery store or hardware store. It’s confusing terminology, but that stuff is so not fine. Just look for something called butter muslin and you’ll be fine. Finer than cheesecloth. Sorry. You can get it here.
- You can opt to use raw OR pasteurized/homogenized milk. It can be cow milk or goat milk. Any of those choices will be delicious.
- Goat milk is naturally more tangy, so if you use cow milk, you may want to consider adding a bit of lipase powder. Lipase is an enzyme that naturally occurs in higher amounts in goat milk. If you want cow milk feta to have that bite that is found in feta, lipase powder is your answer. You can get it via my beloved Amazon.com should you wish to.
- As far as specialty ingredients go, the lipase is optional, but rennet and mesophilic culture are not optional. Again? You can turn to Amazon.com. Here’s one for mesophilic culture.
- Whatever you do, don’t think Junket Rennet will do the job. It simply won’t. That’s for custard making. My preferred cheesemaking rennet is made from animal sources.
- But there is a perfectly acceptable and delicious vegetarian option…
- Finally, I suggest you start the process around lunch time. This gives you the time needed to do the Day One portion of the recipe before too late in the day.
Just think what you’d do with a gallon jar full of fabulous feta cheese. You can go nuts with feta! On pizzas, spanakopita, this tempting salad from my friend, a baked potato, in soup, in omelets, with olives and bread, IN bread, and in just about any recipe that calls for cheese. Where would you use your wealth of feta?

Homemade Feta Cheese | Make Ahead Mondays
Rate RecipeIngredients
For the Cheese:
- 3 gallons fresh raw or pasteurized and homogenized goat or cow milk
- 1/4 teaspoon Mesophilic culture see link in post for source
- 1/4 teaspoon lipase powder if using cow milk Omit for vegetarian cheese. Lipase is animal derived.
- 1 teaspoon single-strength liquid rennet dissolved in 1/2 cup of cool or 1/2 teaspoon double strength liquid OR 3/4 of a vegetarian rennet tablet crushed, UNCHLORINATED water.
- kosher salt no substitute
For the Brine:
- 1/2 cup kosher salt no substitute
- 1 gallon cool UNCHLORINATED water
Instructions
To Make the Cheese:
- Sterilize all of your equipment with boiling water before beginning (including the cheesecloth.)
- In a very large, non-reactive pot, bring all of the milk up to 86°F.-88°F. Add the mesophilic culture and the lipase powder, if you are using it. Stir well with an up and down motion, cover the pot and let rest for one hour. Try to maintain the 86°F temperature. If you have trouble with that, you can set your large pot inside a larger pot with an inch of hot water in the bottom of it. This should help regulate the temperature more gently than firing up a burner directly beneath the milk. The goal is to avoid rapid temperature changes.*See notes.
- After 1 hour, add the dissolved rennet to the milk and stir vigorously for 15-20 seconds. Remove the spoon from the pot, cover it, and let it stand undisturbed for 30-40 minutes or until the curd 'breaks' cleanly when you insert the tip of a knife and lift as shown below.
[img src="https://www.foodiewithfamily.com/wp-content/uploads/2013/01/homemade-feta3.jpg"] - Cut a 1/2-inch grid pattern into the curd. Don't get perfectionist here, you'll get frustrated. The curd likes to move while you try to cut it, so just do your best.
[img src="https://www.foodiewithfamily.com/wp-content/uploads/2013/01/homemade-feta.jpg"] - After you have the grid pattern, hold the knife at a 45° angle and retrace the cuts you've already made. This is going to make MOST of the curd in the pot into roughly 1/2-inch pieces.
[img src="https://www.foodiewithfamily.com/wp-content/uploads/2013/01/feta-in-brine.jpg"] - The ones that didn't get cut that small will break up later in the process. DO NOT STIR THE CURD YET.
- Let the curd rest undisturbed for 10 minutes.
- After 10 minutes, stir gently, breaking up any larger pieces you missed with the knife. Again, don't sweat this too much... Just try to have most pieces in the neighborhood of 1/2 an inch.
- Keep the curd at 86°F to 88°F for 45 minutes, stirring from time to time to keep the curd from sticking to itself. You'll notice the curd getting slightly firmer and smaller. This is because as you stir it and hold it at this temperature it releases more whey.
[img src="https://www.foodiewithfamily.com/wp-content/uploads/2013/01/homemade-feta-1.jpg"] - Dampen your butter muslin/cheesecloth and use it to line a large colander. I usually position the colander over another large stockpot because I like to save the whey for baking.
[img src="https://www.foodiewithfamily.com/wp-content/uploads/2013/01/homemade-feta-2.jpg"] - Carefully and gently ladle the curds and whey into the lined colander.
[img src="https://www.foodiewithfamily.com/wp-content/uploads/2013/01/homemade-feta-4.jpg"] - When all the curds are in the colander, draw all 4 corners of the cheesecloth together to form a bag and tie in a sturdy knot. Hang the bag over the sink or a bowl or pot so it can drain freely.
[img src="https://www.foodiewithfamily.com/wp-content/uploads/2013/01/homemade-feta-5.jpg"] - Let the cheese drain at room temperature for 3-4 hours, carefully lower the bag into the colander and untie the bag. At this point, the cheese will be smooth on the bottom and spiky on top.
[img src="https://www.foodiewithfamily.com/wp-content/uploads/2013/01/homemade-feta-6.jpg"] - Flip the curd over so the spikes are at the bottom, retie and rehang the bag. Let it drain for 24 hours.
Here is where you're going to notice a certain stank coming from the vicinity of your cheese. That's okay. It means you're on the right track. Don't back down!
- After 24 hours, lower the cheese, untie the bag and put the curd onto a sterilized cutting board. Cut it into blocks. I usually aim for pieces that are about the size of a deck of cards but about 2 inches thick.
[img src="https://www.foodiewithfamily.com/wp-content/uploads/2013/01/homemade-feta-9.jpg"] - Generously sprinkle all of the surfaces of the cut cheese with kosher salt then load the cheese into a sterilized, large, food-safe container with a tightly fitting lid.
[img src="https://www.foodiewithfamily.com/wp-content/uploads/2013/01/homemade-feta-10.jpg"] - Let the cheese rest at room temperature (DO NOT REFRIGERATE even though it is counterintuitive.) for 2 to 3 days so that it can continue releasing whey and hardening up. This will help it store longer.
To Prepare the Brine and Store the Cheese:
- Pour the whey the cheese has released into a sterilized large, food-safe container with a tightly fitting lid. Arrange the cheese blocks in it.
- Add the gallon of water and 1/2 cup of kosher salt to a non-reactive pot. Stir well over medium heat until the salt is completely dissolved. Let the brine come to room temperature before pouring it over the cheese. Put the lid in place tightly on the container and store the cheese in the refrigerator.
- Let the cheese age at least two weeks before eating. It is good for up to a year as long as it is kept submerged in the brine and refrigerated. It will continue to get stronger in taste as it ages.
Notes
Nutrition
Nutritional information is an estimate and provided to you as a courtesy. You should calculate the nutritional information with the actual ingredients used in your recipe using your preferred nutrition calculator.
did you make this recipe?
Make sure to tag @foodiewithfam on Instagram and #hashtag it #foodiewithfamily so I can check it out!


Reader's Thoughts...
apryl says
this is the best feta cheese recipe! i’ve made it successfully twice now and tried another recipe that didn’t turn out. my only complaint is that your photos aren’t working on your site. I followed you way back in the day before your cookbook, when you posted regularly on instagram and I loved seeing your recipes. I do miss it!
Rebecca says
Thanks so much, Apryl! I’ll try to fix those photos and I so appreciate you taking the time to rate the recipe and let me know you love it. Stay tuned! I’ll be adding many new recipes soon! The blog was on the backburner for a couple of years while my mom was ill.
luci says
I wish I could see the jpg photos. I don’t know how “generously” to salt the feta before it sits a few days.
Rebecca says
Hi Luci- I’ll have to fix the photos. In the meantime, you want to salt it enough that you have a layer of kosher salt covering the exposed surfaces of the cheese. It helps draw the liquid out and most of it drains away.
Hassan says
In almost all recipes I see adding Calcium Chloride either to the milk or to brine. Your recipe doesn’t do that. Is it needed? Should it be added to the milk, to brine or both? How much do you recommend? If not needed why others add it?
Thank you
Rebecca says
Hi Hassan- My recipe does not use it, and I stand behind the recipe. It makes delicious homemade feta cheese. I can’t answer why others would use it when I don’t see a need for it, but I can promise this makes good cheese when instructions are followed. 🙂
Sharon says
Can you use buttermilk as the starter culture instead of the powdered packaged starter? And if so what amount? Thankyou.
Rebecca says
Hi Sharon- I’m afraid I don’t actually know! I haven’t tried that!
Royce Faina says
So far I have had the most success with this recipe and recommendations. My father’s grand father and grand mother came from Italy. The origin of our surname is Greece so making feta means allot to me. If you have recipes for making Greek cheeses I would love to try them! I have a source of Goat’s milk from a near by farm though available only in the spring. I hope to have a source of sheep’s milk.
I have a question, I was wondering if the whey could be used in place of water for the storage brine?
Rebecca says
Hi Royce! I’d say using the whey would be okay, but I would add salt to it in the same proportion that you’d add it to water for the brine. The salt is important to the preservation and aging process.
Tina says
My milk did not coagulate. I used vegetarian rennet and followed the steps up to step 4 but it didn’t work. I waited 20 extra minutes (past the 40) and then added more rennet. Then waited 40 minutes and it didn’t work. :/ it basically looks like liquid on top of very soft loose cottage cheese.
Rebecca says
Hmmm. It sounds like maybe you used a weaker rennet than I’ve used. That’s a real bummer that it didn’t work out for you. I’d hang onto that milk, grab some double strength stuff, and try again!
Samantha says
Your link for rennet made from animal sources is the same as the vegeteble rennet link. The description for the product says double strength and to use 1/3 of what the recipe calls for. Does your recipe reflect using the double strength?
Rebecca says
Hi there. My recipe specifies using 1 teaspoon of single strength liquid rennet or 1/2 a teaspoon of double strength, so you can adjust accordingly. I’ll have to have a look at the links and fix them up. 🙂
Tina says
If you have enough whey to cover the cheese after the 2 days on the counter, do you fill the whole jar with whey or partly with whey and partly with brine? I saved the whey after straining into the cheesecloth and put it in the fridge right afterwards so we have about a gallon of whey. Should I just use the whey and add extra salt?
Tina says
Also what are some fun things to do with the leftover whey?
Tina says
Is it ok if you overheat the milk in the beginning? I accidentally heated it up to 120 degrees, not knowing how long it would take to heat up and what temp (low, med or high) to heat on. I found that info in the comments and am now waiting for the milk to cool down to add the culture. I’m wondering if this will affect the turnout and of i should just use this milk for something else and try again another time.
Rebecca says
I’d go for it anyway, Tina!
Peggy says
This recipe calls for 1/4 tes. Mesaphelic. How do you mesuare that. When I make up my culture I freeze it in 1 oz. cubes? I have been making cheese for my family for a lot of years. When the kids grew up I quit for awhile. Now I am 78 years and starting back into it. It gets into your blood.
Rebecca says
Hi Peggy- I’m afraid I don’t know how much homemade culture is the equivalent of the freeze dried mesophilic culture I purchase from cheese making supply stores. I wish I did! I hear you about cheese making, though. It is just plain fun!
Diane Novak says
Is this recipe able to be scaled down as in 1/3-1/2. If so would you publish the measurements. TY
Vivian says
I’m doing a 1/2 batch, it is slow ghrly cooler but I’ve got nice curds. Now hanging to drip. We shall see! Thank you!
Margot says
Hi there and thanks for sharing.mjust to be sure, in the brining process, you cover the cheese with whey and then you add the brine to the whey-covered cheese? What ratio whey – bring do you advise?
Margot
Rebecca says
Add brine to the jar to make up for any space not filled with whey. It’s not so much about the ratio as it is about keeping the cheese covered. 🙂
Sarah says
I’m currently right in the middle of making this following your instructions. So far, so good! I am about to make the brine to pour over it. It smells and looks like feta, which is kind of like magic. It’s the first cheese I have made, other than some very simple farmers cheese. Thanks for the detailed instructions and encouraging words!
kim says
F***** cool man I’m going to give this one a whirl… hahaha and I am such a cheese freak as it is and I live right around the corner from rumiano cheese bet you they have some stuff that I can use hmmm…
Amy says
So enjoyed reading your feta making how to 🙂 I feel as though I can give it a go through your encouraging way of writing and pics I’m very excited thank you 🙂
Joanne says
I recently retired and wanted to try my hand at making different cheeses among other cooking interest. I came across your Feta Cheese recipe and tried it. Turned out so good on the first try I have made it several times already. Everyone I gave some to as gifts have raved about it. Thank you for sharing your recipe and all the helpful tips to go with it. I ran out of my Feta again so will do a few more batches for myself and family.
Rebecca says
Thank you, Joanne! I’m so happy it went over well for you!