Have you been wondering how to make sourdough starter? It’s definitely on the radar of a lot of folks with yeast being tricky to find in some stores these days.
I have good news for you! It’s really easy to make a sourdough starter from scratch with zero yeast.
And with your sourdough starter, you can make beautiful bread from scratch with no added yeast! (You can also make sourdough bread with a little extra added yeast, but we’ll get into that in another post!
I’m going to divide today’s post into “equipment”, “ingredients”, and “instructions” in order to make it as easy to skip to the parts where you need a little extra shoring up as possible.
What equipment do I need to make sourdough starter from scratch?
The shortest list is that you need a spoon, a measuring cup, and 4 to 8 cup food safe container. Everything else we can cludge… but if you’re looking for the most convenient way to make and maintain a sourdough starter, I can identify a couple other things that’ll make your life easier.
KITCHEN SCALE
The single piece of kit that I think makes all sourdough work easier than anything else is an inexpensive, unassuming little kitchen scale with the ability to tare. A scale that tares has the ability to reset to zero so that it doesn’t take the weight of your container (or anything already in it) into account in the display.
Think -if you will- about a bathroom scale that could take into account your clothing. If that existed, there’d be a great many fewer naked people standing on scales.
Ahem. Back to sourdough starter, though.
Sourdough starter is actually a living thing. When you have a starter you’re basically capturing the wild yeast that lives everywhere in your home and air and domesticating it to make delicious bread. It’s like a pet that feeds you.
The reason a scale is so handy is because (looking down the road a bit) sourdough starter increases in volume massively when it is active. That makes the volume vary wildly and consistency of the ingredients is the single best guarantee of results in baking.
Have you ever seen a chicken puff itself up to be more intimidating? It still WEIGHS exactly the same, but it doesn’t necessarily LOOK like it weighs the same. A scale takes the question out of how much you’re adding of all of the ingredients.
If you do not have a kitchen scale or feel like using one is the man trying to keep you down, please allow me to demonstrate WHY a kitchen scale makes your life easier. If you don’t use a scale, measuring is a far greater hassle than the man could ever invent.
Why so? Because to properly measure a cup of flour without a scale, you need to do the following procedure:
- Fluff the flour in the bag or canister with a spoon. Aerate it well.
- Hold a dry measuring cup over the canister. Dip the spoon into the flour and sprinkle it over the cup, making certain you do not shake the measuring cup to settle the flour in any way.
- Continue dipping, sprinkling, and holding the measuring cup level until you’ve filled it slightly over the top. Now carefully flip your spoon around and use it like a knife to scrape over the top of the cup to level it.
- After all of that, you need to dip a spoonful of the flour out because you’re looking for a scant cup.
Now just for fun, after you’ve measured your flour into your container, try your old method of measuring and see how much heavier it feels. Wild, isn’t it?
Likewise, you’ll want to use specifically liquid measuring cups for your water and starter measurements if you don’t have a scale. Why? Because dry measuring cups are designed to hold, well, dry ingredients.
To get that 1/2 cup, you have to fill it to the very top and walk like a balancing act to avoid spilling. It’s nearly impossible to get a FULL 1/2 cup in a dry measuring cup.
Liquid measuring cups have the marks a little further down in the cup, so that when you pour the liquid in, you have some headroom. This means it won’t slosh around or over the sides, ensuring a complete 1/2 cup.
Do you see why I prefer scales now? Here’s a good, inexpensive one you can order.
TWO OR THREE 6 OR 7 CUP CONTAINERS WITH LIDS
One container is necessary, two identical containers are convenient, three identical containers are dreamy. Why?
Place the clean container on the scale and tare it to zero. Pour in the amount of starter you’re feeding and feed it.
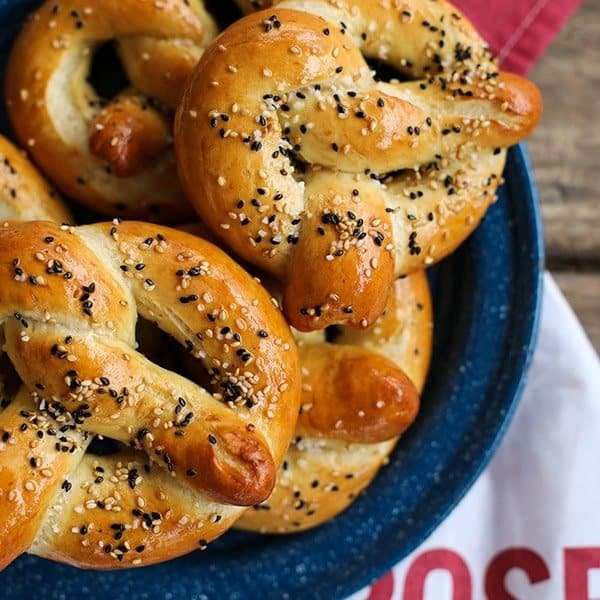
Take the container that held your starter before, wipe the rim, and pop it in the fridge to store your discard (more on why it’s called discard even though you don’t need to actually discard it) through the week. You can use the discard to make the world’s best sourdough soft pretzels (and other things I will share here, soon.)
The third container? Well, that’s so when you go to feed it again, you can plunk it onto the scale, tare the scale, and measure your starter-that-will-be-fed into it before adding the remaining starter to your “discard container” in the refrigerator before washing the container you used this time to be ready for the next feeding.
…but I’m getting ahead of the game here. To recap: 1 container with a lid is necessary, 2 containers are helpful, 3 containers are super convenient.
A SILICONE SPATULA OR DOUGH WHISK
You can absolutely, 100% get by with just a spoon, but a spatula or dough whisk makes super quick work of combining the starter, flour, and water at each feeding. I love both spatulas and dough whisks and tend to go back and forth on which I use; both make feeding your sourdough starter pet simple!
What Ingredients Do I Need to Make Sourdough Starter from Scratch?
In the simplest form, you just need water and flour.
To make your sourdough starter in the tastiest, fastest way, you should have at least 1 cup of whole wheat or pumpernickel flour for the very first step. This is because there’s more of the germ/bran of the wheat left in that flour, and that means more nutrition to help kick start the activity that will make amazing sourdough goodies later.
After your first day, you’ll switch to all-purpose flour. This creates the most stable, predictable sourdough starter for you.
You can sub in whole wheat for half of the flour, but the key here is consistency. After that first day, you should use the same kind of flour to feed it every time -to the best of your ability- to maintain the health of your starter.
My personal preference is to use King Arthur All-Purpose Flour, but their bread flour is also great. If you have trouble laying your hands on that, the next best bet is another brand of unbleached all-purpose flour or bread flour.
Now a word about your water. It should be non-chlorinated if possible.
And the temperature actually matters! If your house is cold (say 68°F or below like my wood-stove heated house), you’ll want to feed your starter pet with lukewarm water.
If you live somewhere warm and/or humid, or you keep your house at 70°F or above, you’ll want to use cool-to-the-touch water. This helps regulate the activity of the starter.
Do I Need to Feed Sourdough Starter Every Day?
You’re going to need to feed it TWICE a day to get the action really going, but after about 5 to 10 days -depending on your home’s temperature, humidity, etc…- you can stash your fed starter in the refrigerator and feed it once every 7 to 10 days. This is effectively putting your sourdough starter into hibernation.
If you opt for hibernating starter, you’ll just want to take it out of the fridge and give it a couple of feedings until it is puffy, bubbly, and active again.
What is Sourdough Discard?
When you’re keeping your starter active (feeding it and baking with it regularly) you have to divide the starter before feeding it and get rid of some of it. This is called “sourdough discard” and it is done for a couple of very good reasons.
First, remember you’re adding flour and water equal to the amount of starter you have each and every time you feed it. If you carried on like this without dividing it, you’d be adding exponentially more flour and water each time and soon have FAR too much sourdough starter to work with even for the most ardent baker.
Second, having a smaller amount of starter helps regulate that delicate balance of nutrients and the bacteria that eat them that makes a good, fruity-smelling, pleasantly tangy sourdough starter. Doing much larger amounts can throw that balance off and tinker with the flavours in play.
Third, there are a multitude of delicious things to make with the sourdough discard. You can use them (as mentioned before) to make my very favourite ultimate sourdough soft pretzels (and you can use that dough to make these pretzel rolls, too.), but you can also use discard for the ultimate sourdough crackers to serve with wine and cheese (or just wine or just cheese), sourdough pizza dough, waffles, pancakes, muffins, and more.
Now’s let’s get into it! No need to strap on an apron unless you feel motivated to do so, here’s our 5 to 7 Day Plan for How to Make Sourdough Starter.
How to Make Sourdough Starter
DAY ONE
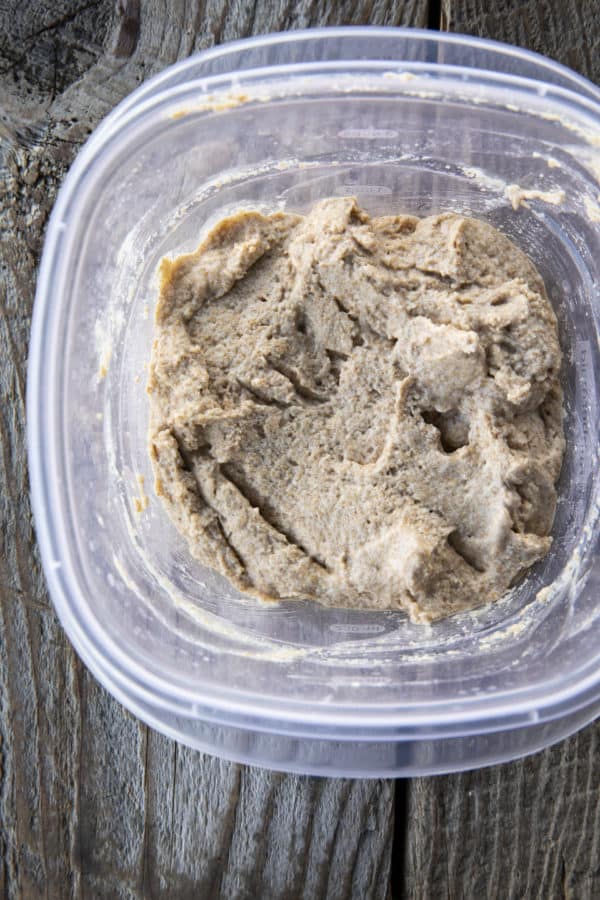
Measure 4 ounces by weight of whole wheat or whole rye flour (a scant 1 cup by volume) and 4 ounces by weight (1/2 cup by volume) of lukewarm water into a food safe container. Stir until no dry pockets remain. It’ll look like this.
Cover this loosely. This could mean you lay a lid that fits the container on top without snapping it into place OR that you lay a piece of plastic wrap or waxed paper over the top.
You’re looking to make sure some air can get in and out while trying to minimize evaporation and keep it moist. A tight fitting lid can literally blow off of an active starter, so loose fitting is always going to be the name of the cover game.
And while we’re talking about the name of the game, consider the temperature of your room. If your room is below 68°F, like my cool-climate house, you’ll want to find a place that IS at that temp or above to help coax your starter into reliable activity.
If you just plain don’t have a part of your house suitable to do that, you can pop it -still loosely covered!- into a cold oven with the oven light on. The light should provide enough heat to keep your stove the right temperature to encourage starter growth.
If your oven light is out, you can lay a folded towel over a heating pad set to low and put your container of starter on top of that. Some other good, warm-ish places are behind a woodstove (ask me how I know), on top of a refrigerator or desktop computer CPU, or next to (not directly in front of) a space heater.
The goal is just to find a place that has a steady, warmish temperature to grow your starter but not a place that is wickedly hot or drafty.
SAMPLE SCHEDULE TIME: START THE PROCESS AT 9AM.
DAY TWO
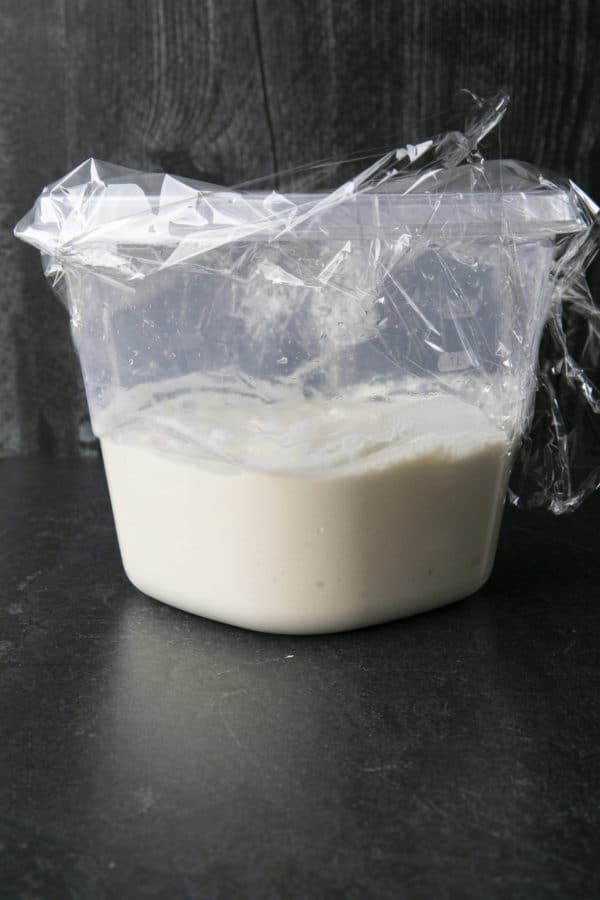
24 hours later, it might not look like much is going on with your starter when you look down on it from the top, but if you’re using a glass or clear plastic container, you may see a few small bubbles under the surface when you look at it from the side. If you don’t, don’t worry.
It’s okay if you don’t see bubbles. It could mean that your room is on the cooler side. Just keep on keeping on.
You’ll stir down the starter, discard half of it (into a container that you’ll keep covered and in the refrigerator), and then add 4 ounces of all-purpose flour (that’s a scant cup by volume) and 4 ounces of lukewarm water (that’s 1/2 cup by volume) to the remaining starter. Once again, stir well until there are no dry pockets.
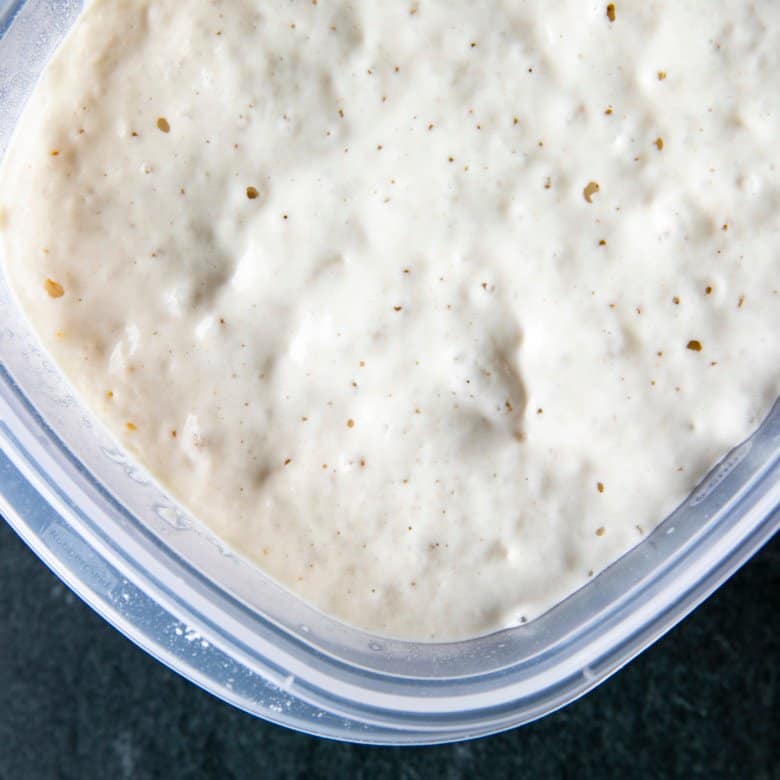
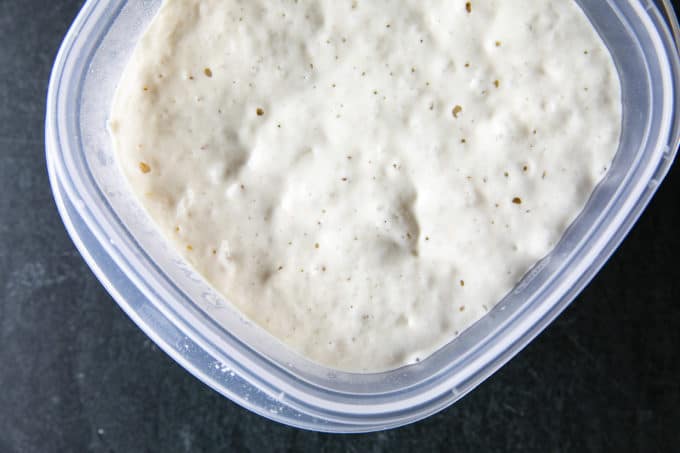
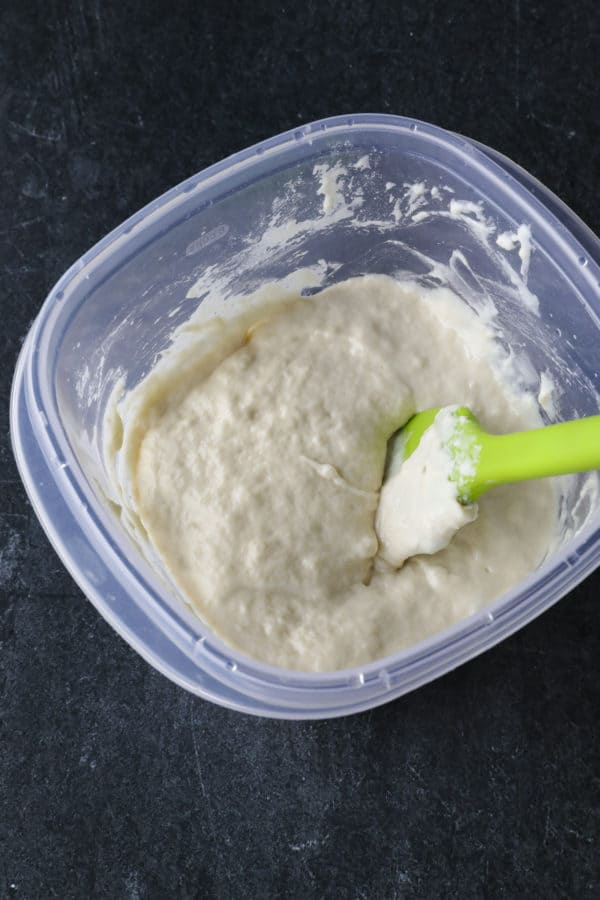
It should look something like this in the container. It should also smell pleasantly tangy.
You’re going to loosely cover it and tuck it back into its warm bed, wherever that is, for another 24 hours.
SAMPLE SCHEDULE TIME: FEED THE STARTER AT 9AM.
DAY THREE
24 hours later, you should see increased bubbling in your starter and it should start to smell a bit more, well, sour. But this is sour in a pleasant way; kind of fruity, kind of happy.
Now, we’re going to shift the feeding schedule. You’re going to move to feeding your starter every 12 hours. Each time, you’ll repeat the stir down, divide in half, feed with 4 ounces by weight each lukewarm water and all-purpose flour. (Remember, if you’re going by volume, that’ll be 1 scant cup of all-purpose flour plus 1/2 cup water.)
After each feeding, you’ll loosely cover and tuck it in. It should look like this right about now. You’re getting to the good part.
SAMPLE SCHEDULE TIME; FEED THE STARTER AT 9 AM AND AGAIN AT 9PM.
DAY FOUR THROUGH FIVE (AND BEYOND?)
By this point, when you go to feed your starter, you should see some more bubbles in your starter. Some of them might be stacking on top of each other and you may see little rivulets of liquid near the top.
It should smell very fruity and tangy now. Toward Day Five, you should start noticing that the starter is rising higher and higher close to feeding time.
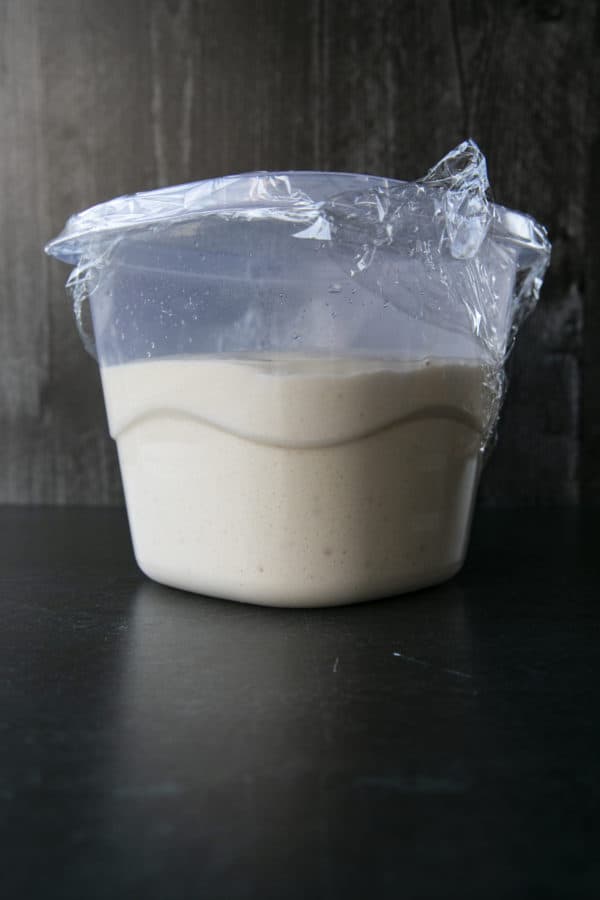
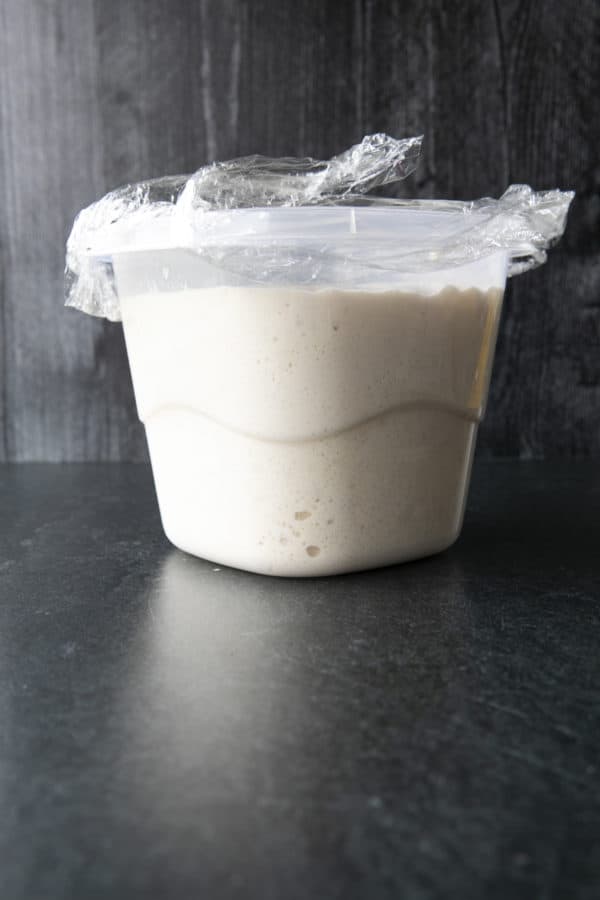
See how it’s starting to get higher in the container?
If it hasn’t quite gotten to that phase, don’t worry… just repeat the twice daily feedings until you get there. It may take up to 2 weeks to get there, but you’ll be alright!
This is where the sourdough discard recipes come in very handy. I’ll add a few extra in the next couple of weeks. In the meantime, ahem, MAKE THOSE PRETZELS.
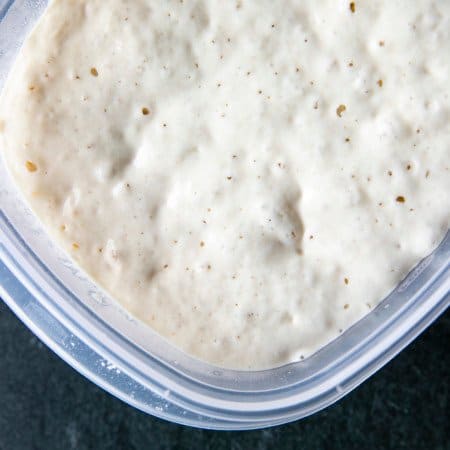
When you notice that your starter is full of tiny and variable sized bubbles, rises to almost twice its original height over when you feed it, and smells very fruity and tangy, you’re ready to bake with it!
You’ll notice that this starter has climbed almost all the way up in the container. You can either carry on with twice daily feedings, or discard, re-feed, and stash in the refrigerator.
If you do that, you’ll need to bring starter back out to room temp and feed it for a couple of days before making any recipes that require ripe starter. Need a recipe to use your ripe sourdough starter? Try this Rustic Roasted Garlic Sourdough Boule or this fantastic pure 100% sourdough bread from King Arthur Flour which needs NO YEAST WHATSOEVER!
How to Make Sourdough Starter
Rate RecipeEquipment
- bowl
- spoon, silicone spatula, or dough whisk
- liquid + dry measuring cups OR kitchen scale
Ingredients
- 4 ounces whole wheat or whole rye flour by weight. If using volume measurements, this will be 1 scant cup of flour.
- 4 ounces lukewarm water per feeding by weight. If using volume measurements, this will be 1/2 cup water.
- 4 ounces unbleached all purpose flour per feeding by weight. If using volume measurements this will be 1 scant cup all purpose flour per feeding. Day 2 that will be one feeding, Days 3 to 5 will have 2 feedings per day
Instructions
DAY ONE
- Measure 4 ounces by weight of whole wheat or whole rye flour (a scant 1 cup by volume) and 4 ounces by weight (1/2 cup by volume) of lukewarm water into a food safe container. Stir until no dry pockets remain. It'll look like this.
- Cover this loosely. This could mean you lay a lid that fits the container on top without snapping it into place OR that you lay a piece of plastic wrap or waxed paper over the top.
- You're looking to make sure some air can get in and out while trying to minimize evaporation and keep it moist. A tight fitting lid can literally blow off of an active starter, so loose fitting is always going to be the name of the cover game.
- And while we're talking about the name of the game, consider the temperature of your room. If your room is below 68°F, like my cool-climate house, you'll want to find a place that IS at that temp or above to help coax your starter into reliable activity.
- If you just plain don't have a part of your house suitable to do that, you can pop it -still loosely covered!- into a cold oven with the oven light on. The light should provide enough heat to keep your stove the right temperature to encourage starter growth.
- If your oven light is out, you can lay a folded towel over a heating pad set to low and put your container of starter on top of that. Some other good, warm-ish places are behind a woodstove (ask me how I know), on top of a refrigerator or desktop computer CPU, or next to (not directly in front of) a space heater.
- The goal is just to find a place that has a steady, warmish temperature to grow your starter but not a place that is wickedly hot or drafty.
- SAMPLE SCHEDULE TIME: START THE PROCESS AT 9AM.
DAY TWO
- 24 hours later, it might not look like much is going on with your starter when you look down on it from the top, but if you're using a glass or clear plastic container, you may see a few small bubbles under the surface when you look at it from the side. If you don't, don't worry.
- It's okay if you don't see bubbles. It could mean that your room is on the cooler side. Just keep on keeping on.
- You'll stir down the starter, discard half of it (into a container that you'll keep covered and in the refrigerator), and then add 4 ounces of all-purpose flour (that's a scant cup by volume) and 4 ounces of lukewarm water (that's 1/2 cup by volume) to the remaining starter. Once again, stir well until there are no dry pockets.
- You're going to loosely cover it and tuck it back into its warm bed, wherever that is, for another 24 hours.
- SAMPLE SCHEDULE TIME: FEED THE STARTER AT 9AM.
DAY THREE
- 24 hours later, you should see increased bubbling in your starter and it should start to smell a bit more, well, sour. But this is sour in a pleasant way; kind of fruity, kind of happy.
- Now, we're going to shift the feeding schedule. You're going to move to feeding your starter every 12 hours. Each time, you'll repeat the stir down, divide in half, feed with 4 ounces by weight each lukewarm water and all-purpose flour. (Remember, if you're going by volume, that'll be 1 scant cup of all-purpose flour plus 1/2 cup water.)
- After each feeding, you'll loosely cover and tuck it in. You're getting to the good part.
- SAMPLE SCHEDULE TIME; FEED THE STARTER AT 9 AM AND AGAIN AT 9PM.
DAY FOUR THROUGH FIVE (AND BEYOND?)
- By this point, when you go to feed your starter, you should see some more bubbles in your starter. Some of them might be stacking on top of each other and you may see little rivulets of liquid near the top.
- It should smell very fruity and tangy now. Toward Day Five, you should start noticing that the starter is rising higher and higher close to feeding time.
- If it hasn't quite gotten to that phase, don't worry... just repeat the twice daily feedings until you get there. It may take up to 2 weeks to get there, but you'll be alright!
- When you notice that your starter is full of tiny and variable sized bubbles, rises to almost twice its original height over when you feed it, and smells very fruity and tangy, you're ready to bake with it!
- You'll notice that this starter has climbed almost all the way up in the container. You can either carry on with twice daily feedings, or discard, re-feed, and stash in the refrigerator.
- If you do that, you'll need to bring starter back out to room temp and feed it for a couple of days before making any recipes that require ripe starter.
Nutrition
Nutritional information is an estimate and provided to you as a courtesy. You should calculate the nutritional information with the actual ingredients used in your recipe using your preferred nutrition calculator.
did you make this recipe?
Make sure to tag @foodiewithfam on Instagram and #hashtag it #foodiewithfamily so I can check it out!


Reader's Thoughts...
Linda L Brown says
I hope I’m not too late to get in here for a response.
I would like to use the sour dough to make your recipe for the best pan. pizza. Would I just use 1 cup of starter to make up the 3 cups of flour or what?
I hope its possible cause the pizza recipe looks awesome but would sure love to add the sour dough.
Thank you so much!
Rebecca says
Hey there, Linda! I’m afraid I won’t be much help because I’ve never made sourdough starter into the pan pizza. I’d think you’d need a bit more flour, though, even if not much of it. If you play around with it, please let me know what your results are and how you got there!
Greta says
Finally after watching too many videos and reading here and in my few cook books, I think I’ve found the best, mist detailed instructions. I am currently on day 5 and only now understand the dry wet measuring. guidelines.
Rebecca says
Hi Greta! I’m so glad this is helping you out. I can’t wait to hear how your baking goes!
Margaret says
What do I do with the Day 1 discard that it says to put in the fridge? Or did I miss it. (entirely possible.)
Sincerely,
Troll Fairy
Rebecca says
HAHAHAHAHA. Hi Troll Fairy. Will you grant me a wish if I answer your question? Reserve the discard in a tightly covered container in the fridge and add to that with the discard from each feeding. You can collect enough to make these FABULOUS soft pretzels or the sourdough crackers I’ll be posting later this week. 🙂
Margaret says
The trolls thank you they would love pretzels!! I will do that! Today is Day 2!
Rebecca says
Hooray! Happy Baking!
Ghulam Mohyudin says
Good to know that works too! I learn so much from you as well! Keep it up great post.
Rie says
Excellent tutorial!! Can’t wait until I have the time to dedicate to making a starter and baking. I did a starter several years ago but I believe I “killed” it so I discarded it. Thanks.
Rebecca says
You can kill a starter if it’s ignored too long… the real key is to notice whether there’s a weird pink or orange colour to it or if it is fuzzy with mold. You probably did right to discard if you were in doubt. I can’t wait to hear what you do with your new one when you make it!