Ethereally light, crisp on the outside, and marshmallowy on the inside, my Mini Pavlova Recipe is as simple as it is stunning. If you are capable of whipping cream, you can make a perfect Mini Pavlova Recipe.
This post for our Mini Pavlova Recipe was sponsored by Caribbean Cruises and inspired by the excellent ones served on their cruises. All recipes, photos, and opinions remain, as always, my own.
Pavlovas; you either love them, or haven’t heard of them. Ethereally light, crisp on the outside, and marshmallowy on the inside, my Mini Pavlova Recipe is as simple as it is stunning.
Really. I promise they’re easy! If you are capable of whipping cream, you can make a perfect Mini Pavlova Recipe.
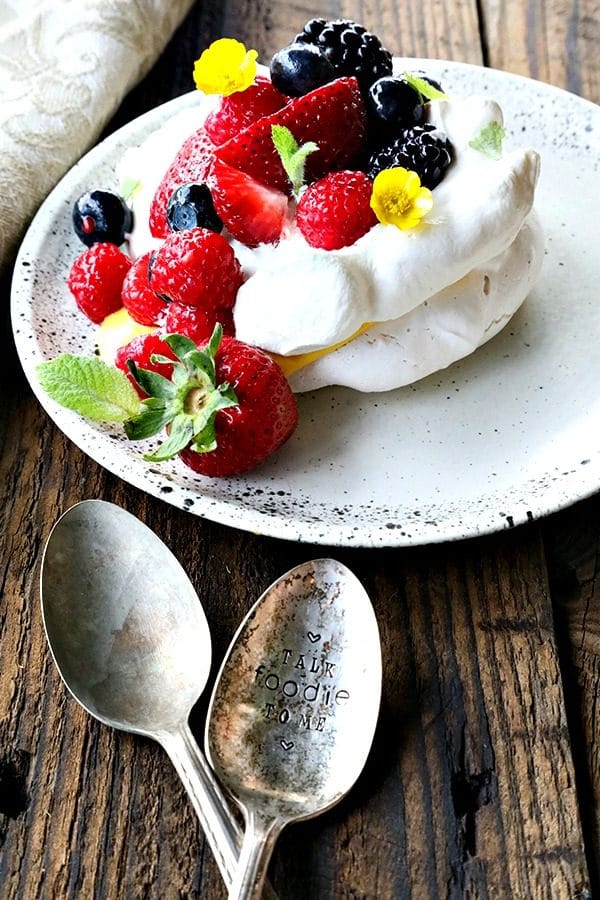
I’ve always loved pavlovas, but was inspired to make our Mini Pavlova Recipe while on a Western Caribbean Cruise with Princess Cruises. I grabbed these from the International Marketplace after lunch to take with me for sustenance while I hid in my favourite quiet place on deck to read.
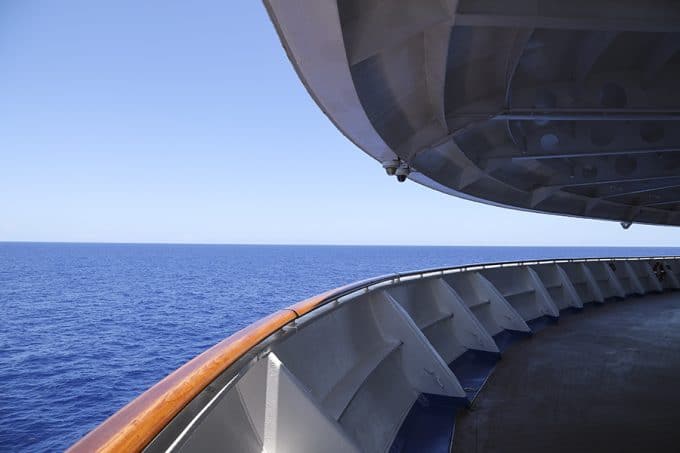
So as I sat in this blissfully quiet spot, basking in the warmth like a lizard on a rock, reading my book and indulging in a post lunch dessert, I thought. I wondered what made their Mini Pavlova Recipe hold up so perfectly to being out on the buffet line and how it didn’t weep and wilt in the Caribbean heat.
I wondered this because I know that the chefs on all Princess Cruises make all of the food from scratch every single day. There is not one thing -from the bread to the sauces to the soups- where they use a mix, or take a shortcut.
In other words, that personal sized pavlova I gobbled so ravenously had been made by a pastry chef separating eggs and making picture perfect pavlovas on the ocean in the warmth. I set a goal to make a foolproof mini pavlova recipe as soon as I got home.
…and I did just that. I found out something important. Super fresh chicken eggs are NOT the best for pavlovas of any size. Oy.
I had some very shiny, very fluffy, very sticky, not-at-all-structurally-sound pavlovas from my day old and week old eggs. I had some experimenting to do.
Many batches of mini pavlovas of varying degrees of success later, I can tell you I have the most foolproof Mini Pavlova Recipe to share with you, so you, too, can hide yourself in a warm, quiet place with a book and a mini pavlova.
How to make foolproof Pavlovas
Okay. I said it’s easy and I meant it. I did, however, discover a couple of things that surprised me.
The Mini Pavlova Recipe works best when you use packaged egg whites from the refrigerated egg and dairy section at the grocery store. I know that sounds crazy, but even the tiniest bit of yolk in the egg white keeps your egg whites from pavlova perfection. And my farm-fresh eggs were just TOO fresh.
Oddly, while most recipes recommend using room temperature egg whites, I found better results using cold egg white and whipping them for longer. It wasn’t a one time thing, either. This was consistent for me.
Another strange but consistent finding was that it mattered whether I started the mixer on low and moved slowly to high or just rammed it into high gear from the outset. My mini pavlova recipe worked far better when I started the mixer on low, let it go for a minute, then slowly (about every 30 seconds or so) eased the mixer up to medium speed until the bubbles were even and small. More on this in the Cook’s Notes.
It doesn’t really matter whether you use “caster” or “superfine” sugar or regular granulated white sugar but you can’t use raw or demerara sugar without taking it for a spin for about 30 seconds in a food processor fitted with a metal blade. And of the three options, I actually prefer regular old granulated white sugar for my mini pavlova recipe.
I found cream of tartar to be infinitely more successful in my mini pavlova recipe than white vinegar. I will not ever try vinegar again unless I am desperate for pavlovas and have no cream of tartar and no ability to go buy it.
Pretty piping is nice and all, but is far more of a pain to do than the payoff it provides warrants. I think our mini pavlova recipe looks even prettier when spooned into mounds vs. piped into fussy shapes. Besides, I thought they cooked more evenly and had more of the classic crisp-exterior-marshmallow-inside characteristics when portioned and shaped with spoons.
And now for the rules, because there are some. They’re not complicated or difficult, but they are important.
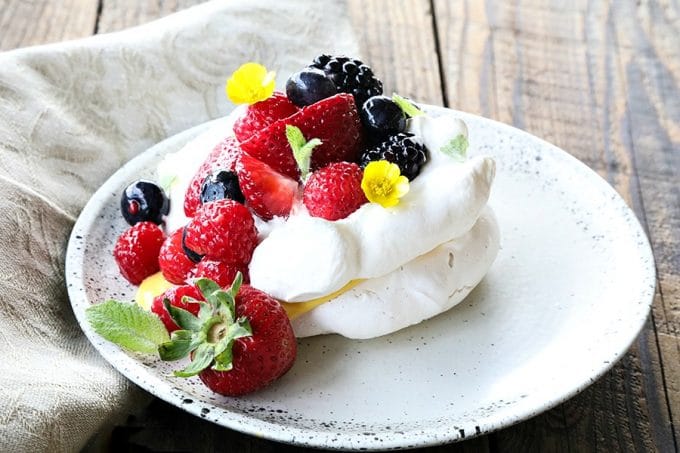
How to make perfect pavlovas; the rules.
Make sure your bowl and beaters (or stand mixer bowl and whisk attachment) are scrupulously clean. If you have even a little grease on either, your egg whites just plain won’t beat to the state they need to get to for perfect pavlovas. Any grease or fat of any sort will doom your pavs.
If you really, really want to separate your own eggs for your mini pavlova recipe, be my guest. But woe betide you if you get even the tiniest bit of yolk in there. Yolk is basically fat, and as discussed before, fat is the death knell for perfect pavlovas.
Don’t overwhip your egg whites. The goal is thick and glossy, not super stiff with big bubbles.
This will make your meringue weep which will, in turn, make you weep. Here’s a great visual guide for whipping egg whites to stiff peaks, which is the goal.
Parchment on the pan is absolutely non negotiable. Well, maybe it’s the tiniest bit negotiable… but only if you substitute a silpat baking mat for it.
One or the other is obligatory. Nobody but NOBODY wants to chisel soon-to-be-formerly-perfect-pavlovas from a baking sheet to which they’re adhered. Trust me. I took one for the team on this one.
Last, but not least important, do not ever open a discussion on whether Pavlovas were invented by Australians or New Zealanders. This is evidently contested.
I propose a pavlova-bake-off to settle this. I’ll selflessly offer to take another 7-day Caribbean Cruise and judge. Whaddya say?
Cook’s Notes
Before you start anything else, measure your granulated sugar and cornstarch into a mixing bowl and whisk to combine evenly.
When you’ve set up your stand mixer bowl or mixing bowl with the egg whites in it, sprinkle the cream of tartar and pinch of salt over the top before you begin whipping.
Begin whipping on low speed. After 30 seconds to 1 minute, raise the speed one setting. Slow raise the speed every 30 seconds until your each medium speed. Continue mixing on medium until the egg whites are frothy and the bubbles are small and even.
Raise the mixer speed to medium high, then begin spooning the sugar mixture into the mixer, aiming for the wall of the mixer to avoid the sugar going POOF in your face. Do this about a tablespoon or so at a time, until all of the sugar has been incorporated. Let it go for about 3 to 4 minutes at this speed to help dissolve the sugar.
Add the vanilla, raise the mixer to high speed, and let ‘er rip until the whites are thick and glossy, and you reach stiff peaks; this means that when you raise the beater or whisk from the whites, they hold their shape like a little mountain with just the very tips of the meringue folding over on itself. This is likely to take about 4 to 5 minutes.
On a parchment or silpat lined baking sheet, use two tablespoons (the sort you eat with, not the measuring variety) to portion about 10 to 12 mounds. You’ll scoop the meringue with one spoon and use the second one to coax it from the first one onto the sheet. Be sure to leave ample space between the mounds for air to circulate. Use the spoons to make an indentation to hold whatever goodies you intend to use to top your mini pavlova recipe.
The ideal placement for your pan full of future pavlovas is the very center of the oven. Try to arrange your oven racks to accommodate that.
Don’t give in to the temptation to open the oven door to check on your mini pavlova recipe more than once. Only open it at about halfway through the cooking time to rotate your pan from front to back. If you need to use more than one pan, rotate them from top to bottom then, too.
When they’re done, you’ll get the most longevity from your mini pavlova recipe -assuming you can’t eat all 12 in one sitting- if you let them cool completely in the oven without opening the door.
Store leftover, untopped pavs loosely wrapped at cool room temperature. If you need to re-crisp them, you can do so on a parchment lined pan in a 200°F oven for 15 minutes.
How to Top a Mini Pavlova Recipe
Use any of these ideas alone or in combination with each other!
- lemon curd, lemon lime curd, or any fruit curd
- blueberry sauce
- whipped cream
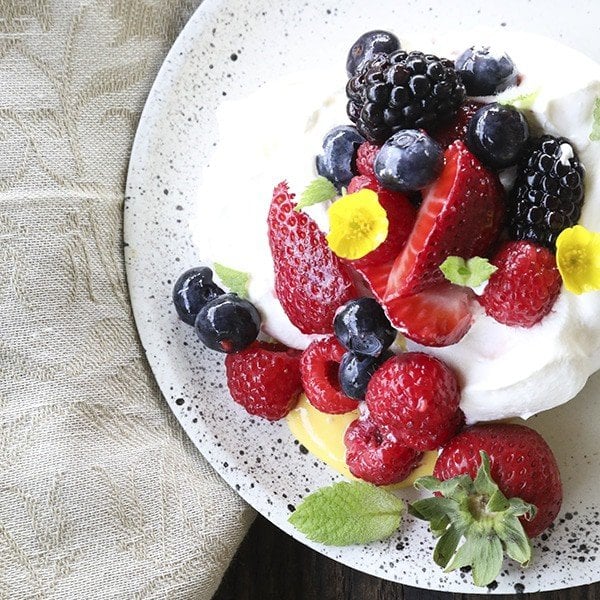
- mixed berries
- citrus salad
- seasonal fruit
Use these to make your Mini Pavlova Recipe
Perfect Mini Pavlova Recipe
Rate RecipeIngredients
- 1 1/2 cups granulated sugar
- 1 1/2 tablespoons cornstarch `
- 3/4 cup liquid 100% egg whites (6 ounces)
- 1 1/2 teaspoons cream of tartar
- pinch salt
- 1 1/2 teaspoons pure vanilla extract
Instructions
- In a small mixing bowl, whisk together the granulated sugar and cornstarch until everything is evenly combined. Set aside.Preheat your oven to 275°F with your oven racks arranged in the center of the oven. Line a half sheet pan or cookie sheets with parchment paper or silpats.
Pour the liquid egg whites into the bowl of a stand mixer fitted with a whisk or a large mixing bowl if you’re using a hand mixer.Sprinkle the cream of tartar and salt over the surface, and begin whipping on low speed. After 30 seconds to 1 minute, raise the speed one setting. Slow raise the speed every 30 seconds until your each medium speed. Continue mixing on medium until the egg whites are frothy and the bubbles are small and even.Raise the mixer speed to medium high, then begin using a spoon to slowly sprinkle the sugar mixture into the mixer, aiming for the wall of the mixer to avoid the sugar going POOF in your face. Do this about a tablespoon or so at a time, until all of the sugar has been incorporated. Let it go for about 3 to 4 minutes at this speed to help dissolve the sugar.Add the vanilla, raise the mixer to high speed, and let ‘er rip until the whites are thick and glossy, and you reach stiff peaks; this is likely to take about 4 to 5 minutes.On a parchment or silpat lined baking sheet, use two tablespoons (the sort you eat with, not the measuring variety) to portion about 10 to 12 mounds. You’ll scoop the meringue with one spoon and use the second one to coax it from the first one onto the sheet. Be sure to leave ample space between the mounds for air to circulate. Use the spoons to make an indentation to hold whatever goodies you intend to use to top your mini pavlova recipe.Bake for 50-60 minutes, opening the oven door only once at about 30 minutes to rotate the pan from front to back, and -if using more than one pan- from top to bottom. Close the door as quickly and gently as possible and continue cooking for another 20-30 minutes, or until the exteriors are dry and crisp and the mini pavlova can be easily lifted from the parchment without sticking.
Allow the mini pavlovas to cool completely on the pan in the oven with the door closed.Top as desired.
Store untopped mini pavlovas loosely wrapped at room temperature.
Nutrition
Nutritional information is an estimate and provided to you as a courtesy. You should calculate the nutritional information with the actual ingredients used in your recipe using your preferred nutrition calculator.
did you make this recipe?
Make sure to tag @foodiewithfam on Instagram and #hashtag it #foodiewithfamily so I can check it out!
Love this Mini Pavlova Recipe? Try these excellent fruit desserts!


Reader's Thoughts...
Amy says
Also another question…! How far in advance can you make these before serving them or can the freeze?
Rebecca says
Hi Amy! Unfortunately, pavlovas do not freeze super well! You could easily do these 24 hours ahead!
Amy says
Thanks for the amazing recipe
However mine turned out a little grainy to look at – not that nice smooth meringue look on the outside
Any tips?
Rebecca says
I’m so glad you liked it! What type of sugar did you use, Amy?
Sara says
Have you tried a convection bake on these? I’m wondering if they would turn out! I’ve made your recipe before without convection and they were amazing so thank you!
Rebecca says
Hi Sara- Thanks so much for your sweet words and great rating on the recipe! I actually have not tried them in a convection oven.
Pamela Hunter says
Should the oven temperature stay at 275 degrees F for the duration of the 50-60 baking period?
Rebecca says
Hi Pamela- Yes, it should! Thank you!
Deanne says
What circumference do these end up being? I am making 60 for a dinner and would like to trace circles on the parchment.
Also may I double or quadruple the recipe?
RS says
I made these the other day and they tasted great. While the crust retained its shape, the marshmallow center had sunk and I had a big air pocket in my pavs. Any idea what I did wrong?
Rebecca says
Hmmm, RS. I wonder if you had some weird humidity going on?
Kat says
Thank you so much for all the tips! My grandma always made Pavlova but has passed and I would normally be asking her all the questions you answered in your notes–so thank you!
I have some eggs in my fridge that I would like to use up in this recipe. How many egg whites would make up 6 oz?
Thanks!
Rebecca says
I’m so glad to be able to help, Kat! I’m so happy to say we have a pretty simple solution here. Just measure your egg whites into a liquid measuring cup until you reach 3/4 of a cup which is 6 liquid ounces. That’ll do it for you! A standard large egg yolk is about 1 liquid ounces, so measuring it should help eliminate most issues!
Ruth says
Thank you so much. Some friends of ours made these for us when I was young, I’ve been wanting to make them. Your description is the same as I remember. Your directions are simple with things I have at home,yet you describe all the do’s and donuts so well.
Ana says
Hi. Love the step by step recipe. My first attempt was a complete success and I quickly became obsessed with pavlova. My only problem was when I tried to make the recipe again it failed and failed and failed. I tried everything and the frustration was off the charts UNTIL I read that packaged egg whites are the culprit. I guess it’s a hit or miss because my first attempt was perfect. Just FYI Incase others are having any problems. Again, thank you for the recipe. It’s a gorgeous dessert.
Rebecca says
Hi Ana- I’m so glad it worked for you the first time. I hope you have better luck next time around! What’s interesting is that the packaged egg whites worked quite well for me! I know some liquid egg whites are pasteurized and/or have chemical stabilizers added to them, in which case you’d have trouble whipping them. The brand that I use does not have stabilizers added to them. I wonder if that’s the difference.
Ana says
Rebecca,
I’m pretty sure all the packaged egg whites I used were pasteurized. I’ve resorted, after the frustrating fails, to separating the egg whites, not a big deal. I have a perfect batch in the oven right now!! ?the pavlova obsession continues!!!
Anne Muncie says
What brand of packaged egg whites is best ? I have always been told they will not work for meringues . Can’t wait to try .
Rebecca says
Hi Anne- I’ve recently been told the same thing, but I had good luck with using Egg Beaters 100% Egg Whites because my recipe calls for cream of tartar which helps acidify the egg whites just enough to loosen the protein back up to whip nicely!
Megan says
I’m obsessed with pavlova.
Azu says
Your instructions are very clear. I have made countless of pavlova and the results were hit and miss. Few days ago when I had to make few mini pavlova for a friend I was afraid they wouldn’t turn out well and that ‘s when I came across your page. I followed everything step by step and each one turn out well and beautiful! Then few days later I made chocolate pavlova and it turned out beautiful too I wanted to cry. Thank you thank you thank you for sharing. God bless you.
Rebecca says
Oh, that makes me smile, Azu! Thank you for letting me know!!
Deanne says
What circumference do these end up being? I am making 60 for a dinner and would like to trace circles on the parchment.
Karen Toscano says
Made them. Loved them !! Thank you ?
Whitney says
Thank you for all the tips. I had this for the first time and they came out great. No cracks. I believe it is because of your easy to follow tips and recipes.
Rosemary Brassey says
What temperature should these be cooked at?
Rebecca says
Hi Rosemary- In the recipe printable, I specify baking them at 275°F and I stand by that. 🙂
Rebecca Adams says
Rebecca is this oven temperature fan forced or conventional please? Thanks 😊
Rebecca says
Hi Rebecca- This is for a conventional oven… no convection needed for it! 🙂
Rosemary Brassey says
Have I missed sonething? I have read and reread everything you have written but I cannot see what temperature they should be cooked at.
Sandii says
Australian all the way! 😉 You should also try layering discs of pavlova with cream, curd, or ganache in middle and on top, plus fruit on top! I am eager to try a citrus curd on mine. Passionfruit is also a favored acid element to compliment the sweet.
Rebecca says
Ooooh. I’ll layer my next Pavlova! 🙂 Thanks, Sandii! <3
beejay says
I love your posts. Knowing how hard you worked to test and perfect this recipe gives me confidence in it. And we can always learn from one another can’t we? Thanks, so much.
Kim says
Rebecca, I have a problem when I’ve made pavlova in the past that by leaving it in the oven to cool it gets too brown. Would it be OK to leave the oven door open until it cools off a little bit from baking before closing it again and letting it cool completely?
I am anxious to try these in individual servings as I have only made one large one in the past. Thanks for all the extra time you spent in dissecting the details to construct the perfect pavlova.
Carly says
Love all the tips! If I wanted to make one big pavlova would the recipe need adjusting??
Rebecca says
Yes, indeedy! You’d want to bake it longer, but I don’t have an exact time for you… I’d check around 1 hour 15 minutes!
Rie says
Will be making this for sure this summer. Thank you so much for all the attention to detail and all the tips. I know it will be a success since it is from you. When I make them will be sure to come back and rate the recipe. xoxoxo
Rebecca says
Thanks so much, Rie! I can’t wait to hear what you think!
Barbara Schieving says
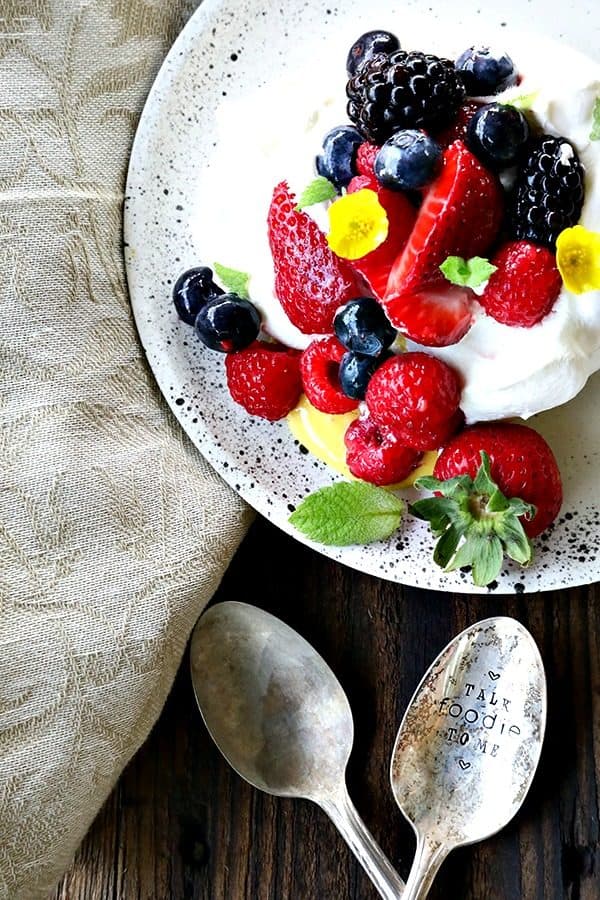
Gorgeous pictures! Love the foodie spoon. The delicious looks irresistible.
Mary says
I wish I had that plate in front of me now! And even more so, I wish I was sailing away with Princess today. Sigh. What a lovely dessert and a memory to make me smile.