If you like this One Hour Bread, visit our Bread Recipes page for more fantastic homemade breads!
Can you think of any scent more bewitching than that of fresh bread baking in the oven? It is nearly impossible to concentrate when I smell it.
While the bread bakes my brain rummages through its box of all my favorite ways to eat a loaf hot from the oven; Should it be blueberry jam? Cold butter?
Ginger marmalade? Or maybe a fried egg? A paper thin slice of salty ham? What sweet agony narrowing down those options.
And what a marvelous way to pass part of a morning; luxuriating in the brown yeasty aroma of dough transforming into the staff of life and contemplating that new loaf’s upcoming rapid demise.
If talk of bread fires up your salivary glands the way it does mine, you are in luck today, my friends. I have a recipe for an astonishingly flavorful yeast bread that is ready to be loaded up with whatever makes your fancy take flight in one hour flat.
From start to finish, from its Alpha to its Omega, from the time you dip that first scoop of flour to the time it is removed from the oven you will have spent sixty minutes; and most of that will have been baking time. There’s no crazy trick to it, it’s simply simple.
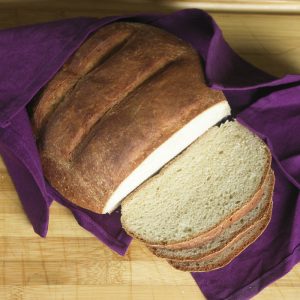
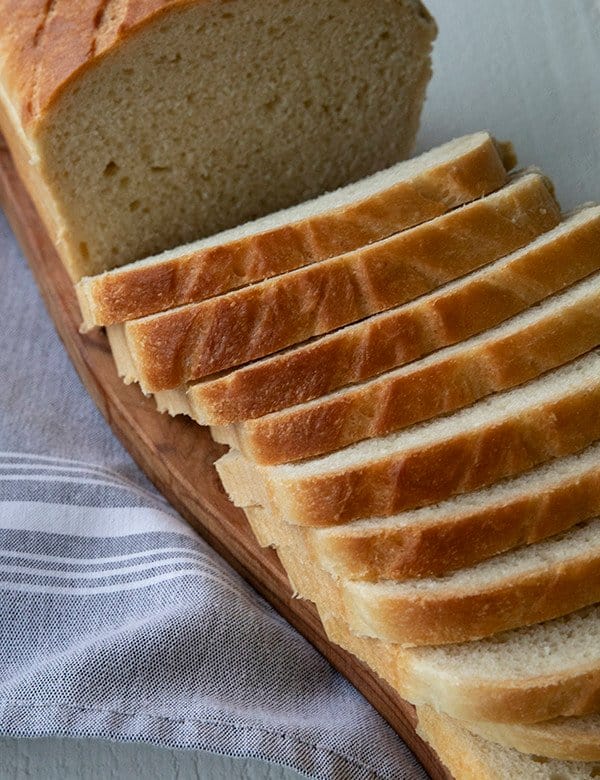
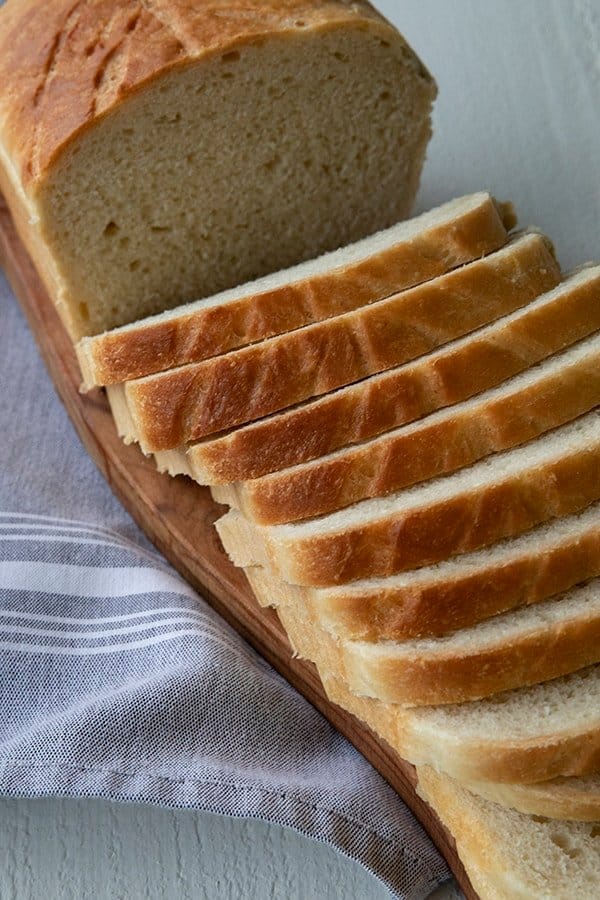
And this is a sandwich bread that is the stuff on which dreams are built; mouthwatering flavor, magnificently chewy crust, fine crumb interior, able to be sliced Texas toast thick or whisper thin and capable of holding anything you want to pile or slather on it. Just take a look at it.
If you have any fears about making yeast breads abandon them long enough to give this a try. Kiss those yeast-bread bogey monsters goodbye, because this is the easy bread recipe that will change your life.
You don’t need special equipment, or mad bread skills, or anything other than a big bowl and a spoon and a little counter space and the counter space is negotiable. I’ll give instructions for preparing this with a stand mixer, food processor and by hand.
And please note that it is just as easy as can be in all three methods. I do believe it’s time to revamp that old cliché, “It’s as easy as pie.”
From now on I’m going to say, “It’s as easy as One Hour Bread!” This sandwich bread recipe will be your old reliable before you know it.
Remember, too, that a last minute loaf of sandwich bread can make the meal or be the meal itself. It can be the difference between a lonely bowl of soup and a feast.
And more than that, this bread turns humble pantry staples into a reason to look forward to dinner. And while the taste and ease are enough, there is also the low price tag to recommend it.
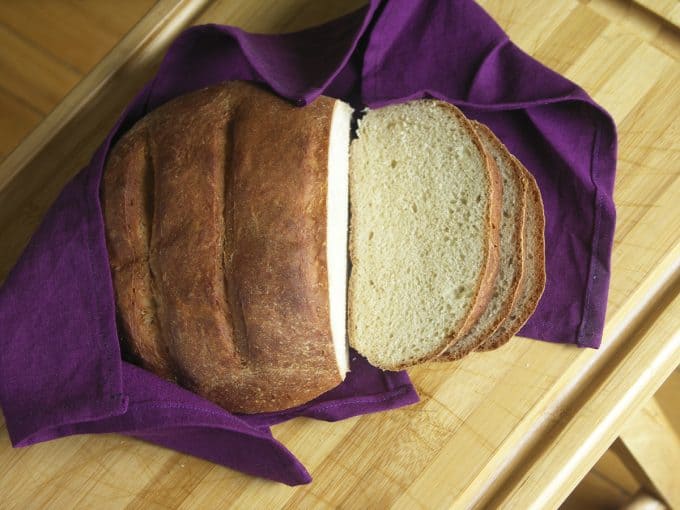
A few cups of flour, salt, sugar, yeast, water and it’s bread! And let me tell you something else, a loaf of this wrapped in a new tea towel makes a fantastic hostess gift. Who doesn’t like a loaf of warm bread?
Can I substitute whole wheat flour for all purpose flour in my one hour bread?
In short, yes- but this is a qualified yes. You can easily substitute 2 cups of whole wheat flour for all purpose flour in this sandwich bread recipe, but you may want to add an extra 10 minutes of rise time.
That’ll increase the overall time for the recipe, but considering that it means the bread takes 1 hour and 10 minutes instead of just 60 minutes, I’d say it’s fine.
No loaf pan? No problem.
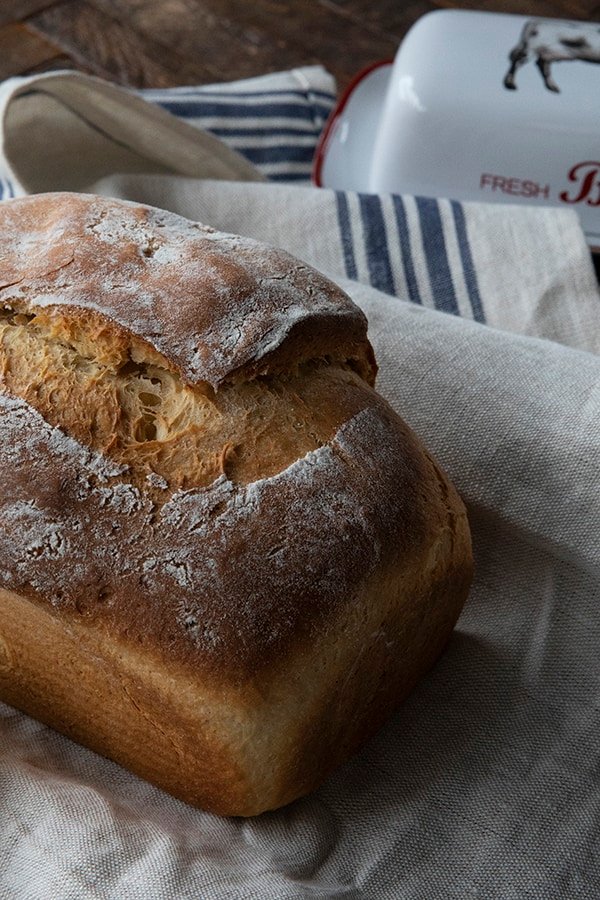
This bread can be formed into rounds and baked free-form or in loaf pans. Either is delicious.
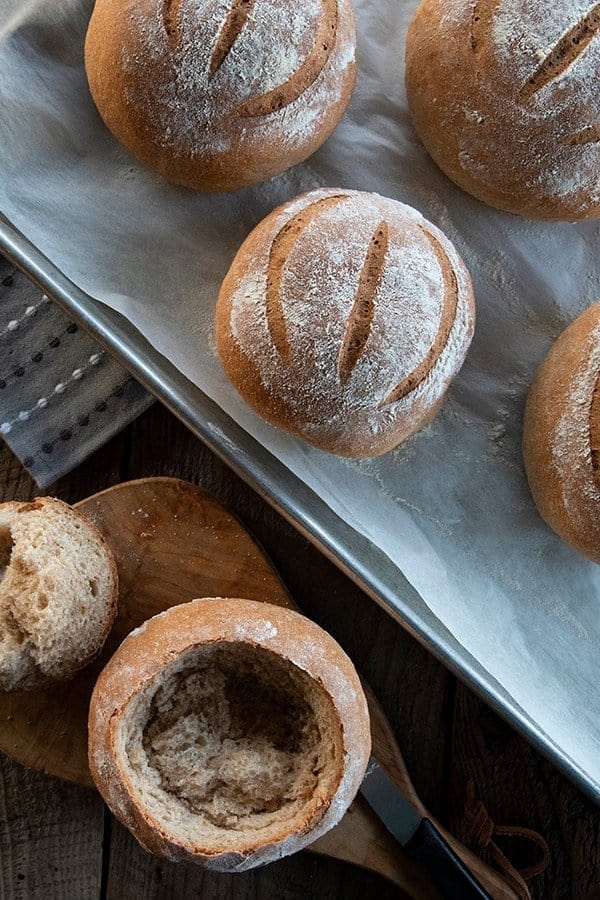
If you’re so inclined, you can even make mini bread bowls for soup or salad from it. Here are some instructions to do that.
That seems like a lot of yeast for two loaves of bread.
I know. It’s more than the average recipe, but it’s what gives this delicious recipe its speed. Trust me. It’s worth it.
Are you sure you mean to say start the sandwich bread in a cold oven?
I’m absolutely positive. This is another moment you’ll need to trust me. Part of the rise of this bread is IN the oven while the oven preheats.
Do not preheat your oven. It will adversely affect your results.
If you love this recipe, and want more like it, please check out my new cookbook “Ready, Set, Dough: Beginner Breads for All Occasions” which is available on Amazon, Barnes and Noble, and at at local retailers!
One Hour Bread
Mixing the dough by Stand Mixer (my preferred method):
Combine flour, instant yeast, sugar, and salt in the bowl of the stand mixer that has been fitted with a dough hook. Mix on low speed for 30 seconds.
With mixer running, slowly pour in the water and olive oil at the same time. Continue mixing on low until the dough comes together and becomes smooth, about 4 minutes.
Remove bowl from the stand mixer, scraping any dough that remains on the dough hook into the bowl. Pull dough from bowl with your hands and form a smooth dough ball. Replace in bowl, cover with a clean tea towel and let rise in a warm place for 15 minutes.
Mixing the dough by Food Processor:
Combine flour, instant yeast, sugar and salt in the bowl of a food processor that has been fitted with a blade or dough blade. Pulse 10 times.
With the food processer running, pour the water and olive oil into the feed chute. Continue processing until the dough forms a cohesive ball.
Spin the dough ball 20 times and shut off the food processor. Remove the dough, form a smooth dough ball and place in a lightly oiled mixing bowl. Cover with a clean tea towel and let rise in a warm place for 15 minutes.
Mixing the dough by Hand:
Combine flour, instant yeast, sugar and salt with a whisk or fork in a large mixing bowl. Pour the warm water and olive oil into the flour mixture and use a sturdy spoon to combine into a shaggy dough.
Use your hands to knead for 8 minutes*. After kneading for 8 minutes, cover the bowl with a clean tea towel and let rise in a warm place for 15 minutes.
*If you find it difficult to knead in the bowl, you can turn the dough out onto a clean surface to knead it. After kneading, just return the dough to the bowl and allow it to rise as instructed above.
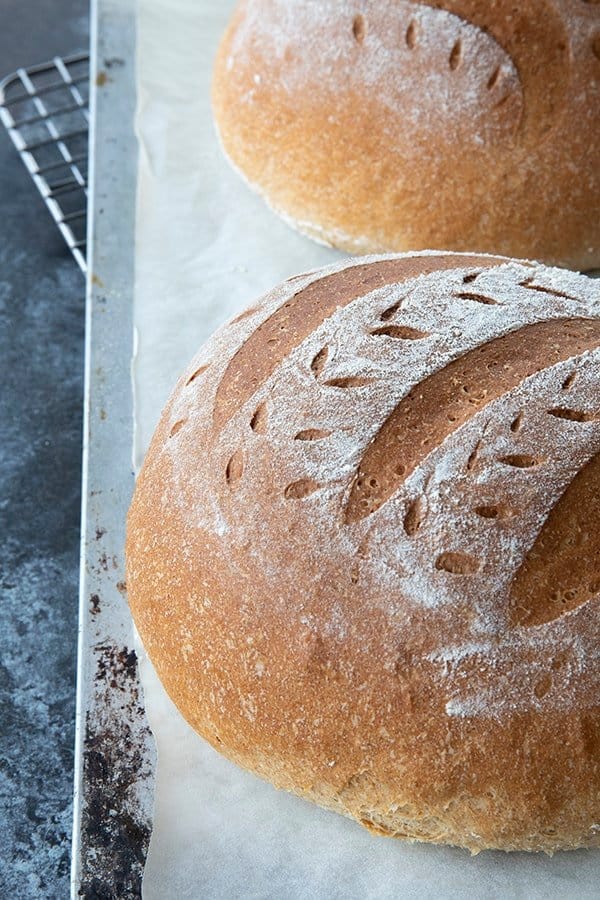
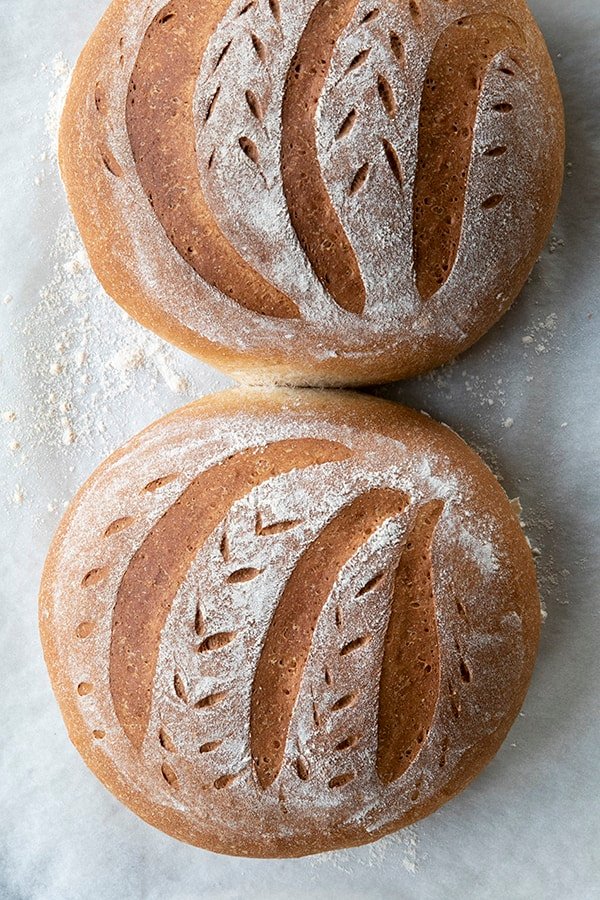
Turn dough out onto a clean surface and divide in half. Form each half into a ball and place 5-6 inches apart on a baking sheet that has been lined with parchment paper or a silpat, or has been lightly greased.
Use a sharp knife to slash the top of the loaf about ¼ of an inch deep. This allows the steam to escape the baking loaf.
To bake the loaves:
Arrange the racks in your cold oven so that one rack is on the very bottom and one is positioned in the center of the oven. Place the baking sheet with the loaves on the center rack and a bread or cake pan that is full of very hot tap water on the bottom rack.
Close the oven and turn your oven on to 400°F. It is imperative that you start this in a cold oven! Set your timer for 40 minutes. That 40 minutes is all that stands between you and fresh bread.
The crust should be a deep brown and quite firm when you remove the loaves from the oven. Transfer the loaves to a rack to cool completely if you wish to slice them, or you can do like I normally do and cool one loaf while tearing the second one into pieces and slathering with cold sweet cream butter.
One Hour Bread
Rate RecipeIngredients
- 6 cups all-purpose flour 1 pound, 9.5 ounces by weight
- 2 Tablespoons instant yeast also known as Bread Machine Yeast
- 2 Tablespoons sugar
- 1 Tablespoon Kosher salt if using table salt, reduce to 1 ½ teaspoons
- 2 cups very warm water about 120°F
- 2 Tablespoons extra virgin olive oil
Instructions
Mixing the dough by Stand Mixer (my preferred method):
- Combine flour, instant yeast, sugar, and salt in the bowl of the stand mixer that has been fitted with a dough hook. Mix on low speed for 30 seconds.
- With mixer running, slowly pour in the water and olive oil at the same time. Continue mixing on low until the dough comes together and becomes smooth, about 4 minutes. Remove bowl from the stand mixer, scraping any dough that remains on the dough hook into the bowl. Pull dough from bowl with your hands and form a smooth dough ball. Replace in bowl, cover with a clean tea towel and let rise in a warm place for 15 minutes.
Mixing the dough by Food Processor:
- Combine flour, instant yeast, sugar and salt in the bowl of a food processor that has been fitted with a blade or dough blade. Pulse 10 times. With the food processer running, pour the water and olive oil into the feed chute. Continue processing until the dough forms a cohesive ball. Spin the dough ball 20 times and shut off the food processor. Remove the dough, form a smooth dough ball and place in a lightly oiled mixing bowl. Cover with a clean tea towel and let rise in a warm place for 15 minutes.
Mixing the dough by Hand:
- Combine flour, instant yeast, sugar and salt with a whisk or fork in a large mixing bowl. Pour the warm water and olive oil into the flour mixture and use a sturdy spoon to combine into a shaggy dough. Use your hands to knead for 8 minutes*. After kneading for 8 minutes, cover the bowl with a clean tea towel and let rise in a warm place for 15 minutes.
- *If you find it difficult to knead in the bowl, you can turn the dough out onto a clean surface to knead it. After kneading, just return the dough to the bowl and allow it to rise as instructed above.
To Shape the Loaves
- Turn dough out onto a clean surface and divide in half. Form each half into a ball and place 5-6 inches apart on a baking sheet that has been lined with parchment paper or a silpat, or has been lightly greased. Alternatively, you can lightly grease two loaf pans. If using the loaf pans, please form each half into an oval roughly the size of the loaf pan before easing them into the pans.Use a sharp knife to slash the top of the loaf about ¼ of an inch deep. This allows the steam to escape the baking loaf.
To bake the loaves:
- Arrange the racks in your cold oven so that one rack is on the very bottom and one is positioned in the center of the oven. Place the baking sheet with the loaves on the center rack and a bread or cake pan that is full of very hot tap water on the bottom rack. Close the oven and turn your oven on to 400°F. It is imperative that you start this in a cold oven! Set your timer for 40 minutes. That 40 minutes is all that stands between you and fresh bread.
- The crust should be a deep brown and quite firm when you remove the loaves from the oven. Transfer the loaves to a rack to cool completely if you wish to slice them, or you can do like I normally do and cool one loaf while tearing the second one into pieces and slathering with cold sweet cream butter.
Nutrition
Nutritional information is an estimate and provided to you as a courtesy. You should calculate the nutritional information with the actual ingredients used in your recipe using your preferred nutrition calculator.
did you make this recipe?
Make sure to tag @foodiewithfam on Instagram and #hashtag it #foodiewithfamily so I can check it out!
Originally published April, 2010. Updated with new photos and improved notes in March 2020.



Reader's Thoughts...
Jennifer says
Just pulled this out of the oven. We are going to do as you suggest. Cool one for slicing and devour one now ; )
Rebecca says
Wonderful! I cannot even wait to hear what you think! Thanks for taking the time to rate the recipe. 🙂
Pat says
How wet/tacky should the dough be? After it was mixed and seemed to be getting pretty smooth, the dough seemed to be tackier than I would have thought to try to form a ball.
Rebecca says
Hmmm. It should be post it note level tacky, Pat. Perhaps flour your hands before trying to form a ball. 🙂
Pat says
Thanks!
K Ann Guinn says
I had a terrible time with the stickiness and thought I should flour my hands next time, yet it still came out wonderfully!
K Ann Guinn says
You, my friend, are a genius!
I was just in the supermarket (after waiting a few days for the initial virus hysteria and hoarding to slow down) and noticed that bread was very low. I reluctantly took one loaf, but wanted to leave the rest for others, knowing I can bake some at home.
I haven’t baked much bread (yeast bread, that is; I’m good with quick breads), except in my bread-maker, but it’s a skill I’d love to work on. This is a perfect starter recipe that sounds almost foolproof.
Perfect timing. 🙂
Rebecca says
Thank you!! <3 This is a time-tested, proven recipe that is super easy! If you feel bucked up by it, you should grab my new book because there's an entire chapter of one hour breads to ease you in, then you can move on to the other ones. They're all pretty easy, but the 1 hour breads are the easiest.
K Ann Guinn says
And now the REAL five stars, as I’ve actually successfully baked this!
I even made one mistake, one substitution, and an accidental substitution: 1)got distracted trying to determine if Himalayan salt was OK to use, then totally forgot until the dough was partly risen; threw it back in the mixer for a couple of minutes with salt and let it rise for a shorter time, 2)used bread flour for 4 cups of regular (can’t find regular flour in the crazy stores yet), and 2) also forgot that the 2 cups of whole wheat flour I subbed in were actually ww pastry flour…..yet the loaves came out nice, tasty and a good texture, anyway. It’s a bread miracle! (Now to see if it feeds 5000…)
I’m quite sure this will be a new and regular favorite. We are hacking into one warm loaf as you suggested. Thanks again for sharing!
Rebecca says
HAHA! And it still worked after all that. If that isn’t a glowing review, I don’t know what is! <3
Joan says
Hi Rebecca,
I am home the day after New Years without any bread in my house and it’s too rainy to go out and buy bread. It was between you and Sally’s Baking Addiction, but you won because yours takes only an hour and hers was more than 3. lol. I will let you know how it turns out. By the way, I raised 5 kids, but only two were boys. I can just imagine how hard it is to fill up 5 boys. My boys would gobble up dinner and 30 minutes later be standing in front of an open fridge looking for more. Aaaagh. I baked every day, but the sun never set on a cookie.
Rebecca says
They’re bottomless pits, aren’t they, Joan? I hope you enjoyed the bread!!
js says
Ate this till I was dizzy, it’s so good it should be illegal haha.
I made it in two large loaf pans, came out great.
Jan B. says
Yeast question: how does “2 Tablespoons Instant Yeast” translate into the little packets? The packets say that 3 of them =6 3/4 tsp. or one 2 oz. yeast cake. Should I use 3 packets per batch? (This is my first time using instant yeast.) Thanks!
Rebecca says
Hi Jan- Each packet has 2 1/4 teaspoons, so my advice is to tear open the packets and measure them into a tablespoon measuring spoon. It’ll take just shy of three packets to fill the measuring spoon twice. 🙂
Chris says
I just have to say, i’ve made a lot of different breads from recipes on the internet, king arthur etc. This recipe just plain works. It makes delicious bread, and in record time. It’s now my go-to, I love it. Making it right now for the third time. I will most likely make this forever. Thanks so much!
Rebecca says
That makes me so darned happy, Chris! Thank you for taking the time to tell me. 🙂
Chas says
I do not usually comment on recipes that I try, even when they work beautifully for me – and honestly, I do not always follow them exactly as they are written. Nonetheless, I have to say to anyone reading this recipe that it actually works. No. Seriously. It actually works – in 1.5 hours (I ignored my dough for a moment dealing with a family issue….you understand, I know) I went from measuring flour to taking beautiful loaves of bread from the oven. Thank you for this recipe, and I will look forward to making it and others of your recipes again and again.
Rebecca says
Thanks, Chas! You made my day and I’m so glad you had such success with it!
Esther says
Great recipe! Works – as is – at 3000 above sea level! Do you have any recommendations for adding in other flours, such as whole wheat pastry flour, etc?
Rebecca says
Hi Esther- I’m so glad it works well for you! I don’t recommend using pastry flour in the bread as it has a very low protein content and will greatly lower the gluten in it making the crumb less desirable. You could play with subbing in a cup or two of white whole wheat flour for some of the all-purpose flour. I’ve done that before and enjoyed the results.
Esther says
Sounds like an idea. Thank you!
Meshe says
I found my dough really slack, would next time I add more flour or less water… I did KA by weight
Rebecca says
Hi Meshe-
I would add flour a tablespoon at a time. Humidity can effect the dough, so it’s best to start with the given amounts and augment as necessary. 😀
Meshe says
thanks tried again today with same results so might be my flour, baking area around 48-50% humidity depending on the gauge, flour kept in air tight containers… will give it another try later when I buy more flour
Rebecca says
It’s almost always okay to add a bit more flour to make it workable if you need to, Meshe. This is a very forgiving recipe, so add as needed.
Barb Ferretti says
Hi, I just made this bread this afternoon to go with a ham I’ve got in the crockpot. The bread is absolutely amazing! I think it’s the best (not to mention fastest) bread I have ever made! Thank you so much!
Pam says
Can this be made in a bread machine?
Rebecca says
Hi Pam- I’ve never tried it in a bread machine. I would love to know the results if you do!
karin says
Hey there! Love this recipe. I was wondering if any modifications have to be made if I wanted to bake them in bread pans.
Thanks!
Rebecca says
Hi Karin- You’ll definitely want to watch the time and maybe even tinker with the temperature if you’re switching to a bread pan. I can’t advise you as to how much time/temp differences you’ll need, but just observe while you go!
Crystal says
Made this yesterday. It worked beautifully! Also, just for the sake of information: I made these in 2 medium loaf pans with no problem whatsoever.
Thanks 🙂
Nahila says
I am so glad to have found this recipe, but it was too dense. I used a mix of sprouted whole wheat and white flour. Any suggestions for next time? Have you ever worked with sprouted wheat in your bread recipes?
Rebecca says
Hi Nahlia- Having not been in your kitchen when you made the bread, it’s a little hard for me to nail down what went awry, but I can throw a couple of ideas out there. I suspect that the culprit for the density issue may have been the sprouted wheat. This recipe was engineered to be made with white whole wheat or standard whole wheat flour. I have not tested it with the sprouted wheat. Do you measure your flour by volume or by weight? Volume measurements often vary wildly, making it possible to have included more flour in the recipe than was specified, too. That is another common issue when bread comes out too dense.
Cheers,
Rebecca
Deitan says
Love this! I’ve made it a lot, great if I am in need of some bread to make sandwiches for lunch and realize I’m out of bread. Mine turns out much crustier than the pic, but we love it that way! Thank you, Rebecca!
Amy says
Just made this tonight & it came out great! I read the comments and eating a warm slice right out of the oven with butter and honey was heaven!
I loved that the recipe made 2 loaves—one for me and one as a surprise gift for our neighbour. Thank you for sharing a fabulous and easy recipe!
Donnisha says
Finally, someone realizes that we all do not have those lovely stand mixers or even a food processor and posts a recipe that includes by hand directions. Thank you, thank you, thank you. I’m traveling to visit my best friend next week and this will be prefect for us to make together.
Will says
Little bit less salt and 1/4 cup of honey sub for all sugar . Perfection. I didn’t know if the rapid yeast packets I had would work. tried it. nailed it. best. recipe. ever. #dinnerpartyhero
Will says
if i want to sweeten it up can I add in extra sugar or what I’d love to do is replace sugar with loads of honey!
Rebecca says
It’s always worth a shot! It’s not a huge time or cost investment. Let me know how it works for you if you do try it!