If you like this One Hour Bread, visit our Bread Recipes page for more fantastic homemade breads!
Can you think of any scent more bewitching than that of fresh bread baking in the oven? It is nearly impossible to concentrate when I smell it.
While the bread bakes my brain rummages through its box of all my favorite ways to eat a loaf hot from the oven; Should it be blueberry jam? Cold butter?
Ginger marmalade? Or maybe a fried egg? A paper thin slice of salty ham? What sweet agony narrowing down those options.
And what a marvelous way to pass part of a morning; luxuriating in the brown yeasty aroma of dough transforming into the staff of life and contemplating that new loaf’s upcoming rapid demise.
If talk of bread fires up your salivary glands the way it does mine, you are in luck today, my friends. I have a recipe for an astonishingly flavorful yeast bread that is ready to be loaded up with whatever makes your fancy take flight in one hour flat.
From start to finish, from its Alpha to its Omega, from the time you dip that first scoop of flour to the time it is removed from the oven you will have spent sixty minutes; and most of that will have been baking time. There’s no crazy trick to it, it’s simply simple.
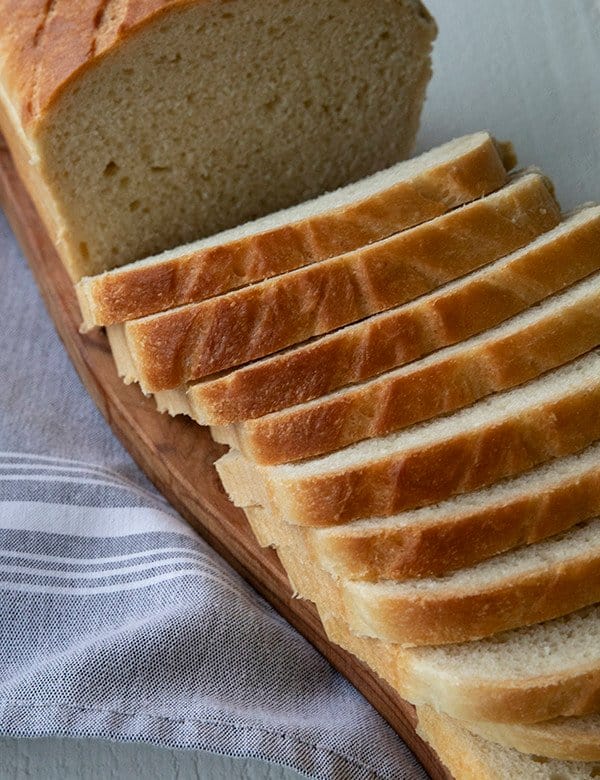
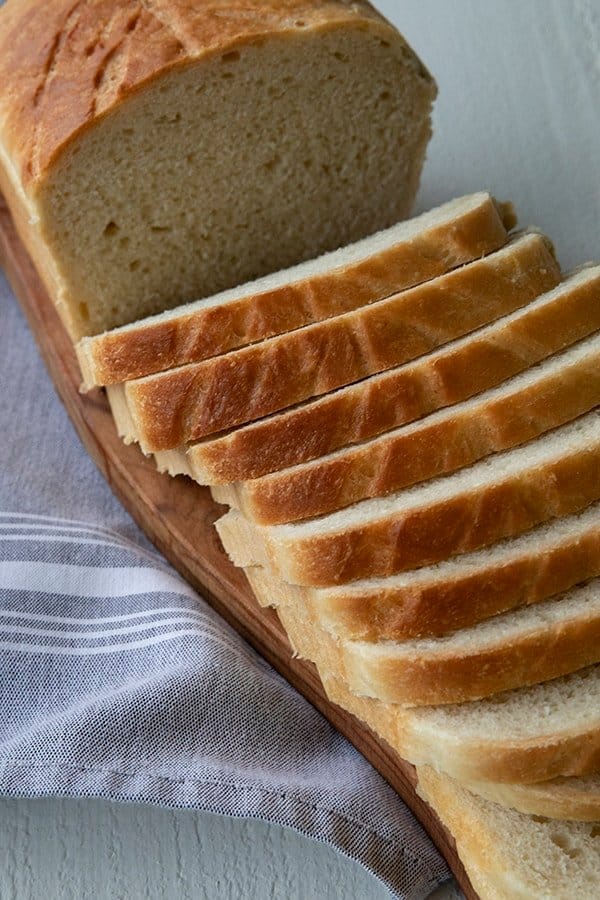
And this is a sandwich bread that is the stuff on which dreams are built; mouthwatering flavor, magnificently chewy crust, fine crumb interior, able to be sliced Texas toast thick or whisper thin and capable of holding anything you want to pile or slather on it. Just take a look at it.
If you have any fears about making yeast breads abandon them long enough to give this a try. Kiss those yeast-bread bogey monsters goodbye, because this is the easy bread recipe that will change your life.
You don’t need special equipment, or mad bread skills, or anything other than a big bowl and a spoon and a little counter space and the counter space is negotiable. I’ll give instructions for preparing this with a stand mixer, food processor and by hand.
And please note that it is just as easy as can be in all three methods. I do believe it’s time to revamp that old cliché, “It’s as easy as pie.”
From now on I’m going to say, “It’s as easy as One Hour Bread!” This sandwich bread recipe will be your old reliable before you know it.
Remember, too, that a last minute loaf of sandwich bread can make the meal or be the meal itself. It can be the difference between a lonely bowl of soup and a feast.
And more than that, this bread turns humble pantry staples into a reason to look forward to dinner. And while the taste and ease are enough, there is also the low price tag to recommend it.
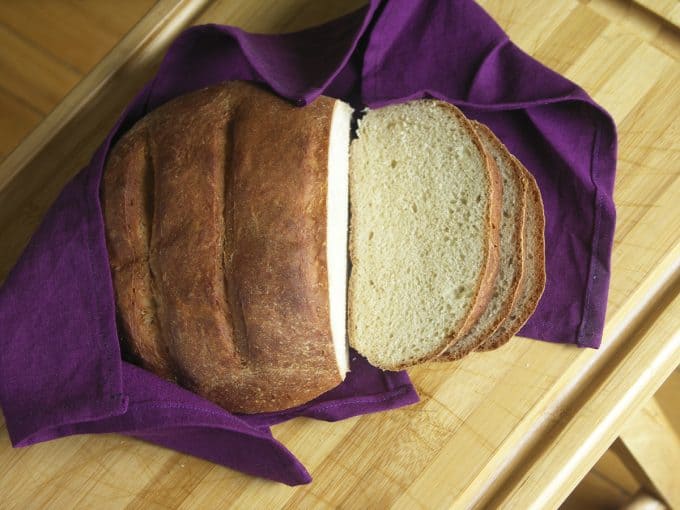
A few cups of flour, salt, sugar, yeast, water and it’s bread! And let me tell you something else, a loaf of this wrapped in a new tea towel makes a fantastic hostess gift. Who doesn’t like a loaf of warm bread?
Can I substitute whole wheat flour for all purpose flour in my one hour bread?
In short, yes- but this is a qualified yes. You can easily substitute 2 cups of whole wheat flour for all purpose flour in this sandwich bread recipe, but you may want to add an extra 10 minutes of rise time.
That’ll increase the overall time for the recipe, but considering that it means the bread takes 1 hour and 10 minutes instead of just 60 minutes, I’d say it’s fine.
No loaf pan? No problem.
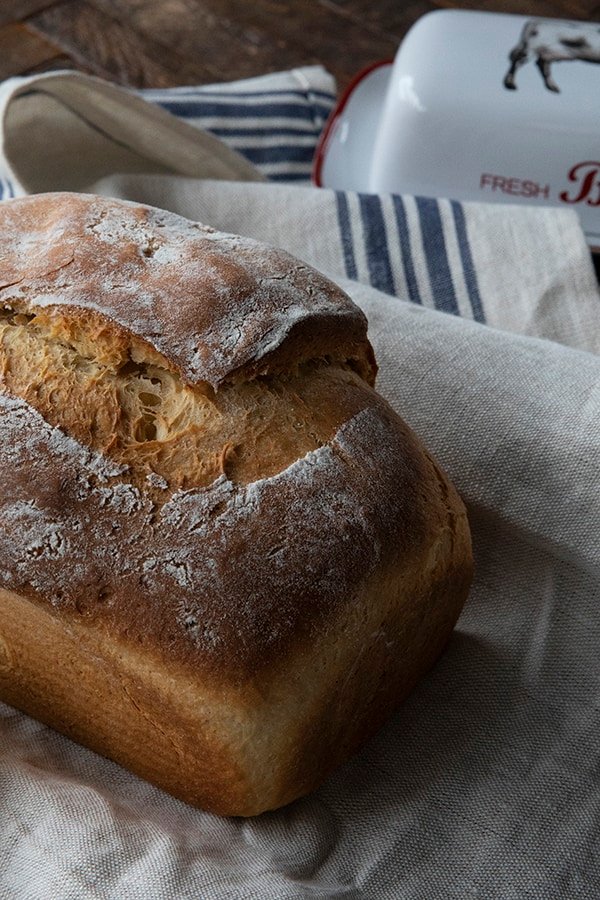
This bread can be formed into rounds and baked free-form or in loaf pans. Either is delicious.
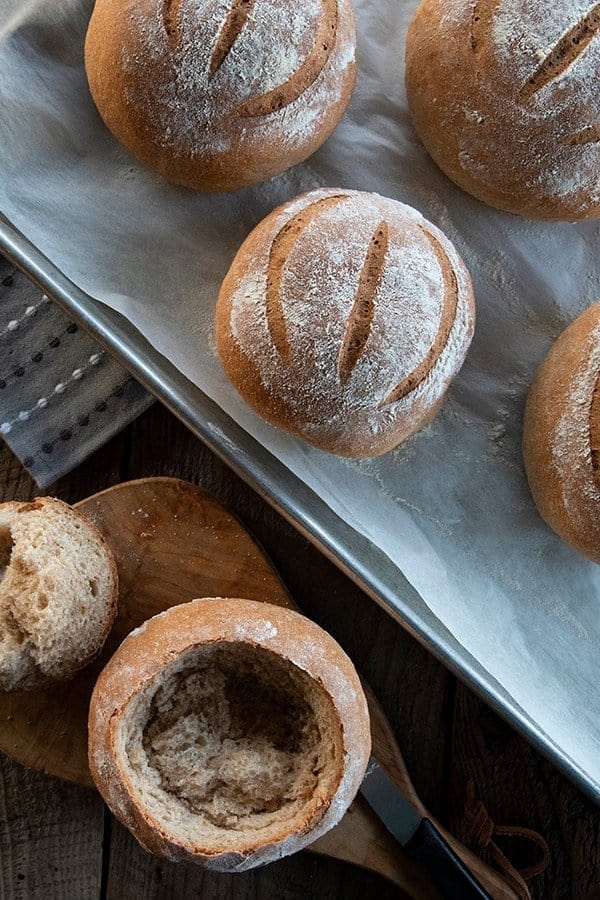
If you’re so inclined, you can even make mini bread bowls for soup or salad from it. Here are some instructions to do that.
That seems like a lot of yeast for two loaves of bread.
I know. It’s more than the average recipe, but it’s what gives this delicious recipe its speed. Trust me. It’s worth it.
Are you sure you mean to say start the sandwich bread in a cold oven?
I’m absolutely positive. This is another moment you’ll need to trust me. Part of the rise of this bread is IN the oven while the oven preheats.
Do not preheat your oven. It will adversely affect your results.
If you love this recipe, and want more like it, please check out my new cookbook “Ready, Set, Dough: Beginner Breads for All Occasions” which is available on Amazon, Barnes and Noble, and at at local retailers!
One Hour Bread
Mixing the dough by Stand Mixer (my preferred method):
Combine flour, instant yeast, sugar, and salt in the bowl of the stand mixer that has been fitted with a dough hook. Mix on low speed for 30 seconds.
With mixer running, slowly pour in the water and olive oil at the same time. Continue mixing on low until the dough comes together and becomes smooth, about 4 minutes.
Remove bowl from the stand mixer, scraping any dough that remains on the dough hook into the bowl. Pull dough from bowl with your hands and form a smooth dough ball. Replace in bowl, cover with a clean tea towel and let rise in a warm place for 15 minutes.
Mixing the dough by Food Processor:
Combine flour, instant yeast, sugar and salt in the bowl of a food processor that has been fitted with a blade or dough blade. Pulse 10 times.
With the food processer running, pour the water and olive oil into the feed chute. Continue processing until the dough forms a cohesive ball.
Spin the dough ball 20 times and shut off the food processor. Remove the dough, form a smooth dough ball and place in a lightly oiled mixing bowl. Cover with a clean tea towel and let rise in a warm place for 15 minutes.
Mixing the dough by Hand:
Combine flour, instant yeast, sugar and salt with a whisk or fork in a large mixing bowl. Pour the warm water and olive oil into the flour mixture and use a sturdy spoon to combine into a shaggy dough.
Use your hands to knead for 8 minutes*. After kneading for 8 minutes, cover the bowl with a clean tea towel and let rise in a warm place for 15 minutes.
*If you find it difficult to knead in the bowl, you can turn the dough out onto a clean surface to knead it. After kneading, just return the dough to the bowl and allow it to rise as instructed above.
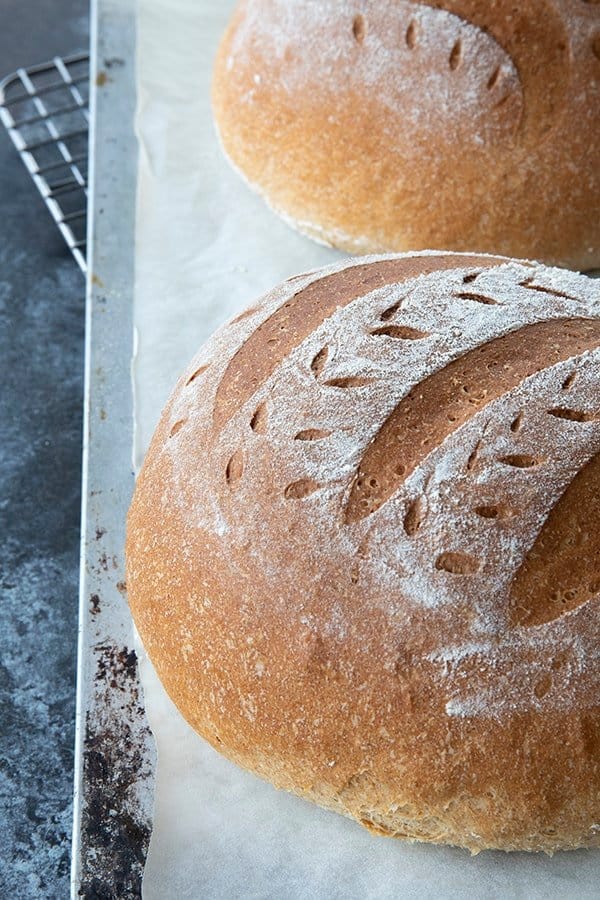
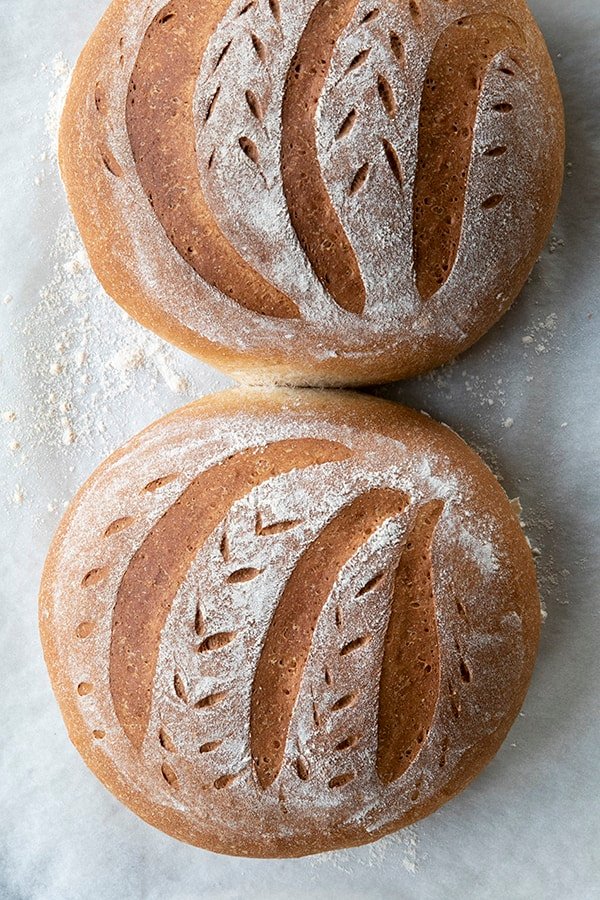
Turn dough out onto a clean surface and divide in half. Form each half into a ball and place 5-6 inches apart on a baking sheet that has been lined with parchment paper or a silpat, or has been lightly greased.
Use a sharp knife to slash the top of the loaf about ¼ of an inch deep. This allows the steam to escape the baking loaf.
To bake the loaves:
Arrange the racks in your cold oven so that one rack is on the very bottom and one is positioned in the center of the oven. Place the baking sheet with the loaves on the center rack and a bread or cake pan that is full of very hot tap water on the bottom rack.
Close the oven and turn your oven on to 400°F. It is imperative that you start this in a cold oven! Set your timer for 40 minutes. That 40 minutes is all that stands between you and fresh bread.
The crust should be a deep brown and quite firm when you remove the loaves from the oven. Transfer the loaves to a rack to cool completely if you wish to slice them, or you can do like I normally do and cool one loaf while tearing the second one into pieces and slathering with cold sweet cream butter.
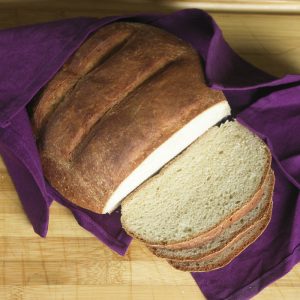
One Hour Bread
Rate RecipeIngredients
- 6 cups all-purpose flour 1 pound, 9.5 ounces by weight
- 2 Tablespoons instant yeast also known as Bread Machine Yeast
- 2 Tablespoons sugar
- 1 Tablespoon Kosher salt if using table salt, reduce to 1 ½ teaspoons
- 2 cups very warm water about 120°F
- 2 Tablespoons extra virgin olive oil
Instructions
Mixing the dough by Stand Mixer (my preferred method):
- Combine flour, instant yeast, sugar, and salt in the bowl of the stand mixer that has been fitted with a dough hook. Mix on low speed for 30 seconds.
- With mixer running, slowly pour in the water and olive oil at the same time. Continue mixing on low until the dough comes together and becomes smooth, about 4 minutes. Remove bowl from the stand mixer, scraping any dough that remains on the dough hook into the bowl. Pull dough from bowl with your hands and form a smooth dough ball. Replace in bowl, cover with a clean tea towel and let rise in a warm place for 15 minutes.
Mixing the dough by Food Processor:
- Combine flour, instant yeast, sugar and salt in the bowl of a food processor that has been fitted with a blade or dough blade. Pulse 10 times. With the food processer running, pour the water and olive oil into the feed chute. Continue processing until the dough forms a cohesive ball. Spin the dough ball 20 times and shut off the food processor. Remove the dough, form a smooth dough ball and place in a lightly oiled mixing bowl. Cover with a clean tea towel and let rise in a warm place for 15 minutes.
Mixing the dough by Hand:
- Combine flour, instant yeast, sugar and salt with a whisk or fork in a large mixing bowl. Pour the warm water and olive oil into the flour mixture and use a sturdy spoon to combine into a shaggy dough. Use your hands to knead for 8 minutes*. After kneading for 8 minutes, cover the bowl with a clean tea towel and let rise in a warm place for 15 minutes.
- *If you find it difficult to knead in the bowl, you can turn the dough out onto a clean surface to knead it. After kneading, just return the dough to the bowl and allow it to rise as instructed above.
To Shape the Loaves
- Turn dough out onto a clean surface and divide in half. Form each half into a ball and place 5-6 inches apart on a baking sheet that has been lined with parchment paper or a silpat, or has been lightly greased. Alternatively, you can lightly grease two loaf pans. If using the loaf pans, please form each half into an oval roughly the size of the loaf pan before easing them into the pans.Use a sharp knife to slash the top of the loaf about ¼ of an inch deep. This allows the steam to escape the baking loaf.
To bake the loaves:
- Arrange the racks in your cold oven so that one rack is on the very bottom and one is positioned in the center of the oven. Place the baking sheet with the loaves on the center rack and a bread or cake pan that is full of very hot tap water on the bottom rack. Close the oven and turn your oven on to 400°F. It is imperative that you start this in a cold oven! Set your timer for 40 minutes. That 40 minutes is all that stands between you and fresh bread.
- The crust should be a deep brown and quite firm when you remove the loaves from the oven. Transfer the loaves to a rack to cool completely if you wish to slice them, or you can do like I normally do and cool one loaf while tearing the second one into pieces and slathering with cold sweet cream butter.
Nutrition
Nutritional information is an estimate and provided to you as a courtesy. You should calculate the nutritional information with the actual ingredients used in your recipe using your preferred nutrition calculator.
did you make this recipe?
Make sure to tag @foodiewithfam on Instagram and #hashtag it #foodiewithfamily so I can check it out!
Originally published April, 2010. Updated with new photos and improved notes in March 2020.



Reader's Thoughts...
Cindy M Schneider says
Made this 1 hour bread today. WOW was it ever easy!
Came out of the oven looking like a delicious loaf of bread.
Wish I could post a picture.
Paired it with spaghetti and it was perfect
Rebecca says
Thanks so much for taking the time to rate the recipe and let me know you love it, Cindy!
Mary says
Thanks so much for this! My six year old likes to bake, and I was looking for an easy loaf recipe she could use for a 4H competition. I saw the “bread in a bag” recipes but hate to waste plastic like that. This recipe is perfect! We used the stand mixer, so it was even easier than making cookies and she could be almost totally independent (with some measuring help from me.)
We did use active yeast and hydrated it with half of the water and the sugar before following the rest of the recipe as written. I couldn’t believe how much the dough rose!
Rebecca says
Thanks so much for taking the time to let me know that you loved it and for rating the recipe! I’m so glad you and your daughter love this. And I’d love to challenge you to try it again without rehydrating the yeast for the sake of scientific inquiry. 🙂 It is crazy how this loaf defies convention and rises even without that first step! I’d love to hear your take on it if you give it a go.
Jennifer says
Decided to have Prime rib sandwiches after Christmas and made this bread for them. Fabulous! I was just asked to make some more and I make lots of breads. Thanks for the recipe!
Rebecca says
Thanks so much for taking the time to rate the recipe and let me know that you love it, Jennifer! I greatly appreciate it and am so glad you love it!
Mindy says
I made the bread and while making it the dough was so stiff that I knew I was not going to like it. It took almost 45 minutes to raise and I was so disappointed. Followed the baking directions and this is some of the best I have ever made! Definitely will make it more. Thank you
Rebecca says
Hi Mindy! I’m glad the bread surprised you. 🙂 Thanks for taking the time to let me know!
TraceyMichelle says
This was such a wet dough, but it wasn’t sticky. I baked one half as instructed and the other I added another cup or so of flour and it was still wet, but I didn’t want to go too far off the recipe or overwork it since I used a mixer.
Needs more salt, very basic flavor but would do when all stores are sold out like the ones are around me tonight.
Could be my I experience, but this is a very wet heavy loaf. I will try again but reserve liquid and combine & knead by hand to work it better. Maybe even a second rise.
Don’t mean to sound mad, this is new to me however I’ve been reading to start for years…life is learning! Obviously I have more to learn!
Rebecca says
Hi Tracey- How did you measure your flour? Did you measure by weight or volume? If by volume, did you use a measuring cup designed for dry goods? And did you scoop the flour in with a spoon then level it without shaking it?
I will say this is not going to be the same texture as white bread from the grocery stores. It’s much more substantial, but wet and heavy are not how I would describe it, so I think something went awry for you.
As for the second rise, I don’t advise it. This dough has a lot of yeast to give it a fast rise both in the bowl and in the oven. If you try a second rise, it will likely put the yeast past the peak of action when it goes into the oven, which may result in an over-proofed dough or one that just doesn’t get the same spring in the oven.
My advise is first to tackle how you measured the flour, then maybe we can trouble shoot more from there. As for salt, feel free to add a little more, but I’d caution against adding too much as that, too, affects the activity of the yeast. If you’d like, you can sprinkle a little coarse salt on top of the crust after you slash it to add some crunch and flavour.
Shara Cooper says
This is not a wet dough at all. I make a lot of high hydration bread, but I needed something quick tonight. It was pretty good! Perhaps my “in a pinch” bread lol.
The dough was actually really soft, smooth and pliable. It was fun to work with.
PattiAnn says
Hi Rebecca,
Read your post and read the recipe in your book. But I can’t find an explanation for the pan of water in the oven. Is this just to make a crisp crust? I usually bake my bread in a Romertopf clay baker, always start in a cold oven. We are not fans of crispy crust, I guess age does that to you, soft crust easier on your teeth.
I will try your recipe in my tried and true Romertopf. I think it will be good.
Also I do like your book, but I convert everything to grams for more accurate measuring.
Thanks for you blog too and I follow you on FB.
PattiAnn
Rebecca says
Thank you, PattiAnn! Please let me know how your Romertopf works out with this recipe! The steam helps both the crust and the oven spring, so I’m curious as to how it’ll go!
Louise says
Good recipe for a quick sandwich loaves. Mine burned on top. I recommend covering the loaves with foil during the entire 40 minute bake. I also lowered the baking rack down one from the middle. Next time I will switch to melted butter instead of oil for a little more flavor.
Rebecca says
Hi Louise! Thanks for letting me know how it worked out for you! It sounds like you either have perhaps a smaller oven than mine or a hot spot in there. I have made these loaves probably hundreds of times by this point and never had one burn. 🙂 I’m glad you figured out a way to make it work for you, though!
Debra says
This is a family favorite. I make this often. It is easy to half the recipe also. Usually I make the full recipe, freezing the extra loaf.
Rebecca says
I’m so glad you took the time to rate the recipe and let us know you love it, Debra! Thank you!
Ellen Henry says
cant wait to try it I usually love your recipes.. though the sushi casserole met with mixed reviews
Rebecca says
I guess I can’t win them all 🙂 My crew and the friends who’ve had it with us love the sushi bake, but sushi is polarizing even in its purest form. 🙂 Anyhoo, this one hour bread is a no-fail one. 🙂 Well, unless you’re feeding it to someone who is gluten intolerant which would be all sorts of not okay. 🙂
Eric W says
This recipe is amazing, truly a one hour from-scratch bread that’s moist, with a beautiful crumb. Saved me after I bombed a much more involved bake, and this was as good or better than the more time consuming recipe. Thank you!
Rebecca says
Thanks so much for taking the time to let me know this worked so well for you, Eric! I truly appreciate it! And it’s wild how something so fast can end up being so tasty, right?
Liz says
The only time you mention rise time is “let rise in a warm place for 15 minutes”.
Just double checking that this bread only needs 15 minutes to rise?
Thanks
Rebecca says
That’s right on, Liz! I know it seems counterintuitive, but that’s correct!
Sonya says
So easy and so yum!! Thank you! 🙂
Indigo Perry says
Loved this! I don’t eat bread often, but when I do I like to make it fresh, so was looking for a quick recipe. Didn’t have enough AP flour, made it up with ground oatmeal. Dough was sticky, but rose fine, and taste and texture were great. Be sure to grease the loaf pan well so the bread pops out at the end of cooking, and also it makes the edges crispier. Definitely a keeper, thank you for the recipe.
Rebecca says
Thanks so much for taking the time to rate the recipe and let me know you love it, Indigo! I so appreciate it. And I love the oatmeal idea!
Lauren says
This is a great recipe. Thank you, Rebecca! You saved the day with this recipe. Forgot bread at the store yesterday and I have 7 children to feed.
Leaving a comment here for anyone else who may be scanning comments like I was, to see if this recipe would work using active yeast. It does! And with only slight variations and increased time.
I will note what I did to hopefully take guesswork out. Activate yeast in one cup of the warm water and add the sugar to it. Measure/ weigh flour and add the salt. Pour in the yeast mixture with the rest of the warm water and olive oil. Follow recipe’s instructions for kneading. Cover with damp towel let rise in a warm place for *30* minutes (I always turn the oven on for one minute , then turn it off). Follow recipe’s instruction for shaping dough and baking.
I did 2 loaf pans and it worked well changing temp to 375 (still did the hot water pan underneath the loaves and put them in the cold oven) and baking for 40 minutes.
Rebecca says
Thanks so much for taking the time to rate the recipe and let me know you love it like we do! I’m so glad you shared your work. I can promise that active dry yeast works quite well in this recipe and you did exactly the right thing to confirm it, but you can skip that next time if you’d like! xoxoxxo
Helen | WelshMumWrites.com says
Oh my gosh I’ve been looking for a quick bread recipe for ages and this looks perfect. I like the way you’ve shown different methods. We have a teeny kitchen (not atypical in the Uk) and don’t have room to leave a mixer out on top of everything else. I’m using to making bread by hand so going to give this a try.
Rebecca says
Thanks so much, Helen! I hope you end up loving this bread as much as we do. 🙂
Caity Smyck says
I never leave reviews for recipes. Like this is literally the first one ever for me and I use recipes I find on line pretty much everyday.
This is the best recipe I have used for bread. I have made a lot of bread in many different ways and this is the best one I have come across when you take into consideration the time and work involved in making it. I have used this recipe over half a dozen times now and each time I have had excellent results. It is light, full of flavour, easy to make and quick to whip up when you want a sandwich.
Thank you so much for sharing this!
Rebecca says
You made my day, Caity! I’m so glad both that you love it and took the time to rate and review my recipe. 🙂 If you’re a fan of this, you should check out my new bread cookbook “Ready, Set, Dough! Beginner Breads for All Occasions.” There’s a whole chapter of one-hour breads!
Leah says
Super simple and super delicious. I love that my family can wake up to fresh bread waiting for them tomorrow morning. I made half of the recipe because I only have a single loaf pan, and it is absolutely amazing. Thank you!!
Rebecca says
I’m so glad you love it, Leah! Thanks for taking the time to rate the recipe and let me know. xoxo
Paul says
Hello! Would this recipe work if one were to replace 100% of the all purpose flour with whole wheat flour (so that the bread would be 100% whole wheat)?
Rebecca says
Hi Paul- I don’t advise making this into a 100% whole wheat recipe. You could sub up to 2 cups of whole wheat for the all-purpose flour, but a higher proportion of whole wheat will not work in the one-hour method. It’ll yield a dense, hockey-puck of a loaf, unfortunately.
Mary Hastings says
If I make four smaller loaves from this recipe would the baking time change?
Rebecca says
Hi Mary- four small loaves is a great idea. I’d only reduce the time by 5 minutes. 🙂
GermanGal says
This German gal living in the US misses the bread the most but with this recipe she doesn’t have to anymore! Only our favorite bread recipes are printed and added to a folder for easy access and I am happy to say this one made “the print”. Yesterday morning we made French Toast with it and it was delicious!! This morning, we toasted some slices and enjoyed it with Nutella. Thanks for this wonderful recipe! Btw…the first time I baked I missed the part where it says to let it rise for 15 minutes and I also let it bake about 10 min longer to get some more color. Immediately after taking out the bread I brushed the crust with cold water. Makes it even crispier!;)
Rebecca says
Thank you, Nina!!! I’m so glad you loved it and it reminded you of good German bread! My son spent a year in Deutschland as an Au Pair, and loved the bread there. Love the water tip. You are so right!