If you like this tutorial on How to Make Buttermilk Biscuits, visit our Bread Recipes page for more fantastic homemade breads.
There are times when nothing but a biscuit will do. Drop biscuits are okay; they can fill in the gaps when you are desperate and short on time.
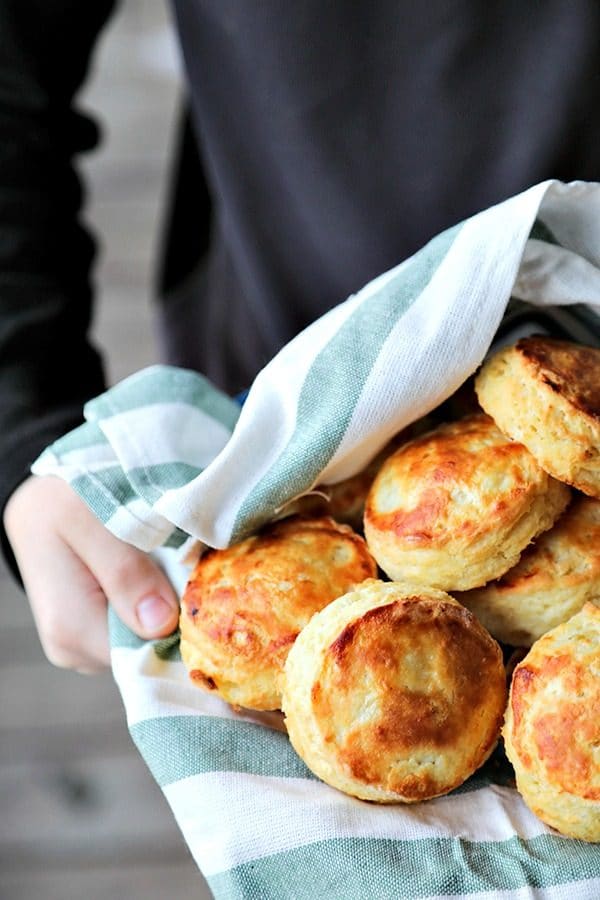
But most of the time, what I’m really and truly hankering for is a lofty, perfect, flaky, layered-from-top-to-bottom, golden brown, moist, golden brown, and delicious buttermilk biscuit. I’m talking about the kind where you can split it in half with your fingers and slather with cold butter and strawberry jam or cover with sausage gravy.
My homemade buttermilk biscuits were always really good… My grandma’s from Arkansas, folks, and she’s an amazing cook and it was her recipe I always made.
Then I learned a few techniques after attending a King Arthur Flour traveling baking demo (and later their Blog & Bake event), that turned my biscuits into the most perfect flaky layered buttermilk biscuits. My Perfect Flaky Layered Buttermilk Biscuits are now the One Biscuit to Rule Them All.
What are these magical techniques? I’ll summarize first.
If these sound fussy, I’ll explain why they make a difference further up and further in! (Name that reference!)
How to Make Buttermilk Biscuits
- Use COLD butter. Do not soften it at room temperature at all.
- Cut your butter into both pats and cubes before working them into the flour.
- Use your hands to work in the butter. Don’t use knives, forks, a pastry cutter, or a food processor.
- Don’t add too much buttermilk. It’s easier to add more later than it is to take excess out.
- Be gentle!!! Don’t overwork or manhandle the dough. Stay relaxed. Biscuits are happy food!
- Use a sharp biscuit cutter. Don’t use a jar, juice glass, or tea cup unless the edge is sharp enough to hurt your lip when you drink from it.
- Push straight down when cutting biscuits. Don’t spin or twist the cutter. Straight down and straight back up!
- Get as many biscuits out of the first cutting as you can. Each subsequent re-rolling and cutting of the dough yields tougher and tougher biscuits.
- Don’t crowd the pan. Make sure each biscuit has room to grow!
Those are the rules. Now, let’s break this down a little more…
Homemade Buttermilk Biscuits
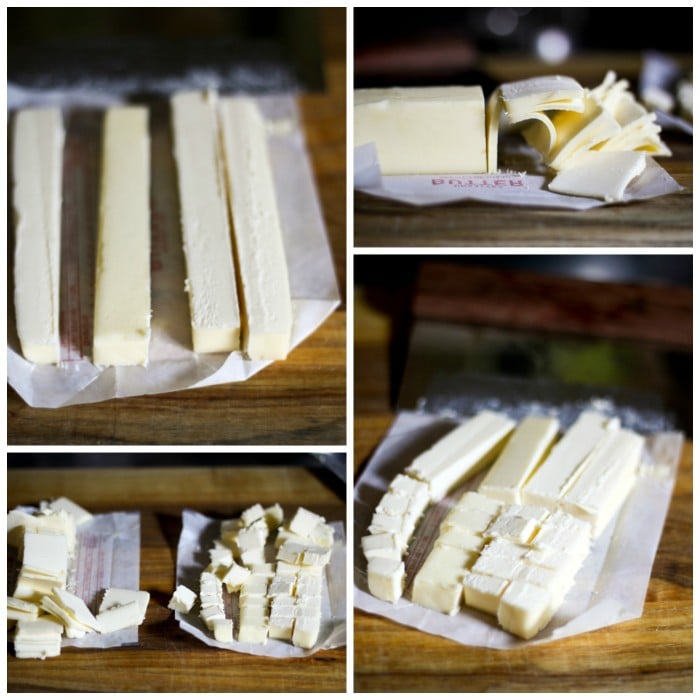
I am not kidding you when I tell you one of the main keys to perfect biscuits is cutting your butter two different ways. When you read through the recipe, it will be obvious that the photos show a double batch here. Because BISCUITS!
Notice that I cut half of the SUPER COLD butter into super thin pats and half into long quarters (or batons) and then crosswise into cubes. There is a scientific reason to this.
You don’t want homogenous pockets or ‘chunks’ of butter in your biscuit dough. Smaller pieces yield tender dough, larger, flatter pieces yield flakiness.
Both of those traits are prized in biscuits. Starting with the butter in two different shapes and sizes helps yield that desired final product.
Using cold butter is crucial, too. Cold butter melts when it’s in the hot oven rather than when it’s being worked into the flour.
The longer it takes to melt, the better… That helps create the layers, too, in our perfect Homemade Buttermilk Biscuits.
Because this recipe uses self-rising flour, you don’t have to worry about anything other than measuring said flour into a nice, large mixing bowl. Into the flour goes the butter.
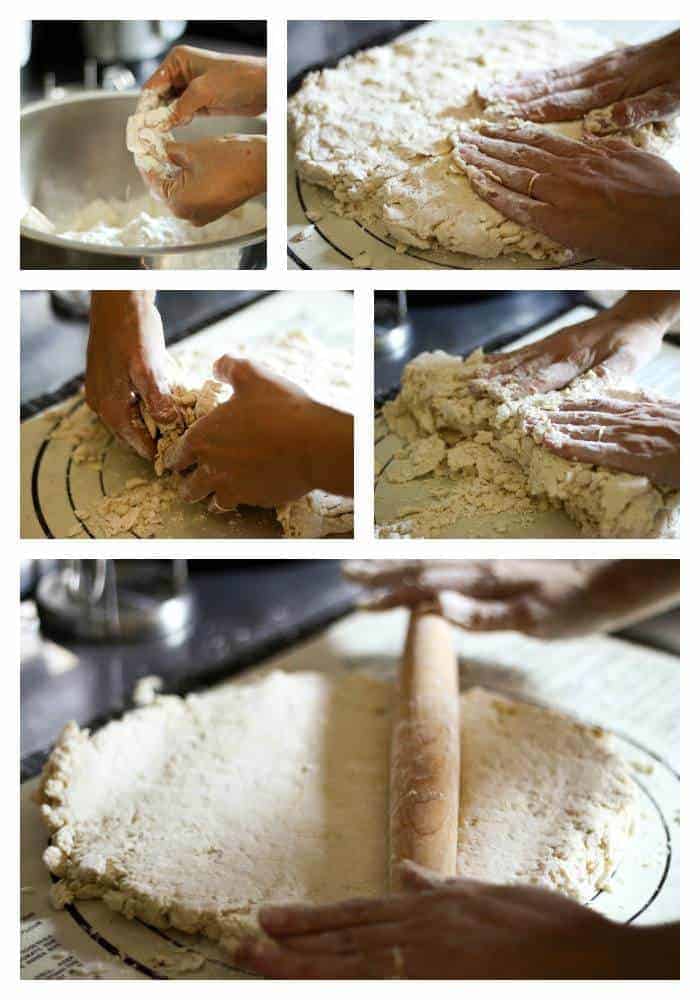
Now, drop your finger tips into the flour and butter and pull apart the butter pieces while tossing them into the flour. Don’t use the palms of your hands because those radiate heat and that melts butter which makes tough biscuits.
TOUGH BISCUITS. It sounds like an insult, doesn’t it?
Here’s a little video my 13 year old helped me make to show you what I mean years ago. Please enjoy the squawking in the background.
This is a real home with real children who eat the real food I share. They’re especially fond of biscuits.
This brings me to an important point.
Why should I use my hands to work the butter into my homemade buttermilk biscuit dough?
There’s a simple reason for this; it’s because you literally get a feel for how the dough is behaving.
When your hands are in the dough, you know when there are pieces that are too big. You also know when it will or won’t hold together, and you know you’re not beating the tar out of it which would yield TOUGH BISCUITS.
And I’m also not kidding when I tell you that your dough will look a little shaggy -okay, a lot shaggy- when you turn it out of the bowl. In fact, if you’ve not had success with biscuits before, you’re quite likely to think you’ve gone dreadfully wrong and that I’m crazy.
You’re going to be tempted to add a lot more buttermilk, but resist! Don’t do it! Trust me!
It’s time to pat out and fold the dough. That’s how we get all the lovely layers.
Here’s the method:
Slide both hands under one side of the dough (at about 9 o’clock if you think of the dough as a clock face), lift it up, and fold it over the other side at 3 o’clock like you’re closing a book. Again, pat the dough round out into a 2-inch thick rectangle.
This time, slide your hands under the bottom of the dough at 6 o’clock and fold it up toward 12 o’clock. Repeat the patting into a 2-inch rectangle, folding from 9 o’clock to 3 o’clock, patting, then folding from 6 o’clock to 12 o’clock.
Each time you do this, the dough should hold together just a little better. Onto rolling the dough!
Just like every other step, use a light hand when rolling the dough. It shouldn’t take much effort to roll it out.
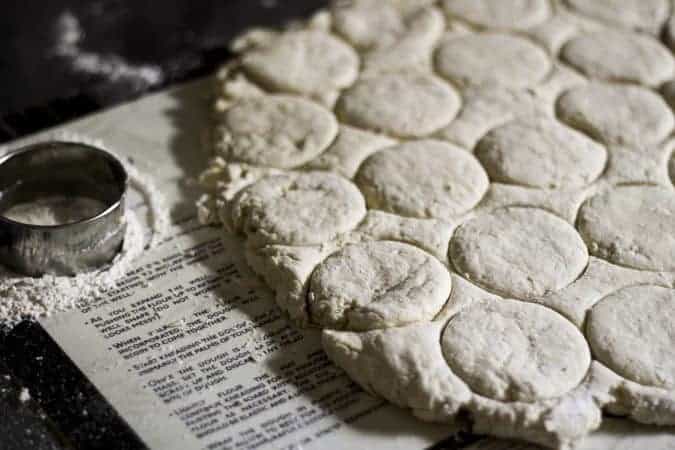
You have a couple of options for cutting the biscuits. You can either use a nice, sharp, open topped biscuit cutter or a knife.
Either way, you will push the cutter or knife straight down toward the counter. Do not twist the cutter or saw the knife back and forth because that will mar the layers you worked so hard to achieve and keep the biscuits from rising high.
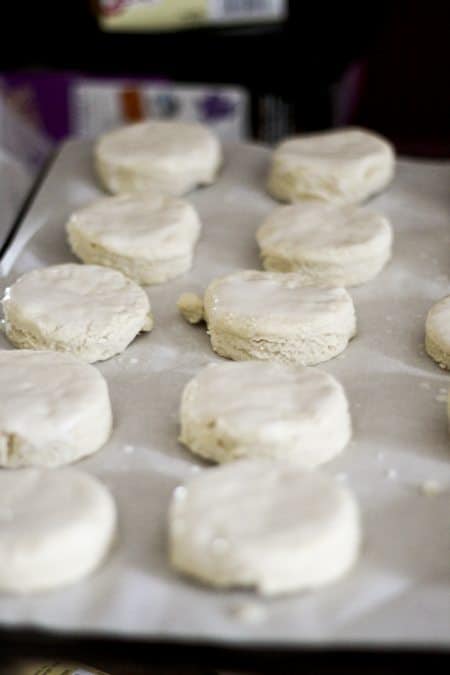
Make sure you don’t crowd your biscuits on the pan. They won’t have a chance to rise and have those gorgeous layered sides if you do. With so many do’s and don’ts in this recipe, I’m happy to say I have an optional step for you.
If you’d like them to be a pretty, glossy brown on top, you can brush them with more buttermilk (as I always do). If you prefer a rustic, flour dusted look to the top of your Perfect Flaky Layered Buttermilk Biscuits, omit that step. It’s just a matter of personal preference.
Finally, I have to tell you… this makes a lot of Perfect Flaky Layered Buttermilk Biscuits. It does.
It even makes more than our Viking horde should eat in one meal. (That’s not to say we haven’t eaten the whole shooting match at once, but I recognize that’s a little excessive.)
When I’m feeling virtuous, I freeze half of the unbaked batch for later meals. Sometimes, when I’m really on the ball, I just whip up a batch of dough, cut out the biscuits, and freeze all of them.
Are you wondering whether they’re as good when they’re baked after having been frozen? I don’t blame you if you are.
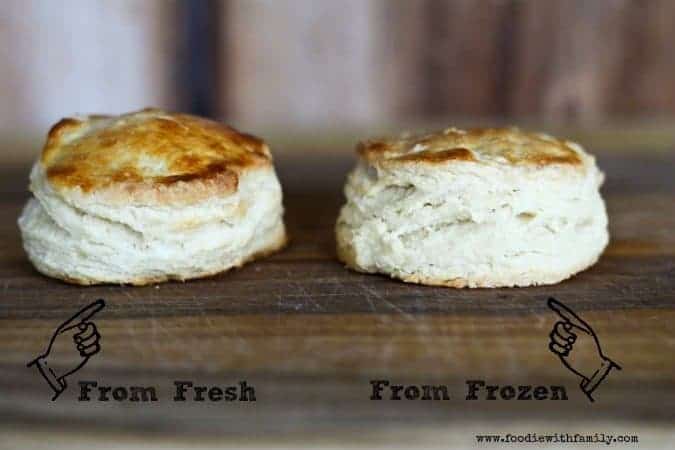
I offer proof. The Homemade Buttermilk Biscuit on the left was made from fresh biscuit dough.
The biscuit on the right was from pre-cut biscuits that were frozen for a week prior to baking. Both are fanastic, moist, flaky, and layered top to bottom with fabulous biscuit goodness.
Would you like to know something I’ve discovered? The frozen ones, in my experience, puff up a little higher than the fresh ones.
I love having frozen biscuits in the oven for busy nights or unexpected dinner guests. Now, anyone want a Homemade Buttermilk Biscuit?
Cook’s Notes
- There is going to be a little give and take on yield, but if you use a 2-inch round cutter, you should get about 24 Homemade Buttermilk Biscuits from this recipe.
- Feel free to cut them into squares if you’d like to reduce the work and waste!
- This is a case where you really want to use real cultured buttermilk. There are a lot of times when ye olde vinegar-mixed-with-milk substitute will work, but this is not one of them.
Use These to make Buttermilk Biscuits
Connect with Foodie with Family
facebook | pinterest | instagram | twitter
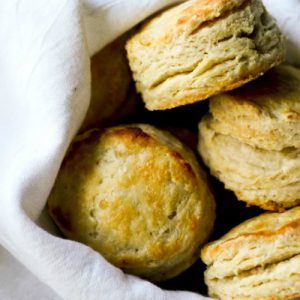
How to Make Buttermilk Biscuits
Rate RecipeIngredients
- 4 cups self-rising flour 1 pound by weight
- 1/2 cup very cold butter 1 stick or 4 ounces by weight
- 1 1/3 cups buttermilk plus extra if needed and for brushing
- all purpose flour for dusting the work surface
Instructions
- Preheat oven to 425°F. Add the self-rising flour to a large mixing bowl.
- Cut the stick of butter in half. Cut one half in 4 batons lengthwise, then cut across the batons to create small cubes. Cut the other half of the butter into pats as thin as you possibly can. Toss the cubes and pats of butter into the flour using just your fingertips so that they are fully coated with flour. Then, one piece at a time, quickly rub each pat and cube of butter between your fingers like you are rubbing dried glue off of your fingers. Continue doing this until all the butter has been rubbed into uneven pieces no larger than peas.
- Pour all but about 2 tablespoons of the buttermilk around the inside edges of the bowl. Reserve the buttermilk in case it's needed. Use a sturdy spoon, silicone or rubber spatula, or flexible dough/bench scraper to toss the buttermilk into the butter and flour mixture until a scrappy dough starts to form. If the mixture is still very dry, toss in the remaining buttermilk. Pick up a small amount of the dough and squeeze it in your hand. If it holds together you're ready to proceed. If most of the mixture is still very dry, you can add buttermilk -1 tablespoon at a time- until the dough holds together when squeezed.
- Dust a clean work surface with all-purpose flour (NOT self-rising here) and scrape the dough out into a pile. Quickly and gently use just enough pressure to pat the pile of dough into a rectangle that is about 2-inches thick. As you're patting it out, gently incorporate any crumbling edges back into the dough mass.
- Slide both hands under one side of the dough (at about 9 o'clock if you think of the dough as a clock face), lift it up, and fold it over the other side at 3 o'clock like you're closing a book. Again, pat the dough round out into a 2-inch thick rectangle. This time, slide your hands under the bottom of the dough at 6 o'clock and fold it up toward 12 o'clock. Repeat the patting into a 2-inch rectangle, folding from 9 o'clock to 3 o'clock, patting, then folding from 6 o'clock to 12 o'clock. Each time you do this, the dough should hold together just a little better.
- Rub a rolling pin with flour and very gently roll out the dough into any shape you'd like, but aim for 3/4-inch to 1-inch thickness. Flour a sharp round or square open-topped biscuit or cookie cutter. Cut straight down into the biscuit dough, not turning or spinning the cutter as you cut. Cut the biscuits as closely together as you possibly can, minimizing any excess between them. If you do not have a sharp biscuit cutter, use a sharp knife and cut straight down into the dough forming squares.
To Bake Right Away:
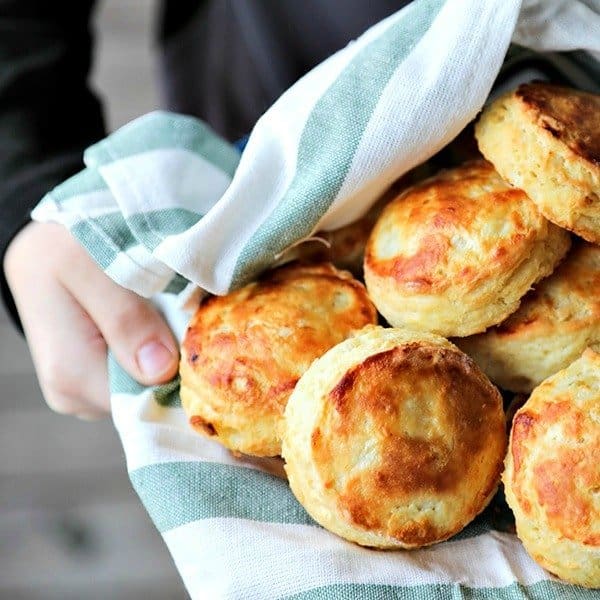
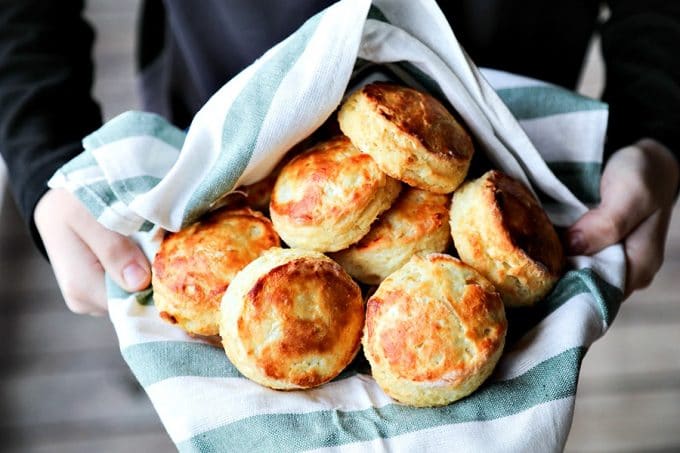
- Transfer the biscuits to a greased or parchment lined cookie sheet, brush the tops of the biscuits with buttermilk. Put the tray in the oven and bake for 8-12 minutes, rotating the pan front to back halfway through baking. When they are golden brown, delicious looking, and lofty. Remove them from the oven. Let stand at least 2 minutes before eating or transferring to a towel lined bowl.
To Freeze Biscuits for Later:
- Transfer the unbaked, cut biscuits to a parchment lined cookie sheet. Cover lightly with plastic wrap and stick the cookie sheet in the freezer. When the biscuits are frozen solid, stack them in a resealable freezer bag, label the bag, and keep frozen until needed, or for up to 3 months. If you store them longer than that, they will still be bake-able after that, but not quite as high-rising and tasty!
To Bake the Frozen Biscuits:
- Preheat the oven to 475°F. Line a cookie sheet with parchment paper. Arrange the frozen biscuits on the sheet leaving at least 2 inches between each biscuit. Brush the biscuit tops with buttermilk and bake the biscuits for 5 minutes. After 5 minutes, lower the heat to 425°F and continue cooking for 10 minutes or until the biscuits are golden brown, delicious looking, and lofty! Remove them from the oven and let stand at least 2 minutes before eating or transferring to a towel lined bowl.
Nutrition
Nutritional information is an estimate and provided to you as a courtesy. You should calculate the nutritional information with the actual ingredients used in your recipe using your preferred nutrition calculator.
did you make this recipe?
Make sure to tag @foodiewithfam on Instagram and #hashtag it #foodiewithfamily so I can check it out!
Are you looking for more delicious options to fill your freezer and pair with your Buttermilk Biscuits? Try this!
Turkey Breakfast Sausage comes together in a flash and is easily stored in the freezer using a clever method that lets you pull single patties from the bulk package!
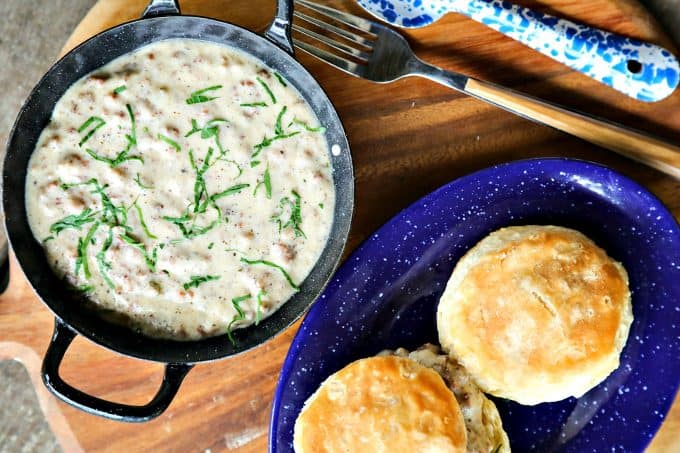
You can also ladle copious amounts of this terrific Classic Sausage Gravy over the Perfect Flaky Layered Buttermilk Biscuits and be a very happy human indeed!
This post originally published on October 26th, 2013, updated notes in November 2015, July 2017, and March 2021.




Reader's Thoughts...
Yolanda Strickland says
I need to make 100 biscuits for an upcoming event. Can I x4 this recipe?
Na-Asia says
Thank you so much for this recipe! It is hands down, the best recipe I have found for buscuits in general. I am vegan and I normally like following non-vegan recipes so I can develop the most authentically tasting product. My grandmother never made buscuits so I missed out on that recipe. I am extremely happy to have found this one. I just finished the first batch and although there was a little mixup as I thought your recipe used all purpose flour and I did not question the lack of baking power (ugh) they still came out pretty amazing…just a bit denser ;-). I will tweak a few ingredients like sugar next time (and baking powder). I have not been able to come this close to a real homeade buscuit until now; even on my last batch which turned out pretty darn good.
One thing however, is there any way for you to show your glazing technique? I have not been able to achieve a glaze whatsoever, even on previous recipes, it still comes out as a flower-top. I thought I added a lot of my vegan buttermilk mixture however it seems like it’s absorbing intead of glazing…not sure if I need multiple topping or what could be the issue there.
Rebecca says
Thanks so much, Na-Asia! I think the problem you’re running into on the glaze is that vegan buttermilk is going to be much, much thinner than cultured dairy buttermilk and will naturally absorb. If you’re really looking for a shiny glazed top that’s vegan-friendly, you might need to add a little sugar to the tops for glaze. It’ll obviously make them a little sweeter, but you’ll get that look. 🙂 I, personally, would skip it and opt for just plain tasty, but that’s just me. 🙂
Gladys says
Je viens juste de tester les biscuits et ils sont magnifique , merci !
Rebecca says
Merci, Gladys! Je suis tellement content que vous aimez ça!
Jane says
These biscuits look as mouthwatering as my favorite dish: called pathiri here in Kerala, India. There are many differences though because that is made from dry rice and this one here is totally other stuff. I like how you have detailed the process for easy preparation. Been trying to make one new recipe for every weekend and guess what, this is what I have planned for next weekend. my kids do not like pathiri, unfortunately. 🙁
Gary Harris says
I have a couple of questions:
1) How high do you make your biscuits?
2) Do you used a cuisinart to mix your dough?
CountryNerd says
I know I’m a few years behind on this post but I just stumbled across it. I like this recipe because no matter how closely I follow the directions, I have never been able to make all purpose flour/baking soda/powder/salt do what it is supposed to do. When I started using self rising flour for everything (cookies, biscuits/cinnamon rolls, gravy, cobbler, you name it), everything just turns out better.
Also, she cooks, she is a REAL Narnia lover (and King Arthur is her flour brand!), with hints to Tolkien as well – Alas, she must surely be taken!
Thanks for sharing this recipe/helpful hints!
Rebecca says
Aw shucks, CountryNerd. Thank you so much! I’m hope you love making these biscuits!
Precious says
Does the dough that’s leftover get reworked or thrown away? I’m new at this so I don’t know what to do with the leftover dough after I’ve cut the first batch.
Rebecca says
Hi Precious! I would re-roll the dough and cut them again. The second cut of biscuits will be slightly less tender, but still delicious! This is why we suggest taking your time to cut as many from the dough as you can the first time around, but I sure wouldn’t waste the rest of that dough! 🙂
Jill says
I have made these multiple times for my family now, exactly how it says, and they are perfect! My family LOVES them, especially with gravy in the morning:) Thank you for sharing your tips qnd knowledge !
Jill says
Just made these to the letter and they are amazing! I don’t have a good track record with biscuits. I just gave one to my husband and he’s so happy! Lol! Thank you for your work and research!
Charlene says
I can not tell you have many times I have attempted biscuits in the 14 years I’ve been married. They either don’t rise, don’t brown, or just don’t taste right. I stayed up until 1 am last night researching tips and came across your recipe. I love how you explain how and why you do things. I made them this morning and they are perfect! I finally made biscuits! Thank you so much.
Vicki says
Hands down best homemade biscuit tutorial on the web! Thank you so much for taking the time to demonstrate exactly how you mix the ingredients in the bowl. And I love the dough scraper! That little tool makes it so much easier.
Much appreciated!
Rebecca says
Thank you, Vicki! You made my day!
Kate @ Cooking On Clocks says
These look so flaky and delicious!
Erin Linn says
About how many biscuits does one recipe make? I’m trying to feed a crowd this weekend and I can’t find the amount of servings listed anywhere. I know it’s just an estimate, but I’d rather have the estimate than nothing at all. Looks easy and delicious! Thank you!
Rebecca says
Hi Erin- with a 2 inch cutter, this should yield approximately 2 dozen biscuits 😀
Bronwen says
This was my second batch of biscuits today, as first batch from a different website/recipe came out like hockey pucks. Which is how I found myself in search of better technique. Very helpful tutorial – I learned a lot. Wow!! These are gorgeous biscuits – I have not had the taste test yet, but the dough was delish ;o) I want these for serving with fresh strawberries and cream for dessert, so I added 2 T sugar.
I have one question… although my biscuits rose beautifully, they all seemed to be ‘hinged’ at one point on the round so that the biscuits opened up like a pac-man when they rose. Any thoughts on what I might have done to cause that?
Lita Watson says
Have you ever tried to spritz the biscuits with water when reheating them in the oven ? Since the moisture from the water can moisten the biscuits like they were before.
Rebecca says
I have not, but that’s brilliant!
Keithrie Reynolds says
Awesome tutorial; I will be making this week. Thank you!!
Rebecca says
Happy Biscuit Making! 😀 <3
Rebecca says
I hope you enjoy them, Keithrie!
MARYANN says
Freeze butter and grate with a cheese gratergt Makes for much easier mixing .
Rebecca says
It absolutely does make it an easy task, but the reason for doing the two different cuts on the butter here is to encourage both flakiness and tenderness by having flat little pieces of butter interspersed among the little pebbly bits. It’s harder to get that variety when you grate the butter to work in.
Delores Liesner says
Why do most people cut the biscuits with circles and leave dough to be reworked? Why not make a rectangle and cut it in squares?
Rebecca says
You know what? There’s no good reason to make them circles other than tradition 😀 You’re absolutely welcome to make squares or triangles or rectangles. It’ll be delicious! <3
Larry Crawford says
Going to cook some of these when the sweet corn is ready in the garden.
Carolyn says
If frozen, do you thaw before cooking?
Rebecca says
Hi Carolyn- There is no need to thaw them first! If you scroll up to the printable recipe, it offers specific instructions on how to bake your frozen biscuits. 😀
Brenda says
I used to watch my grandmother make buttermilk bisquits in a very large wooden bowl that my grandfather made for her. After she cut in the lard (not butter) she would make a hole in the middle of the flour mixture and pour her buttermilk there. She made the best bisquits I have ever tasted.
Rebecca says
Nothing can ever compare to our own grandmothers’ cooking, can it? <3