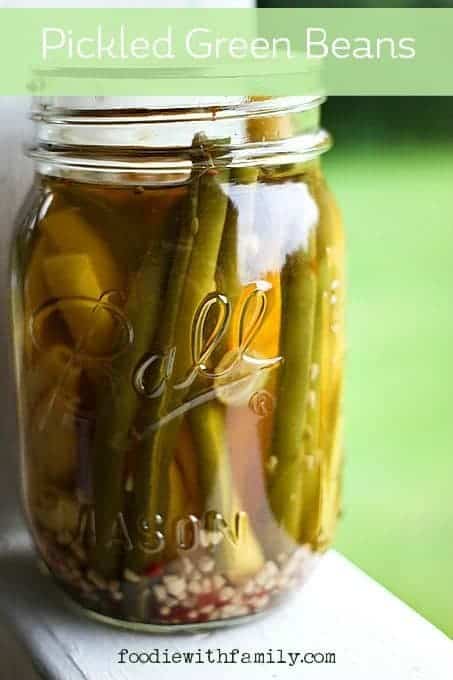
Pickled Green Beans are one of the things I learned to can from the best: my Grandma. I remember hours upon hours at Grandma’s house with Mom and the aunties sitting around peeling peaches, laughing hysterically, shucking corn, chewing the fat, shoving tomatoes in jars, and whatnot.
The kids usually drew the simple task of snapping the ends off of green beans. It was kind of hard to booger that one up and it made us feel like we were really contributing to one of everyone’s favourite snacks: Pickled Green Beans or Grandma’s Dilly Beans.

Garlicky, snappy, crisp, gently spicy, and utterly perfect, these Pickled Green Beans are incomparable when chilled and nibbled on straight from the refrigerator on a hot day. It’s like a cucumber pickle in flavour but with a crunch times a million.
I am a kid all over again -sneaking pickled beans from Grandma’s fridge while she took her siesta- every time I eat one. I wouldn’t say that these are the fountain of youth because the FDA might frown on my claims, but people… it’s pretty darned close.
Clearly, my preference is to eat these straight from the jar. There’s more to these than dunking fingers into garlicky brine, though.
They make a beautiful addition to salads both of the lettuce and mayonnaise-laden potato, tuna, chicken, or pasta varieties when chopped and tossed into the mix. You’d be hard-pressed to find a better accompaniment to a venison or beef roast come harvest time.
Serve a big bowl of these pickled beauties with your Thanksgiving feast to accolades. And while you’re pickling all the vegetables, remember to try out our Pickled Brussels Sprouts!
Add a platter of homemade pickles to the table next to your Christmas ham or goose. The vinegar tang, garlic punch, and mellow hot-pepper bite cut through rich meals making them taste better!

If so inclined, you can even use these crispy, long, pickled-perfection green beans to stir Bloody Marys or other cocktails. So many options, so little time!
The only solution is to hie thee hence to the farmer’s market, grab a peck or two of green beans, and get pickling! Pssst. If you’re a canner-or-planner-by-nature, you’ll want a few jars of these gorgeous Pickled Green Beans on hand for Christmas and holiday gift giving or hostess gifts.
Cook’s Notes
This recipe for Pickled Green Beans is a canning recipe that is suitable for beginners and so well loved that it is also a staple of most veteran canners!
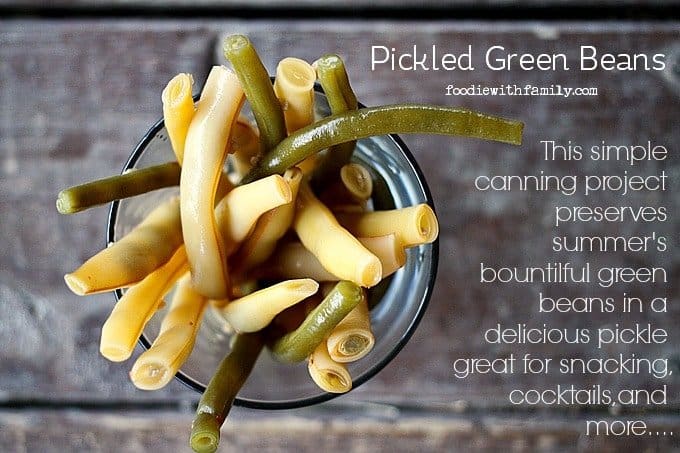
You’ve probably noticed in the pictures that wax beans pickle as well as green beans. I have a weird preference for the green ones although they both taste the same and have the same texture.
It’s just a visual for me, but I LOVE the look of both of them in a jar. It feels old-fashioned and frugal.
In this one, as in most of my pickling recipes, I prefer to use raw apple cider vinegar for pickled green beans because it’s a higher quality of vinegar to begin with.
My second choice is regular apple cider vinegar. I don’t use white vinegar in pickling almost as a rule because I find the flavour to be too harsh. IF that is your preference or only thing available to you, however, there is not any safety concern preventing you from using it.
You can use fresh garlic in each jar OR you can substitute 1 tablespoon of dried garlic flakes per jar.
You can ramp up the quantity of crushed red pepper flakes in each jar if you’re a major hot head, but I really like a gentle back-ground heat instead of a melt-your-face-off heat with these pickles. I’d advise trying the recipe as written for a single batch then increasing if you find it too mild.
On that note, you can upsize this recipe to your heart’s content. I usually make at least 5 to 8 times this batch in one go, but I know that the rest of the world is not necessarily gripped by the CAN ALL THE THINGS mania that I have.
Need to know how to sterilize jars, “process things”, and all that good, basic canning jazz? I have a handy-dandy guide for you!

Pickled Green Beans: Dilly Beans
Rate RecipeIngredients
- 2 pounds fresh green beans ends and strings removed
- 2 1/2 cups apple cider vinegar
- 2 1/2 cups water
- 1/4 cup kosher salt
- 2 tablespoons raw sugar can substitute granulated white sugar if necessary
Additional Ingredients Per Pint:
- 1 dill head or 2 teaspoons whole dill seed
- 2 cloves garlic peeled
- 1/2 teaspoon black peppercorns
- 1/2 teaspoon mustard seed not ground mustard
- 1/2 teaspoon crushed red pepper flakes
- 1/4 teaspoon coriander seeds not ground coriander
Instructions
- Trim the green beans so they are of a height to reach within 1/2-inch of the tops of the jars. Load each jar with the additional per-jar ingredients and pile the trimmed beans in over the spices. Set aside.
- Bring the apple cider vinegar, water, salt, and sugar to a boil in a saucepan. Pour over the green beans in the jars to within 1/4-inch of the tops of the jars. Wipe the rims, fix new two-piece lids in place to finger-tip tightness, and process for 10 minutes in a boiling water bath. Carefully transfer to a rack to allow to cool completely. Remove the rings, wipe down, label, and store in a cool, dark place for up to a year. If there are any that don't seal, refrigerate immediately after processing. Let the pickled beans sit for 2 to 3 weeks before cracking open and eating!
Nutrition
Nutritional information is an estimate and provided to you as a courtesy. You should calculate the nutritional information with the actual ingredients used in your recipe using your preferred nutrition calculator.
did you make this recipe?
Make sure to tag @foodiewithfam on Instagram and #hashtag it #foodiewithfamily so I can check it out!


Reader's Thoughts...
Marlena says
Just a note to say how much I like this recipe! It’s simple and delicious. Especially for a healthy snack. I am curious if I really need to use salt? or maybe cut the salt in half? Only because my husband has to watch his salt intake. I know we could always rinse them off after we open the jar to cut back on the salt but then we would lose the other flavors? So do you know if we need to use all the salt?
Thank you for the nice recipe and I’ll look for your reply
Sincerely, Marlena
Rebecca says
Hi Marlena! Thank you so much for taking the time to let me know you love it! I think for safety’s sake, I’d keep the salt where it is… it helps preserve the food as does the vinegar. I also would like to reassure you that homemade pickles are always far lower in sodium than the ones you generally buy in stores, so there’s that. 🙂 That said, rinsing shouldn’t remove the flavour because it’ll be “baked in” so to speak. 🙂
Pam Fury says
Been making dilly beans for years
I dont put sugar ,mustard seed in my recipe
But add garlic clove and pepper flakes along with the dill
In each jar
pattie pinkerton says
This recipe is confusing, there is no yield count, no jar size, or number of jars needed, makes me want to look elsewhere for a more detailed recipe, so I know what to expect, and what I need. I like to use the low-temp 180 degree no-boil process with all my pickles to insure crispness and also use pickle crisp.
Rebecca says
Hi Pattie- The jar count depends on a few variables: how tightly do you pack the beans, how big are the beans, etc… In general, you’re looking at between 2 and 5 pints. This is not a low-temp recipe, though. This uses the boiling water bath method.
Gloriaburnett says
I found your canned green beans or as my mom called then Dilly pickled beans,but when she die she took her recipe with her and I would like to know how they are made.Thank you.
Rebecca says
I hope these are close to your mom’s recipe, Gloria! They’re pretty old fashioned, so chances are good!
Debra says
Rebecca, my 96 year old Dad and I are “canning” this year from our garden. I’ve been reading and been scared about botulism. So many opinions! I don’t have a canner and want to pickle some green beans and okra using the water bath method. Why do some say you can’t water bath vegetables?? That you have to pressure can them. Your recipe looks awesome! Looking forward to trying it.
Rebecca says
Hi Debra! Welcome to canning! 🙂 You can only water bath vegetables that are pickled because otherwise they’re too low acid and can be a friendly environment for botulism. Your best bet is to use an approved recipe from a cookbook that is thoroughly tested or a recipe from the National Center for Home Food Preservation or one from a trusted source who uses those acidity ratios for their recipes. (I’m in that last category 🙂 ) If you’re talking about anything short of that, pressure canning it is!
Edithann Schaffer says
The recipe looks great and I am looking forward to trying this out. The processing of beans for this recipe doesn’t indicate whether the canning can be done in a pressure cooker or water bath?
Rebecca says
Hi Edithann! This is a water-bath canning recipe. 🙂 Generally speaking, pressure canning recipes also include the pounds of pressure needed for the processing time. I’ll make a note in the recipe to reflect it’s a water bath recipe. Happy Canning!
Donna Dix says
Can u do this to pickle the beans like you do sweet pickles, with a salt brine, allum, and pickling spices and sugar?
Rebecca says
Hi Donna- I’m not sure. This recipe is a simple one that doesn’t require all of the other steps. 🙂
Debra says
Rebecca, my 96 year old Dad and I are “canning” this year from our garden. I’ve been reading and been scared about botulism. So many opinions! I don’t have a canner and want to pickle some green beans and okra using the water bath method. Why do some say you can’t water bath vegetables?? That you have to pressure can them. Your recipe looks awesome! Looking forward to trying it.
Margery A Ripley says
WHAT SIZE JARS?????
Rebecca says
Hi Margery- I usually use pints!
Vanessa says
How many pint jars does this recipe make?
Rebecca says
Hi Vanessa- There’s always going to be a little give or take based on the size of the beans and how firmly you pack them in, but I usually get about 2-3 jars.
Cathi Winnie says
If you haven’t canned or pickled before you wouldn’t know what process mean. Also, what do you mean byr3moce the rings.
Rebecca says
Hi Cathy-
In the body of the post, there is a link to my Canning Basics guide. I’ll include it again here in the comments for you. https://www.foodiewithfamily.com/basic-canning-how-tos/
And when I say “remove the rings”, I mean remove the rings that hold the lid in place. Of course, you’ll wait until the jars have cooled completely (about 24 hours) before doing that, but after that point, they’ve done everything they need to do. When you process the jars (see the link above), it activates the sealing compound on the flat jar lid and *that* (not the ring) is what holds the lid in place after all is said and done. It’s better food-safety wise to remove the rings. For more details, you can see my more extensive book on canning: “Not Your Mama’s Canning Book: Modern Canned Goods and What to Make with Them.“