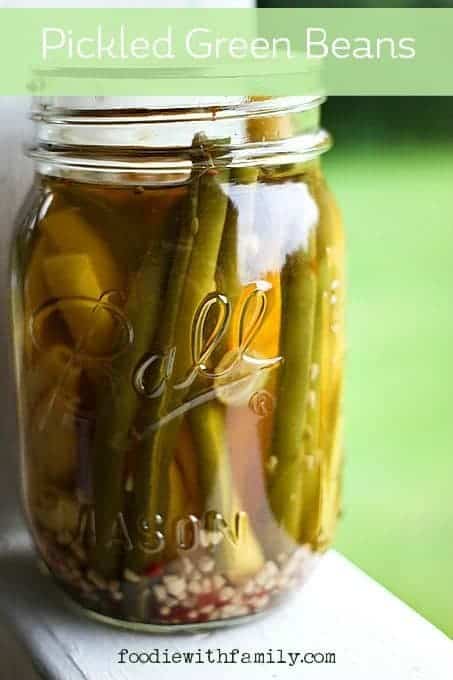
Pickled Green Beans are one of the things I learned to can from the best: my Grandma. I remember hours upon hours at Grandma’s house with Mom and the aunties sitting around peeling peaches, laughing hysterically, shucking corn, chewing the fat, shoving tomatoes in jars, and whatnot.
The kids usually drew the simple task of snapping the ends off of green beans. It was kind of hard to booger that one up and it made us feel like we were really contributing to one of everyone’s favourite snacks: Pickled Green Beans or Grandma’s Dilly Beans.

Garlicky, snappy, crisp, gently spicy, and utterly perfect, these Pickled Green Beans are incomparable when chilled and nibbled on straight from the refrigerator on a hot day. It’s like a cucumber pickle in flavour but with a crunch times a million.
I am a kid all over again -sneaking pickled beans from Grandma’s fridge while she took her siesta- every time I eat one. I wouldn’t say that these are the fountain of youth because the FDA might frown on my claims, but people… it’s pretty darned close.
Clearly, my preference is to eat these straight from the jar. There’s more to these than dunking fingers into garlicky brine, though.
They make a beautiful addition to salads both of the lettuce and mayonnaise-laden potato, tuna, chicken, or pasta varieties when chopped and tossed into the mix. You’d be hard-pressed to find a better accompaniment to a venison or beef roast come harvest time.
Serve a big bowl of these pickled beauties with your Thanksgiving feast to accolades. And while you’re pickling all the vegetables, remember to try out our Pickled Brussels Sprouts!
Add a platter of homemade pickles to the table next to your Christmas ham or goose. The vinegar tang, garlic punch, and mellow hot-pepper bite cut through rich meals making them taste better!

If so inclined, you can even use these crispy, long, pickled-perfection green beans to stir Bloody Marys or other cocktails. So many options, so little time!
The only solution is to hie thee hence to the farmer’s market, grab a peck or two of green beans, and get pickling! Pssst. If you’re a canner-or-planner-by-nature, you’ll want a few jars of these gorgeous Pickled Green Beans on hand for Christmas and holiday gift giving or hostess gifts.
Cook’s Notes
This recipe for Pickled Green Beans is a canning recipe that is suitable for beginners and so well loved that it is also a staple of most veteran canners!
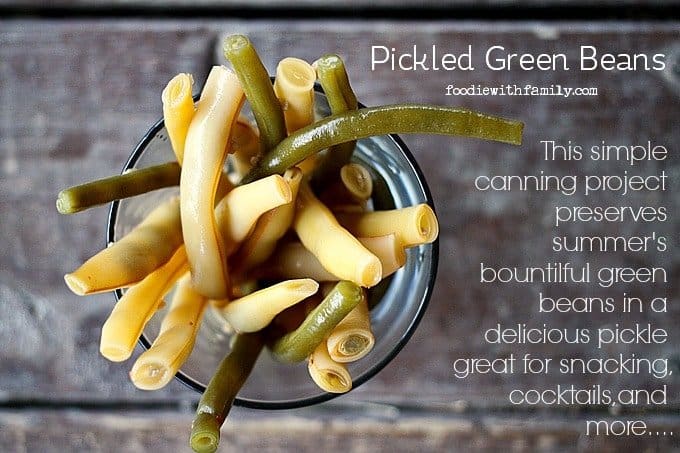
You’ve probably noticed in the pictures that wax beans pickle as well as green beans. I have a weird preference for the green ones although they both taste the same and have the same texture.
It’s just a visual for me, but I LOVE the look of both of them in a jar. It feels old-fashioned and frugal.
In this one, as in most of my pickling recipes, I prefer to use raw apple cider vinegar for pickled green beans because it’s a higher quality of vinegar to begin with.
My second choice is regular apple cider vinegar. I don’t use white vinegar in pickling almost as a rule because I find the flavour to be too harsh. IF that is your preference or only thing available to you, however, there is not any safety concern preventing you from using it.
You can use fresh garlic in each jar OR you can substitute 1 tablespoon of dried garlic flakes per jar.
You can ramp up the quantity of crushed red pepper flakes in each jar if you’re a major hot head, but I really like a gentle back-ground heat instead of a melt-your-face-off heat with these pickles. I’d advise trying the recipe as written for a single batch then increasing if you find it too mild.
On that note, you can upsize this recipe to your heart’s content. I usually make at least 5 to 8 times this batch in one go, but I know that the rest of the world is not necessarily gripped by the CAN ALL THE THINGS mania that I have.
Need to know how to sterilize jars, “process things”, and all that good, basic canning jazz? I have a handy-dandy guide for you!

Pickled Green Beans: Dilly Beans
Rate RecipeIngredients
- 2 pounds fresh green beans ends and strings removed
- 2 1/2 cups apple cider vinegar
- 2 1/2 cups water
- 1/4 cup kosher salt
- 2 tablespoons raw sugar can substitute granulated white sugar if necessary
Additional Ingredients Per Pint:
- 1 dill head or 2 teaspoons whole dill seed
- 2 cloves garlic peeled
- 1/2 teaspoon black peppercorns
- 1/2 teaspoon mustard seed not ground mustard
- 1/2 teaspoon crushed red pepper flakes
- 1/4 teaspoon coriander seeds not ground coriander
Instructions
- Trim the green beans so they are of a height to reach within 1/2-inch of the tops of the jars. Load each jar with the additional per-jar ingredients and pile the trimmed beans in over the spices. Set aside.
- Bring the apple cider vinegar, water, salt, and sugar to a boil in a saucepan. Pour over the green beans in the jars to within 1/4-inch of the tops of the jars. Wipe the rims, fix new two-piece lids in place to finger-tip tightness, and process for 10 minutes in a boiling water bath. Carefully transfer to a rack to allow to cool completely. Remove the rings, wipe down, label, and store in a cool, dark place for up to a year. If there are any that don't seal, refrigerate immediately after processing. Let the pickled beans sit for 2 to 3 weeks before cracking open and eating!
Nutrition
Nutritional information is an estimate and provided to you as a courtesy. You should calculate the nutritional information with the actual ingredients used in your recipe using your preferred nutrition calculator.
did you make this recipe?
Make sure to tag @foodiewithfam on Instagram and #hashtag it #foodiewithfamily so I can check it out!


Reader's Thoughts...
Jody Smith says
I was pretty proud of myself, I made them all by my lonesome! I was a little bit concerned as I doubled the recipe and added 1tsp red pepper flakes per pint. After waiting 2 weeks (the hardest part, I think, LoL!) the truth was told ,,,Amazing, crunchy & dilly! Also, I didn’t use coriander. Thanks for sharing your secret recipe!!
Rebecca says
Well done, Jody!! I’m so glad you love them!
Carol Smith says
We add a strip of green & red bell pepper to the jars. looks pretty.
Rebecca says
I bet that is pretty!
sue says
your recipe makes no sense, how many jars do you use, what size jars and how much spice in each jar???
Rebecca says
Hi Sue- If you read the printable recipe card more carefully, you’ll find that it makes quite a lot of sense. Please notice that there is a section of it that says “Additional Ingredients Per Pint” and then a list that indicates how much of each spice you put in each pint jar, which answers your second two questions. The first question is answered by how many beans you have. This is a scalable recipe based on the fact that people seldom are able to harvest a specific amount from their plants. You can use as many or as few beans as you have, and the number of jars is determined by how many beans you have on hand. Have a nice day.
RogerCat says
Hello Dear Heart,
Would using fresh sprigs of dill work also? Is that a dill head? Also how crucial is the coriander seed? Its the only thing I am missing. I got two pounds of fresh green beans at the farmers market this weekend and I am raring to go. Thank you so much for sharing.
Rebecca says
Hi there! Yes, fresh sprigs of dill would be lovely, as long as you have the dill seed heads in there! The coriander seed is delicious, but not strictly crucial. Of course, it’ll be a little different if you omit it, but still tasty!
Randy Nein says
How do you process them? Some recipe say no boiling just simmer. Do you boil hot water bath?
Thanks Randy
Rebecca says
Hi Randy- The government’s safety recommendations are that you have the water at a full, rolling boil, so those are the recommendations I give as well.
Ruth Temple says
Sound wonderful! How many pints does this recipe make? Can I substitute erythritol for the sugar?
Thanks,
Rutj
Rebecca says
Hi Ruth- I would not advise subbing erythritol for sugar as I have not tested it. 🙂
Ruth Temple says
I might try it and let you know how it works!
Phillis Koons says
I just made my second batch of these beans!!! They are amazing!! The family loves loves loves them!!! Thank you!!!
Rebecca says
I’m so glad you love the, Phillip!!
Mary Ann Isabelle says
I just made these dilly beans. Easy recipe to follow.
Rebecca says
I’m so glad you loved them, Mary Ann!
S. Lento says
I assume this recipe makes 16 pints? Thanks for the recipe!
Kim says
What does “process for 10 minutes” mean?
Colleen Brooks says
Is that water bath or pressure can for 10 min?
Rebecca says
Hi Colleen- It’s definitely a water bath!
Nikki pederson says
Glad to see water bath is ok. That made my day. Thanks. I also am happy I can use kosher salt.
Wayne Vetrone says
I would love the recipe to consolidate the “pint measurements” into the brine ingredients because I am not putting them into pint jars but rather a large container
Rebecca says
Hey Wayne! Just multiply the ingredients by the size of the jar you’re using! If you’re using quarts, double them. Half gallons? Quadruple them. Gallons? Multiply by 8.
Donna Cates says
Hi Rebecca,
I pulled up your website and loved it. It gave me the courage to experiment a little bit. This may freak you out and you may be saying this lady is crazy, but my grandson and I were making Bread and Butter pickles today and we had way too much brine left over. We tossed around a few ideas and decided on green beans to use the left over brine from the pickles. He said everyone loves Bread and Butter pickles why can’t we use the brine from them to can some green beans. I agreed and here we go. They may turn out to be the best green bean we ever had or they may be used to put a smile on his chicken’s beaks. Either way we had a blast today.
Rebecca says
I imagine those will be delicious, Donna! Please check back in to let me know how you liked it!
Barbara Stull says
Can you do the inversion method or must you do the old fashioned canning process? It seems easy but I don’t understand it says to put in the pot, put 2 piece ring on finger tight. Then later it says to remove the rings, wipe down, label, and store in a cool……..remove what rings? I don’t know any other rings but the jar lids and they need to remain on the jars after procession right?
Rebecca says
Hi Barbara- I hate to be the one to tell you this, but the inversion method is unsafe for any canned goods, unfortunately. I was so disappointed when I learned it, but it makes sense. Canning isn’t only about forcing the air out of the jar (which is what the inversion method accomplishes so well.) It’s also about getting the contents of the jar clear to the center to a certain temperature for a particular amount of time. So the old-fashioned water bath is what is indicated here.
And yes, the rings to which I’m referring are the ones that hold the lid in place while you’re processing them. The cool thing is that after the jars have been processed and cooled, the rings are totally unnecessary and maybe even a little undesirable. When you heat the jars, the sealing compound around the inside of the lids softens and adheres to the jar rim. As it cools, it firms up creating the seal. The ring at that point is superfluous. And here’s where removing them becomes something helpful. If, God forbid, something nasty is in the jar (botulism, unwanted fermentation, other food bourne illnesses), it will create gas as it forms and multiplies. If you have removed the rings, the gas will push up on the lids making it break the seal or make the seal weaker. When you go to open that jar, you’ll notice that the lid lifts away easily. If you’ve left the ring in place, it will not have a chance to push away from the top of the jar.
Roeleen van Raaij says
It’s nearly Winter and we have a lot of green beans. Thank you for sharing beautiful memories. Luv and greetings from South-Africa.
Rebecca says
Thank you, Roeleen! I hope you love these pickled green beans!
William Scof says
LOVE this! And your pictures are amazing! I need to make this ASAP
Rebecca says
Thanks, William! They’re awfully delicious!
Melissa says
Why remove the rings before storage
Rebecca says
If, God forbid, something nefarious is growing in your jar, it could very well create gas and loosen the seal on a jar lid, meaning it won’t make that satisfying “schlooop” sound when you open it. If a jar lid lifts easily from the jar, you know it’s possible something bad is in there. If you store the jars with rings in place, it holds the lid in place and doesn’t offer the lid the chance to lift away.
Lucylle DeWitt says
There’s nothing in the recipe that tells what size jar to use or how ma you jars it makes.
Rebecca says
It actually specifies “per pint jar” in the ingredients portion of the recipe. You can count on it making about 4 pints, give or take…
Laurie Baur says
I understand her question, and your answer, but it doesn’t say how many pints it makes, just 16 servings. Most recipes say how many jars it makes so you can plan to make.
Rebecca says
Hi Laurie- I’d say if you have 6 pint jars ready, you’ll be more than prepared. 🙂 I usually make less than that with this recipe, but I always overprepare jars when canning.
Mgray says
Thank you for sharing! I can’t stop eating theses. Very cruchy and tasty! Oh, and fun to make 🙂
Mgray says
Thank you for sharing! I can’t stop eating these. Very crunchy and tasty! Oh, and fun to make!
Apparently, I can’t type while munching on dilly beans 🙂
Kim says
Can I use this recipe and safely omit the sugar?. I cannot have sugar but this recipe sounds perfect beside the point.
Rebecca says
You can safely omit the sugar in this particular recipe. The acidity is what keeps it safe and the only reason the sugar is there is to take a little edge off of the vinegar. If you can do other sweeteners, you may want to do something mild like a clear or light agave in the place of the sugar!